Crathco® Post Mix Beverage Dispensers Page 7
Once the brix is set, use the same flavor set up on each dispensing head. The flavor used on a particular
dispensing head can be changed if the brix and viscosity of the syrup remains the same.
Dispenser Operation Tips
1. To dispense the drink, depress and hold dispensing push button as long as needed.
2. After dispensing 2 liters consecutively allow a 15-30 second idling time before next usage.
3. Keep dispenser door closed and do not allow it to be open for a longer time than necessary.
4. Avoid a concentrate spillage inside the cabinet. If spillage occurs, clean immediately. If spillage is left
unattended, over time it will dry out and be difficult to clean.
Care and Cleaning
Flushing the Dispensing System.
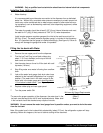
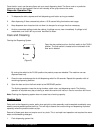
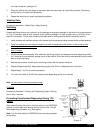
1. Open the door cabinet and turn the flush switch to the FLUSH
position. The flush switch is located on the inside wall of the
door and is labeled:
By turning the switch to the FLUSH position the product pumps are disabled. The machine now can
dispense water only.
2. Close the door and depress the far left dispensing switch for 30 seconds. Repeat this operation with all
remaining dispensing switches.
3. Open the door and turn the flush switch to the DISPENSE position.
The flushing operation rinses the mixing chamber, static mixer, and dispensing nozzle. The flushing
operation is required every day at closing or when the machine will not be in use for more than four hours.
Note: Flushing the dispensing system does not cause loss of cooling capacity.
Washing Parts
Parts such as the dispensing nozzle, static mixer and pick up tube assembly must be washed consistently every
week to remove possible product build up. This will help to assure the correct mixing and dispensing of product
especially when the product contains a pulp.
Removal of these parts does not require use of any tools. This is a simple hand operation and requires luke warm
water and dishwashing detergent.
1. Flush dispensing system first.
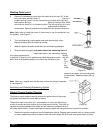
(Figure E)
Dispense
FLUSH


