16
Should there be any malfunctions in the system, please attempt to answer the
following questions before notifying maintenance or calling Equipment &
Instrument Service Center
Haier
Freezer does not start up.
Freezer's refrigeration ability is reduced.
The unit is noisy.
Is the power supply normal? Has the main power switch been turned on yet?
Is the voltage supply too low?
Is a larger amount of load placed into the unit at one time?
Is the environment temperature too high?
Are the inner doors and outer door closed properly? Does any ice and frost damage
the seal between the door and the frame?
Is the condenser filter clogged?
Is the temperature setting correct?
Is the freezer far away from any direct sunshine?
Is the freezer near any heat source?
Is the porthole plug installed in the porthole with proper insulation materials?
Has the freezer been loaded with too many non-frozen samples within the last few
hours? If so, the problem is temporary. You can set the temperature to a higher
value to let the freezer cycle at temperature then gradually lower the set point
temperature until it reaches the desired temperature.
Is the unit set on a firm floor?
Does the exterior of the unit touch any objects?
Is the freezer unit leveled with the leveling legs?
Does the freezer operate in a low temperature zone? If the load is heavy, and the
cabinet temperature is warm, the unit may emit noise. The noise level would
decrease as the cabinet temperature gets colder.
Is the noise emitted from the compressors? ULT compressor noise tends to be
higher than that of a household refrigerator unit.
The noise might be a crackling sound. This is probably the result of contraction of
internal mechanical parts due to rapid cooling inside the equipment. Stepwise
pulldown in temperature with slower temperature change can reduce this noise.
Troubleshooting Guide
9
Installation
1.Remove all packing materials and straps.
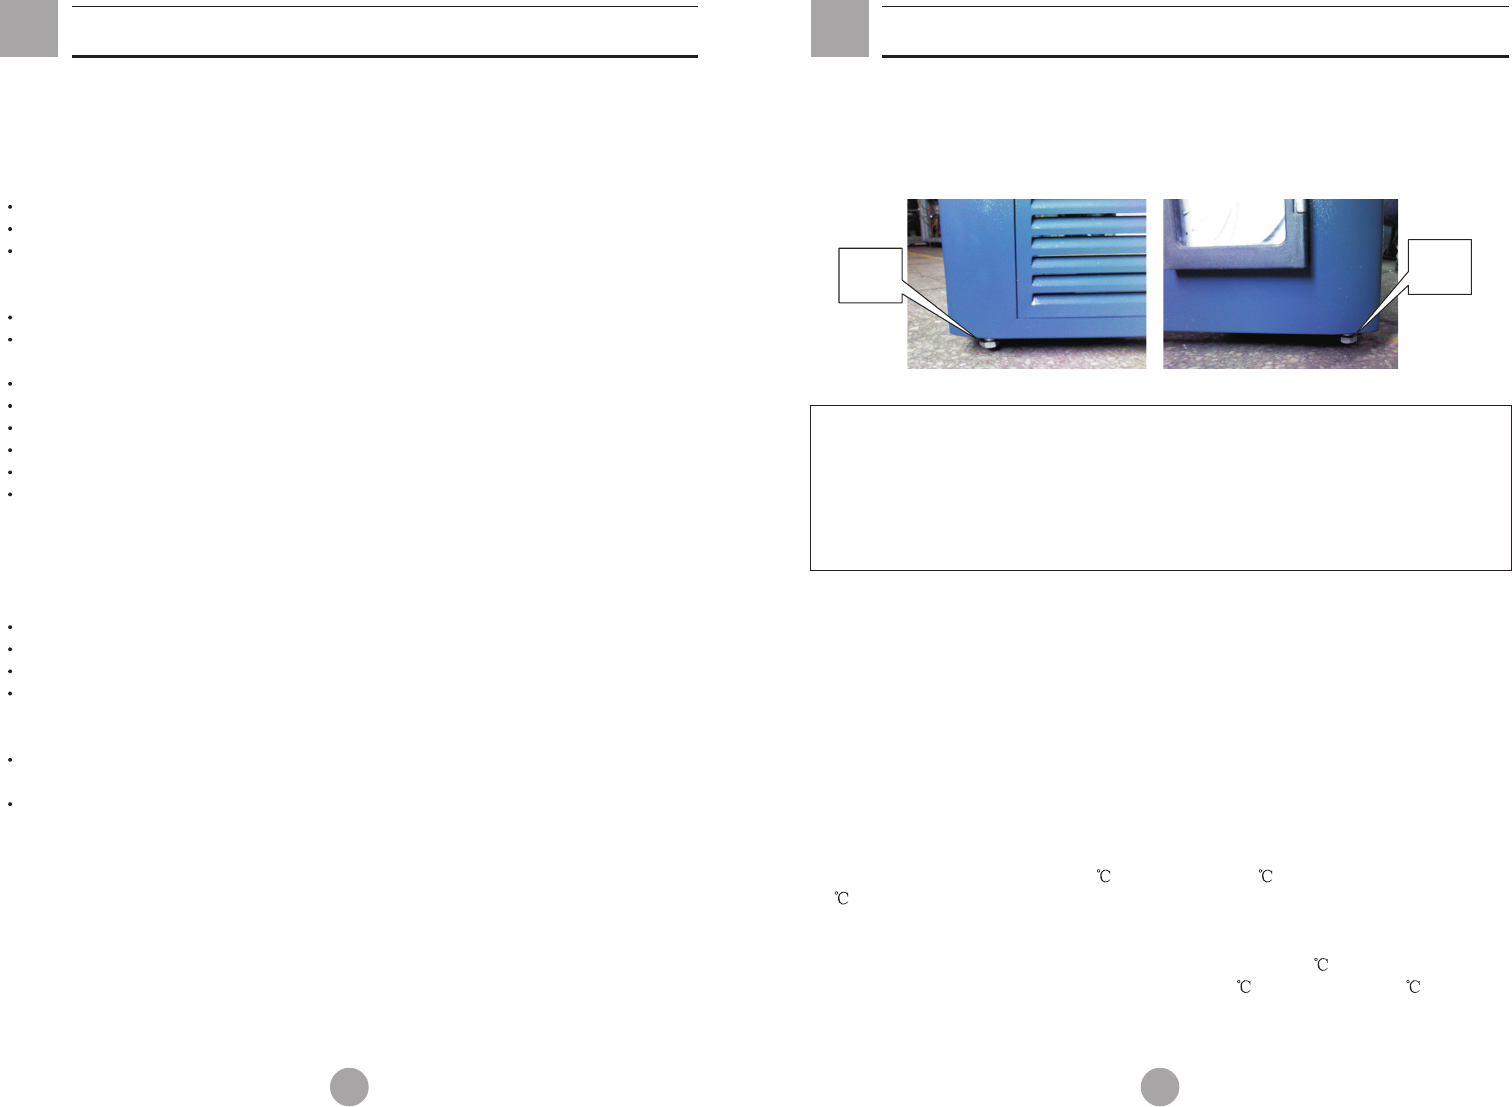
2.Adjust support legs
Rotate the leveling legs clockwise to extend them out to anchor to the floor to ensure
the unit does not move while in usage.
3.Grounding
Warning A socket with proper grounding must be used for the equipment. If
the socket is not grounded, an upgrade of the power socket to include grounding
must be done by a qualified technician. Do not use gas lines, water mains, telephone
lines or lightening rods as the grounding device as they can lead to electric shock.
After the unit's power cord is plugged into the power socket, the plug must be easily
accessed. This allows a quick disconnect of the unit from the power supply in case of
an emergency. The condenser inlet must not be blocked at anytime.
Test and adjustment
When the unit is started the first time, please follow the procedures below.
1.Leave the unit standing in its intended location for at least 24 hours before
switching the power on.
2.While keeping the unit empty, plug in the power cord to a dedicated power socket
that meets all requirements.
3.Please turn on the power switch for the rechargeable battery located on the
control box in the back the unit. This control box is visible from the back of the unit. If
this switch is in the "OFF" position, there will be a low battery alarm during functional
test.
4.If the unit has a backup cooling system, turn off the backup system.
5.If the alarm buzzer sounds, press the cancel button to silent the alarm.
8.If the unit has a backup cooling system, turn on its control.
6.Set the unit to desired temperature:Do not load the unit with any samples. Power
up the unit to let it run down to -60 . Let it run at -60 for 8 hours then lower it to -
80 . Observe the unit performance for 24 hours for normal cycling to ensure it is
working properly.
7.Once the unit is confirmed to operate properly, it is ready to be loaded with
samples. In principle, the freezer unit should be set at about 3 above the desired set
point. For example, if the storage temperature is -60 , set the unit at -57 . Load the
unit to 1/3 of the unit's capacity. Make the unit is capable of cycling for more than 8
hours.
Initial Loading
Leveling
leg
Leveling
leg


