11
Ask about our case installation video available by request through your local Hill PHOENIX Sales or Field Service
Representative.
12
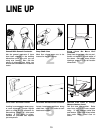
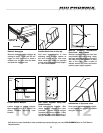
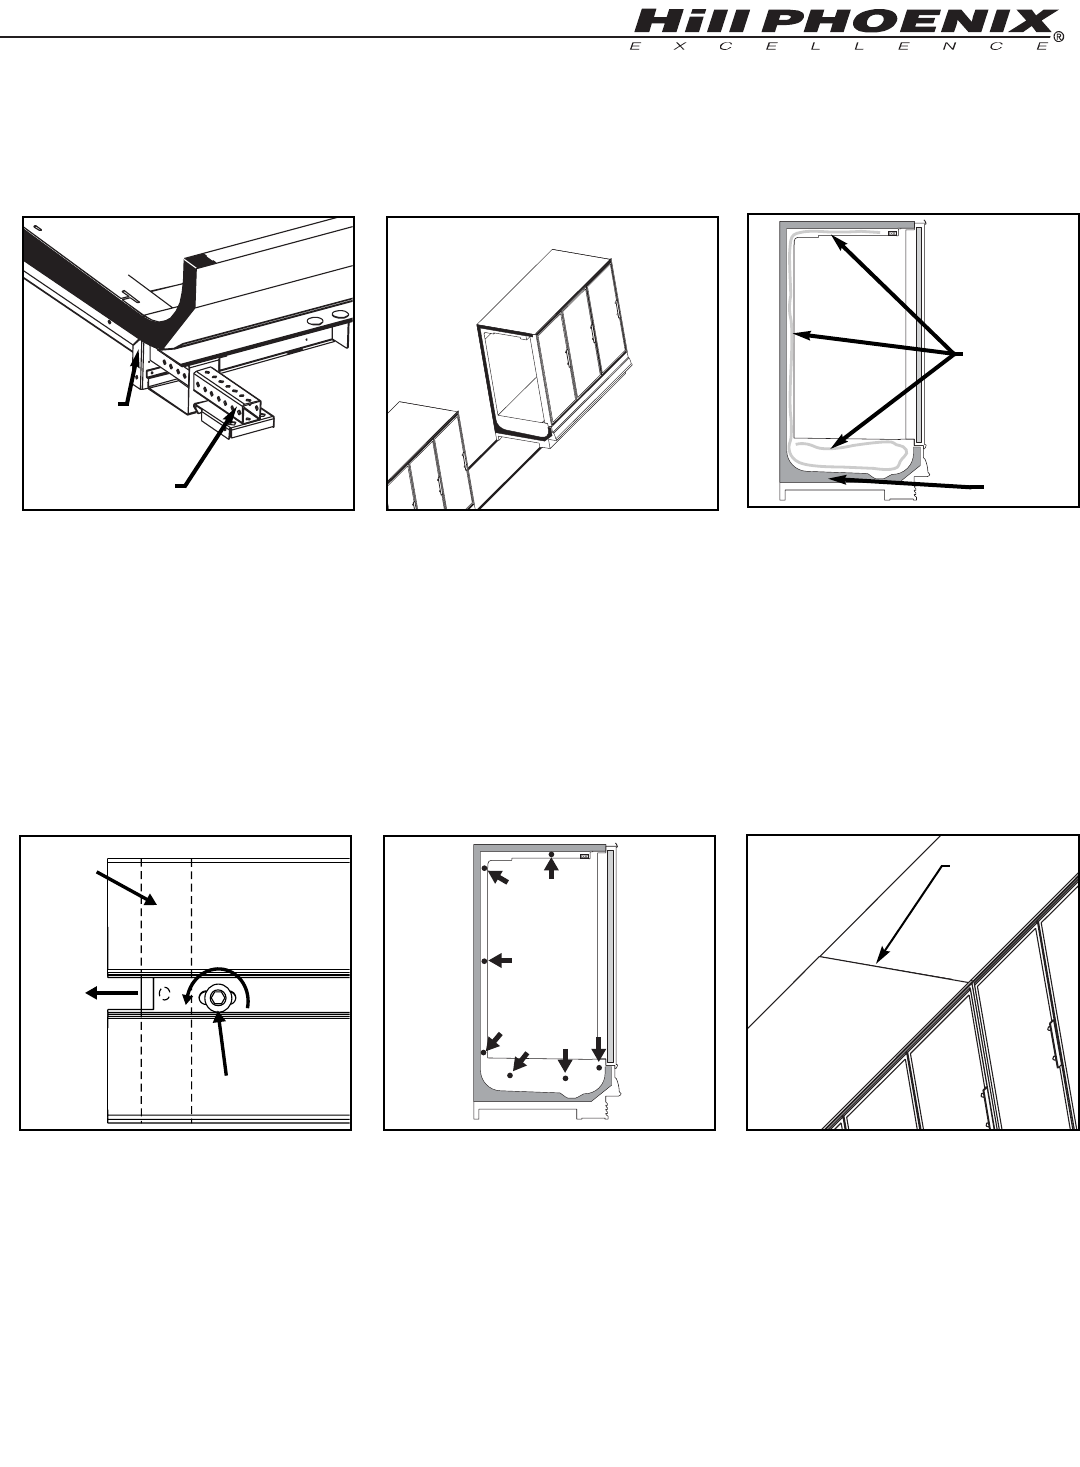
Add Sealant to Top Case Joint.
Once cases are pushed tightly togeth-
er and bolted run a bead of sealant
along the top joint.
11
Bolt Cases Together Using Bolt
Holes Provided
Push cases tightly together. Bolt
cases together through the holes
provided. Tighten until all margins
are equal; do not over tighten. If bolt
5 interferes with shelf positioning, it
may be removed once cases are set.
10
Loosen Master Bumper
Loosen screws on master bumper.
Move bumper joint to a position for
sliding between adjoining case
bumper.
BUMPER
SCREW
BUMPER
JOINT
1
2
3
5
7
6
4
7
Remove Outriggers
Remove cotter pin from outrigger by
cutting tie strap. Either pull the out-
rigger out from the front or insert a
crowbar into the tube from the back
and push the outrigger out.
8
Position Next Case In Line Up
Roll case approximately 6’ from
adjoining case. Remove casters on
the end nearest to the next case.
Allow casters to remain on opposite
end to assist in pushing cases togeth-
er - then remove them.
CAULK
OUTRIGGER
COTTER PIN
LOCATION
9
Remove Shipping Accessories
From Case. Add Sealant.
Remove anything from the case that
may interfere with case joining. Apply
the foam tape that is shipped loose in
the case to the end breakers on each
side of the case. Run a bead of
sealant around the entire end before
pushing cases tightly together.
CAULK
FOAM TAPE


