– 24 –
13. Thoroughly wash out the interior of the machine with a heavy-duty hose fitted with a squeeze
valve. Remove remaining soil with a cloth or soft brush and mild cleanser. Rinse again with hose.
Do not allow food soil to accumulate on the bottom of the tank.
14. Return all strainer pans, strainer basket(s) and the pump intake strainer to their original locations.
15. Install upper wash arms. Rest the manifold on the rear hanger bracket with the open end of the
arm next to the wash pipe and rotate the arm upward to latch it.
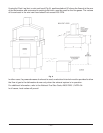
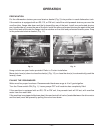
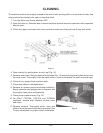
16. Insert the lower wash arm at an angle between the conveyor and install the retainer over the pin.
Rotate the arm toward the catch and engage the hook into the notch (Fig. 14).
17. Leave door(s) open and curtains removed while machine is not in use. This will allow the interior
to air out and dry.
DOs AND DON'Ts FOR YOUR NEW HOBART WAREWASHER
DO assure proper water hardness.
DO pre-scrap dishes thoroughly.
DO use only detergents recommended by your chemical professional.
DO at the end of the day, thoroughly cleanse the machine, rinse and dry (leave door open).
DO closely follow your chemical professional's prescribed deliming schedule.
DO use only products formulated to be safe on stainless steel.
DO NOT over soften water (recommended water hardness is no less than 4 grains per gallon).
DO NOT use detergents formulated for residential dishwashers.
DO NOT allow food soil to accumulate on the tank bottom.
DO NOT exceed chemical manufacturer's recommended concentrations for detergent, sanitizer, rinse
aid or lime scale remover.
DO NOT use steel wool to clean ware or warewasher surface.
DO NOT allow foreign objects to enter the unit, especially metallic contaminants.
NOTE: Failure to follow use, care and maintenance instructions may void your Hobart warewasher
warranty.


