


– 7 –
not exceed 200 parts per million concentration of
available chlorine. For example, mixing 1 tablespoon of
5.25% sodium hypochlorite bleach with 1 gallon of
water yields a solution containing 200 ppm of available
chlorine. Solution with concentrations greater than 200
ppm will accelerate corrosion of metals. Maximum
exposure to sanitation solution varies with temperature
and concentration. Rinse with clean water.
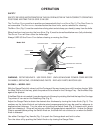
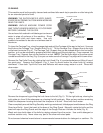
Reassemble the sharpener to the mounting bracket by
sliding the left slot on the sharpener over the left guide
pin on the bracket while tilting slightly (Fig. 7). Then,
press down on the right side of the sharpener so the
locking hole fits over the right guide pin on the bracket.
Slide the Lock Lever to the right to lock the sharpener in
position. Make sure the sharpener is securely engaged
to the pins on the bracket.
Carefully reassemble the Top Knife Cover by putting it
in position (three guide pins). Lock by turning the Latch
Knob to the left while lowering the Top Knife Cover;
then, release the Latch Knob and turn it to the right until
snug.
Replace the Deflector below the slicer knife:
Guide
bottom of socket onto mount and rotate upwards.
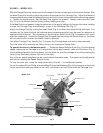
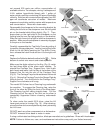
Make sure the digits etched on the Key (Fig. 8) match
the last three digits of the slicer serial number. To
reinstall the Carriage Tray / Support Arm: Hold it with
both hands and lower it so the Key at the bottom of the
Support Arm fits into the slot of the Carriage Pivot
(Fig. 8). The Carriage Tray should rest almost horizontal
(Fig. 4). Return the Carriage Tray to the Gauge Plate by
tilting to the left. Turn the Knob on the Carriage Tray /
Support Arm clockwise until snug.
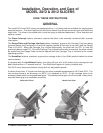
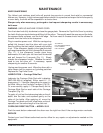
The model 2812 slicer has a Cleaning Leg underneath
the machine. To engage the Cleaning Leg, raise the
front of the slicer by lifting the front of the slicer base.
The Cleaning Leg will swing straight down. Pull the
Cleaning Leg all the way to the front so the slicer is
completely supported before cleaning underneath
(Fig. 9).
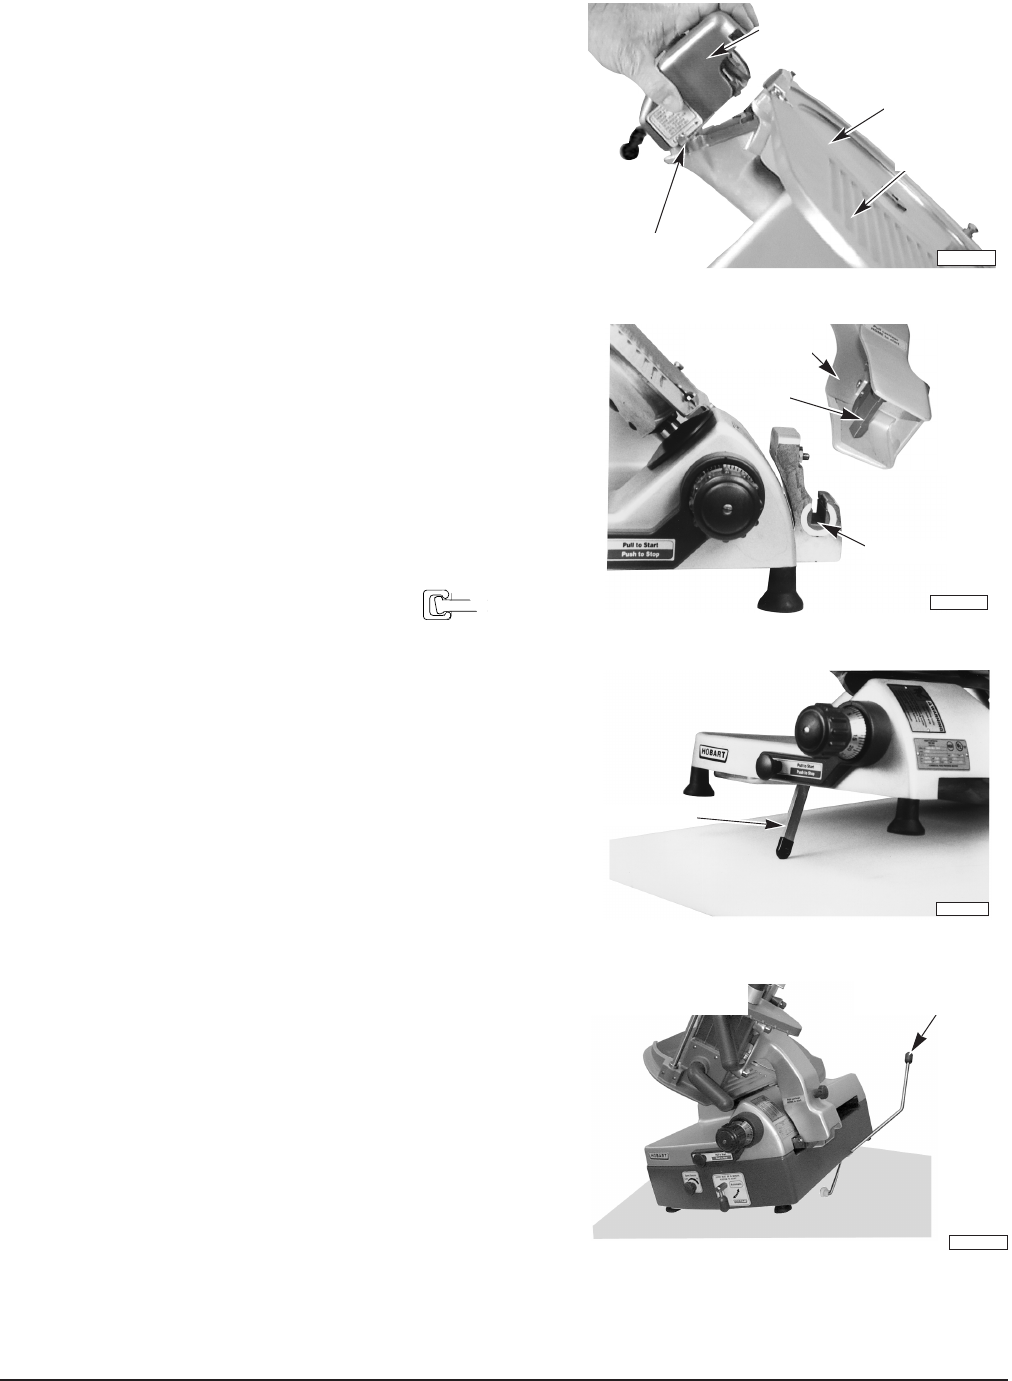
To clean under the model 2912 slicer, raise the Lift
Lever past center to its stop (Fig. 10). After cleaning,
return the slicer to its normal position by slowly retracting
the Lift Lever.
DO NOT wash any slicer components in a dishwasher.
DO NOT immerse slicer base or motor in water.
If using a chlorinated sanitizing solution, dilute per manufacturer’s guidelines. Rinse with fresh water.
NOTE: Failure to follow use, care, and maintenance instructions may void your Hobart warranty.
PL-40866-1
CLEANING LEG
PL-41248-1
CARRIAGE PIVOT
KEY
CARRIAGE TRAY /
SUPPORT ARM
PL-41402-1
GAUGE PLATE
KNIFE
SHARPENER
LOCK LEVER
PL-41259-1
MODEL 2912 –
RAISED FOR CLEANING
LIFT LEVER –
RAISED PAST CENTER
Fig. 7
Fig. 8
Fig. 9
Fig. 10