


14
III. INSTALLATION AND OPERATING INSTRUCTIONSIII. INSTALLATION AND OPERATING INSTRUCTIONS
III. INSTALLATION AND OPERATING INSTRUCTIONSIII. INSTALLATION AND OPERATING INSTRUCTIONS
III. INSTALLATION AND OPERATING INSTRUCTIONS
1. CHECKS BEFORE INSTALLATION1. CHECKS BEFORE INSTALLATION
1. CHECKS BEFORE INSTALLATION1. CHECKS BEFORE INSTALLATION
1. CHECKS BEFORE INSTALLATION
IMPORTANTIMPORTANT
IMPORTANTIMPORTANT
IMPORTANT
1. Remove shipping carton, tape(s) and packing. If packing material is left in the
ice dispenser, it will not work properly.
2. Ensure all components, fasteners and thumbscrews are securely in place.
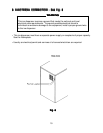
1) Remove the Upper Front, Top and Side Panels to prevent damage when installing the ice
dispenser. (See “2. HOW TO REMOVE PANELS.”)
2) Remove the package containing accessories.
3) Check that the refrigerant lines do not rub or touch lines or other surfaces, and that the fan
blade turns freely.
4) Check that the Compressor is snug on all mounting pads.
5) See the Nameplate on the upper right part of the Rear Panel, and check that your voltage
supplied corresponds with the voltage specified on the Nameplate.
6) Check that a spare fuse is provided as an accessory. For DCM-500BAF and DCM-500BWF,
1 A and 0.5 A fuses, and for DCM-750BAF and DCM-750BWF, 3 A and 0.5 A fuses are
located on the Control Box.
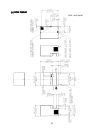
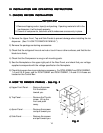
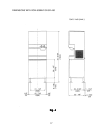
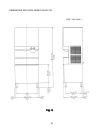
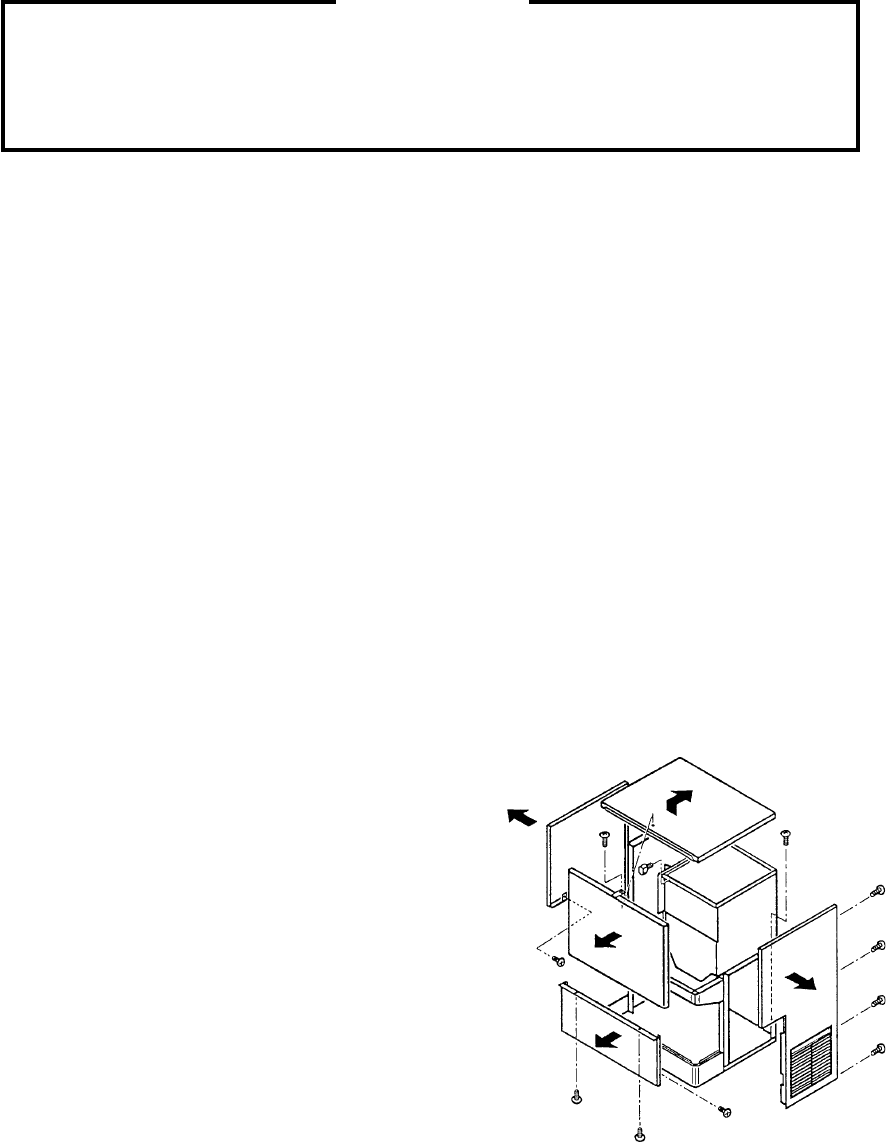
2. HOW TO REMOVE PANELS - See Fig. 22. HOW TO REMOVE PANELS - See Fig. 2
2. HOW TO REMOVE PANELS - See Fig. 22. HOW TO REMOVE PANELS - See Fig. 2
2. HOW TO REMOVE PANELS - See Fig. 2
a) Upper Front Panel. . . . . Remove the screw.
Pull the bottom
toward you.
b) Top Panel. . . . . . . . . . . .
Remove the Thumb-
screw. Lift up the
front and push
away.
c) Apron Panel . . . . . . . . . . Remove the screws
and pull toward you.
d) Side Panel. . . . . . . . . . .
Remove the screws
and pull toward you.
Fig. 2Fig. 2
Fig. 2Fig. 2
Fig. 2