37
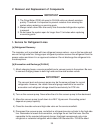
3. Removal and Replacement of Compressor
IMPORTANT
Always install a new drier every time the sealed refrigeration system is
opened. Do not replace the drier until after all other repair or replacement
has been made.
1) Unplug the icemaker.
2) Remove the panels.
2) Remove the terminal cover on the compressor, and disconnect the compressor
wiring.
3) Recover the refrigerant and store it in an approved container, if required by an
applicable law.
4) Remove the discharge, suction, and access pipes from the compressor using
brazing equipment.
WARNING
When repairing a refrigerant system, be careful not to let the burner flame
contact any electrical wires or insulation.
5) Remove the bolts and rubber grommets.
6) Slide and remove the compressor. Unpack the new compressor package. Install
the new compressor.
7) Attach the rubber grommets of the prior compressor.
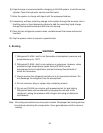
8) Sandpaper the discharge, suction and access pipes.
9) Place the compressor in position, and secure it using the bolts.
10) Remove plugs from the discharge, suction and access pipes.
11) Braze the access, suction and discharge lines (Do not change this order),
while purging with nitrogen gas flowing at the pressure of 3-4 PSIG.
12) Install the new drier.


