


20
3. Setup
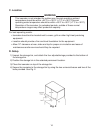
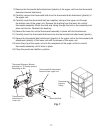
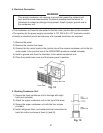
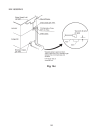
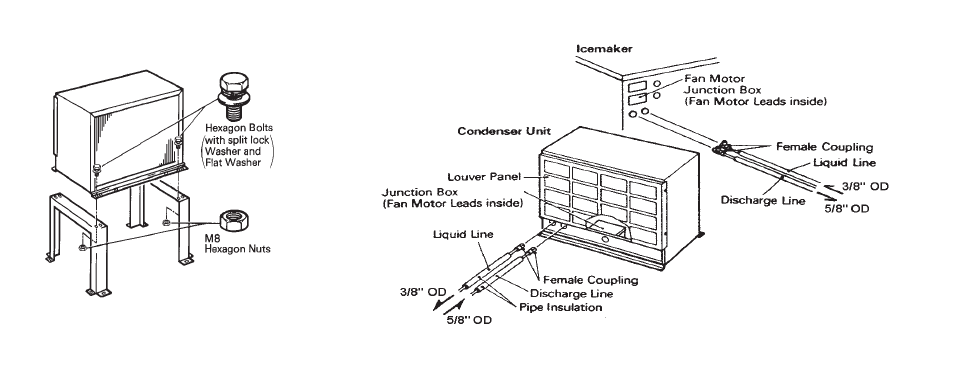
1) Secure the legs to the condenser unit with eight M8×16 mm hexagon bolts and M8 nuts
as shown in the illustration. See Fig. 10.
Note: Locate the legs symmetrically.
2) The legs have eight mounting holes. Secure the legs with eight bolts (not included).
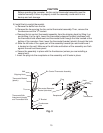
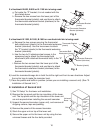
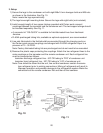
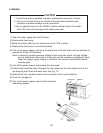
3) Install enough length of two copper tubings provided with Parker quick connect
couplings between the icemaker and the condenser unit. The two copper tubings should
be insulated separately. See Fig. 11.
• A connector kit "OS-QUICK" is available for field-fabricated lines from Hoshizaki
America.
• R-404A precharged tubing kits, available as optional equipment, are recommended.
4) Line sets fabricated in the field should be evacuated through the charging ports on
the Parker quick connect couplings and charged with R-404A refrigerant vapor to a
pressure of 15 - 30 PSIG.
Note: Factory fabricated tubing kits are precharged and do not need to be evacuated.
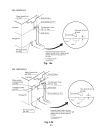
5) Remove the plastic caps protecting the couplings. Attach the two refrigerant lines to the
male couplings on the icemaker and the remote condenser unit. Each refrigerant line
must be connected as follows:
Icemaker discharge refrigerant line - 5/8" OD tubing to "DIS" of condenser unit
Icemaker liquid refrigerant line - 3/8" OD tubing to "LIQ" of condenser unit
Note: Care should be taken that the unit, line set and condenser contain the same
type refrigerant prior to making connections. Mixing of refrigerants will result in
improper operation and possible damage to the refrigeration system. Make the
connections at the remote condenser first and then at the icemaker.
Fig. 10
Fig. 11