17
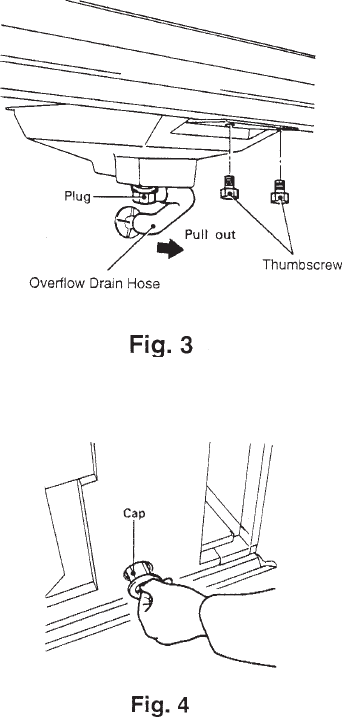
4) Remove the plug at the bottom of the water
tank to drain the tank. See Fig. 3. After
draining, replace the plug in its correct
position.
5) Pull out the cap at the front of the plastic
body 1" or more. See Fig. 4.
6) Pour the cleaning solution into the water
tank.
7) Replace the cap in its correct position.
8) Move the control switch to the “WASH”
position. Close the door.
9) After 30 minutes, move the control switch to
the “OFF” position.
10) Remove the plug to drain the water tank.
After draining, replace the plug in its
correct position.
11) Move the control switch to the “ICE”
position to fill the water tank with water.
12) After 3 minutes, move the control switch to
the “OFF” position.
13) Move the control switch to the “WASH” position.
14) After 5 minutes, move the control switch to the “OFF” position.
15) Remove the plug to drain the water tank. After draining, replace the plug in its correct
position.
16) Repeat 11) through 15) three more times to rinse thoroughly.
17) Remove the thermostat bracket and the water tank from the bin by removing the two
thumbscrews for each at the top of the bin, and disconnect one end of the overflow
drain hose. See Fig. 3.
18) Mix a new batch of the cleaning solution.
19) Wash the bin liner, the thermostat bracket, the water tank bracket and the water tank
using a nylon scouring pad, brushes and the cleaning solution.
20) Rinse the parts in the previous step thoroughly with water.


