


5
GB
PLEASE PHONE US TO REGISTER YOUR APPLIANCE AND ACTIVATE YOUR PARTS GUARANTEE ON 08448 24 24 24
Installation
WARNING – THIS APPLIANCE MUST BE EARTHED.
Electrical connection
Electric cookers come without a power supply
cable. The cooker is designed to operate on an
electricity supply which conforms to the electrical
data shown on the Rating Plate. The cooker can be
connected to the mains only after removing the
back panel of the cooker itself with a screwdriver.
N.B.:N.B.:
N.B.:N.B.:
N.B.: the following installation procedure must be
carried out by a qualified electrician. The electrical
installation must comply with the IEE Regulations,
Building & local By-Lays.
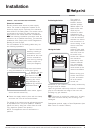
For the installation of the feeding cable carry out
the following operations:
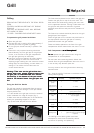
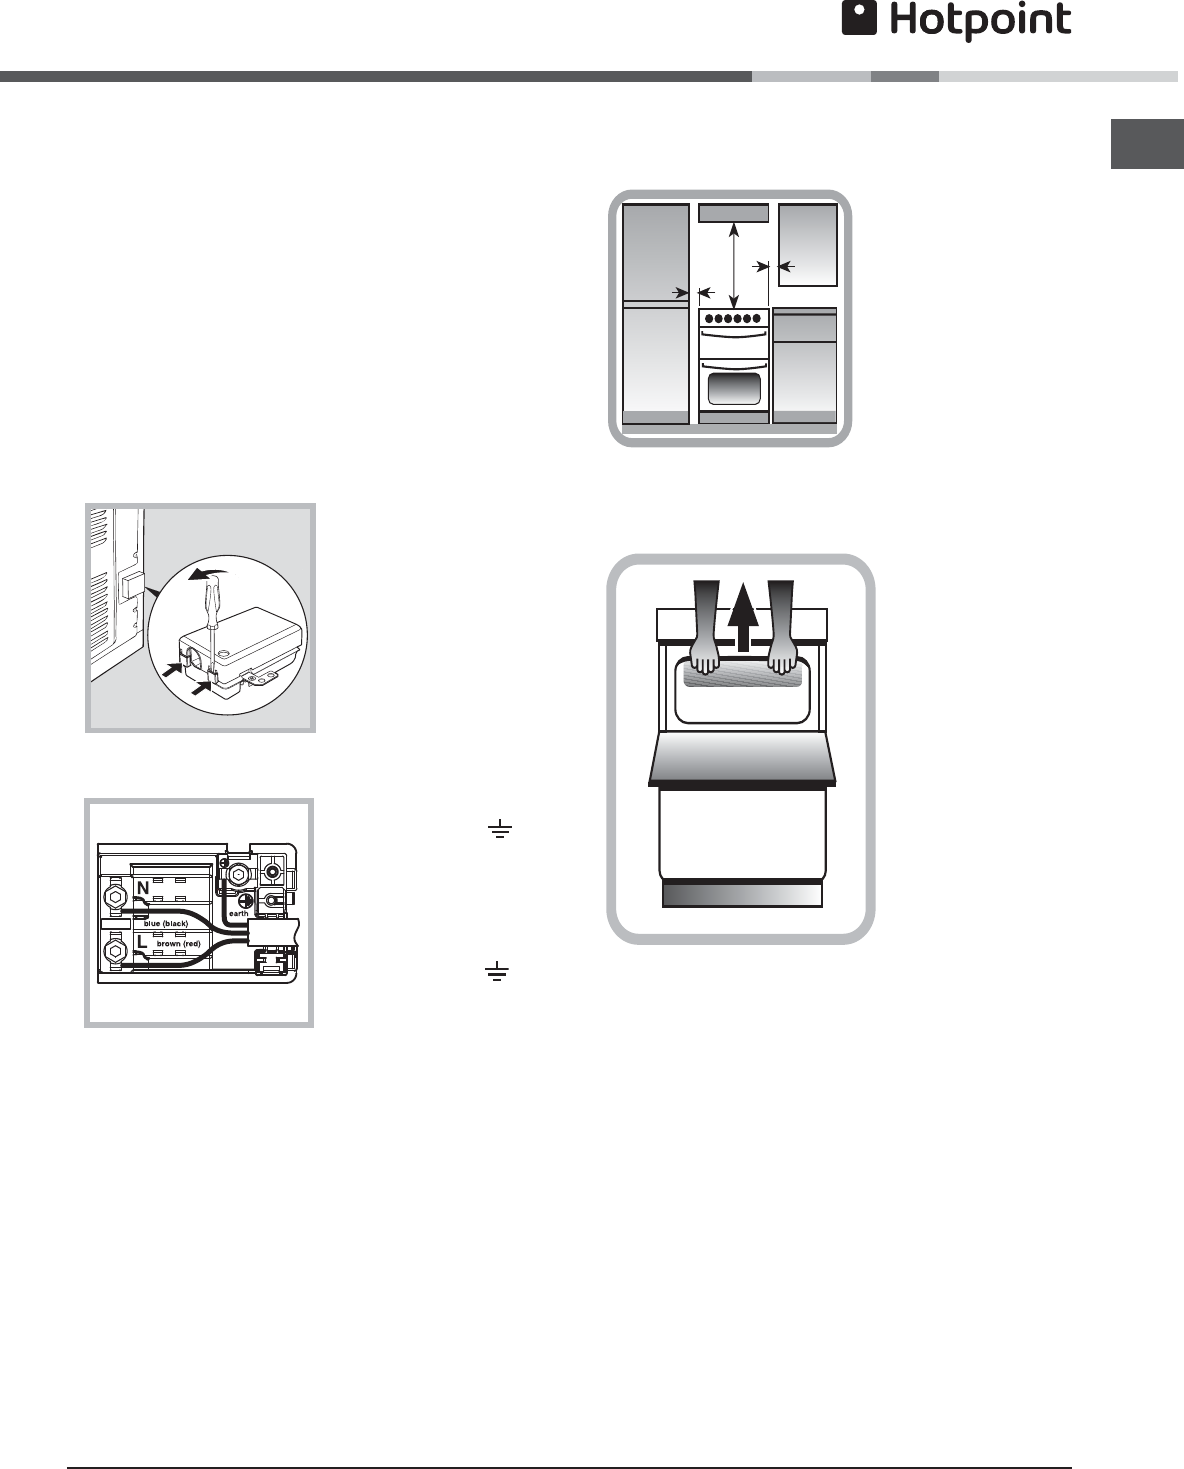
1 Open the terminal
board by inserting a
screwdriver into the
side tabs of the cover.
Use the screwdriver
as a lever by pushing
it down to open the
cover (see diagram).
2 Loosen the cable clamp screw and remove
it, using a screwdriver as a lever (see figure).
3. Remove the wire
contact screws L-N-
,
then fasten the wires
under the screw heads,
respecting the colour
code: Black/Blue (N),
Red/Brown (L) and Bare
Wire/Yellow-Green (
).
Once the connections have been made, tighten
all the terminal screws fully.
Fasten the supply cable in place with the clamp
and close the cover of the terminal board.
The height of the cooker can be adjusted by means
of adjustable feet in the plinth (900mm - 930mm).
Adjust the feet by tilting the cooker from the side.
Then install the product into position.
NOTE: This appliance must not be fitted on a
platform.
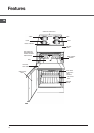
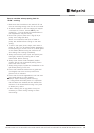
The cooker is
designed to fit
between kitchen
cabinets spaced
500mm apart. The
space either side
need only be
sufficient to allow
withdrawal of the
cooker for servicing.
It can be used with
cabinets one side or
both as well as in a
corner setting. It can
also be used free-
standing.
Adjacent side walls
which project above
hob level, must not
be nearer to the
cooker than 150mm
and should be
protected by heat
resistant material.
Any overhanging
surface or cooker
hood should not be
nearer than 650mm.
Before moving your
cooker check that it
is cool, and switch
off at the cooker
control unit.
Movement of your cooker is most easily achieved by
lifting the front as follows:
Open the grill door sufficiently to allow a comfortable
grip on the underside front edge of the oven roof,
avoiding any grill elements.
Note: Note:
Note: Note:
Note: Take care in moving the cooker as it is heavy.
Take care to ensure that any floor covering is not
damaged.
Splashplate optional, apply to Parts Department (see
Back Cover for contact number.)
Moving the Cooker
Positioning the Cooker
150 mm
150 mm
650 mm