


10
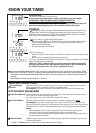
ELECTRONIC CLOCK & AUTOMATIC OVEN
TIMER OPERATION
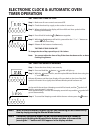
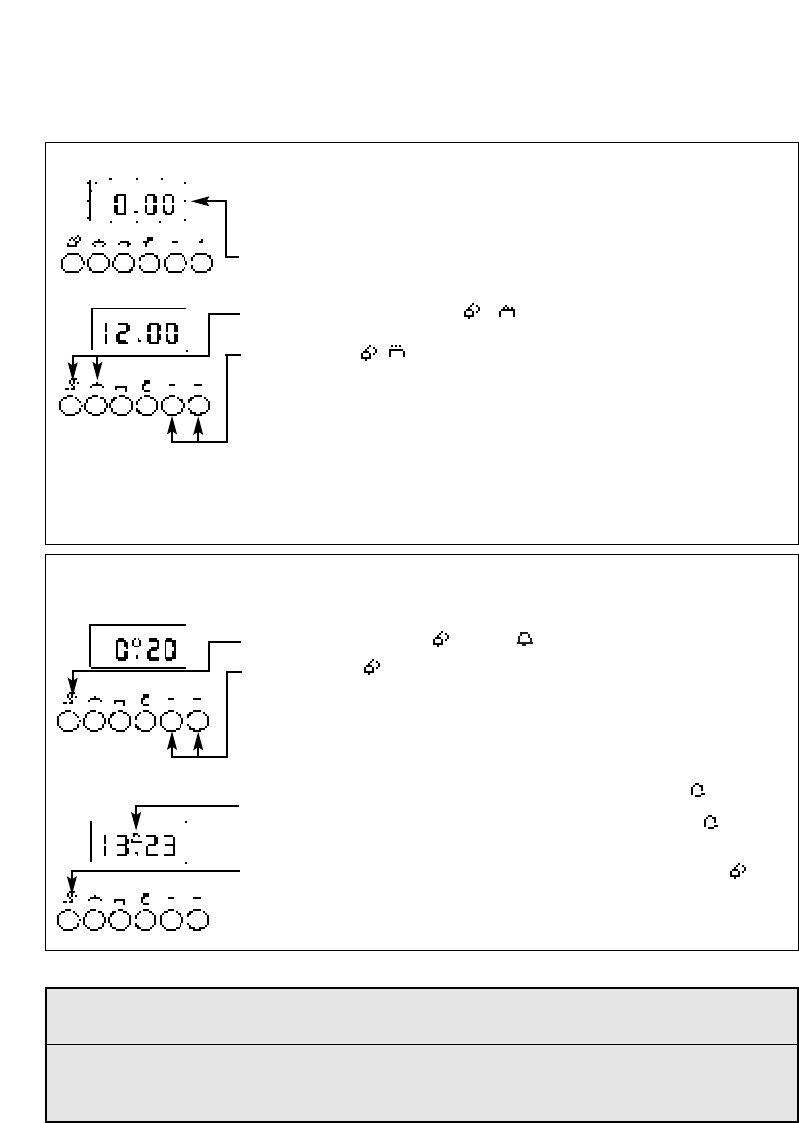
SETTING THE TIME OF DAY
Step 1 Make sure all oven controls are turned Off.
Step 2 Check the electricity supply to the cooker is turned on.
Step 3 When switched on the display will show 0.00 and Auto symbol will be
flashing intermittently.
Step 4 Press & hold in both the & buttons together.
Step 5 With the & buttons still held in, press either the “+” or “–” buttons to
set the correct time of day.
Step 6 Release all the buttons simultaneously.
THE TIME OF DAY IS NOW SET.
To change the time of day repeat Steps 4, 5 & 6 above.
Note: You cannot adjust the time of day if the timer has been set for an Auto
Cooking Programme.
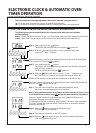
SETTING THE MINUTE MINDER
Step 1 Ensure the time of day is set correctly.
Step 2 Press and hold the button, a symbol will light up.
Step 3 With the button held in, set the required Minute Minder time using the
“+” and “–” buttons.
Release all buttons and the timer display will revert back to the time of day. Bell
symbol will remain lit to signify that a Minute Minder period has been set.
At the end of the set time a bleeping sound will be heard, and the symbol will
flash for approximately 2 minutes.
After approximately 2 minutes the bleeping sound will stop and the symbol will
go out automatically.
Step 4 To cancel the bleeping sound within the two minutes press the button.
Note 1 When the Minute Minder has been set, the time remaining can be checked at any
time by simply pressing the Minute Minder button.
Note 2 If necessary the Minute Minder can be cancelled before the tone sounds by
pressing and holding the Minute Minder button and then at the same time
pressing the “–” button until 0.00 appears in the display window.