6
GB
PLEASE PHONE US TO REGISTER YOUR APPLIANCE AND ACTIVATE YOUR PARTS GUARANTEE ON 08448 24 24 24
Conversion for use on Butane or Propane
Each hob burner requires the injector to be replaced and
each burner gas tap to have the by-pass screw adjusted
according to the following procedure:
1. Lift off the burner cap and the burner body and place it
to one side.
2. Remove the injector from the burner base with a suitable
box spanner and discard.
3. Replace the injector with the appropriate replacement
(see Table).
4. Repeat for each burner.
5. Replace the burner bodies and caps, taking care that
they are positioned correctly.
6. Remove the tap knob from the left hand hotplate tap.
Insert a narrow at screwdriver centre of the tap spindle
and turn fully clockwise. Replace the tap knob. Repeat
this procedure with the other six hotplate taps.
7. Position and x the self-adhesive LPG conversion label
over the gas details on the rating plate label.
Space for xing
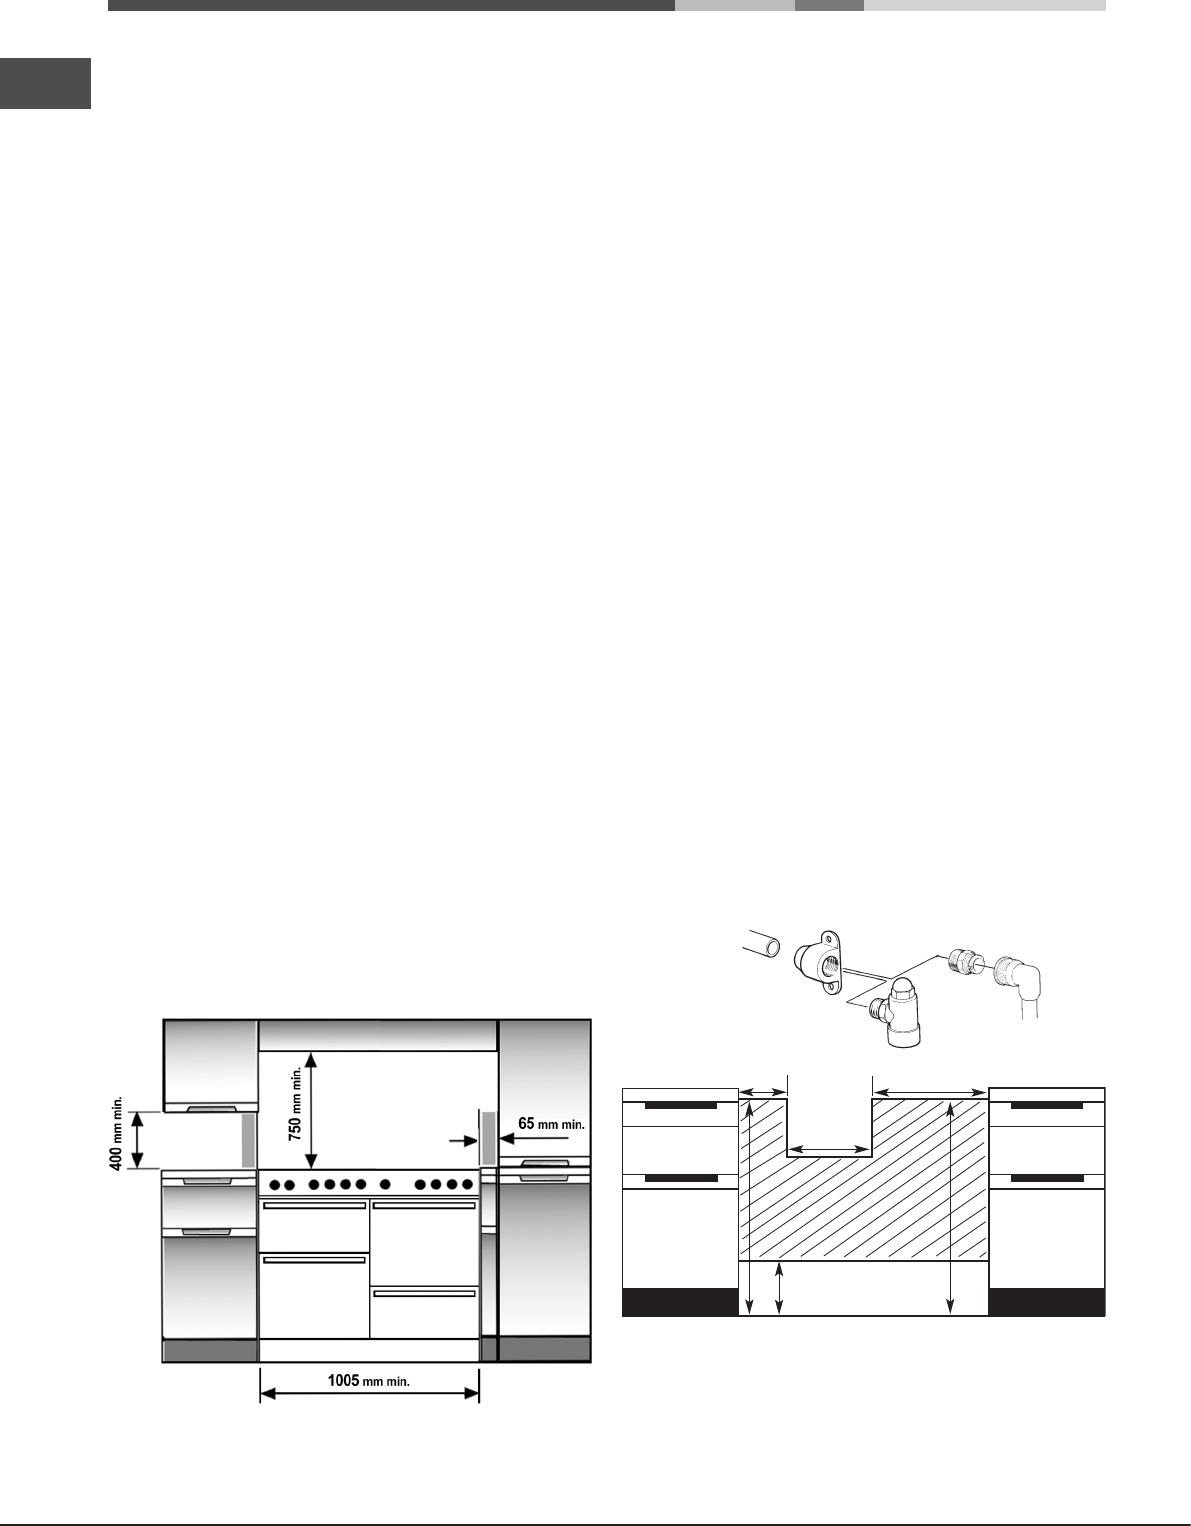
The cooker can be close tted below hotplate level. This
requires a minimum distance of 600mm between cupboard
units of hotplate height.
When installing next to a tall cupboard, partition or wall, for
a minimum distance of 400mm above hotplate level, allow
a side clearance of at least 65mm.
The diagram below illustrates the minimum clearance
between the cooker and adjacent walls, cupboards etc.
The wall behind the cooker, 50mm below and 450mm
above, and the width of the cooker, must be a non-
combustible material such as ceramic wall tiles.
If the cooker is to be tted close to a corner on the left hand
side, ensure that there is a clearance of at least 50mm to
allow the main oven door to open fully for when removing
oven shelves.
Cooker hoods
If a cooker hood is to be installed, refer to the cooker hood
manufacturers’ instructions regarding xing height.
UNPACKING THE COOKER
Unpack the components from inside the grill and oven.
Check that the following parts are present:
Meat pan Pan supports (3)
Grill pan, grid and handle LPG conversion kit
Loose burner parts (14) Oven shelves (4)
Aluminium burner bodies (6) Griddle
Wok Stand Literature pack
After unpacking your cooker, make sure that you remove all
the packing from the oven and grill, and any stickers from
the oven door and the hob.
Levelling
Your cooker is heavy, so it would be advisable for two people
to move it. The cooker is tted with rear wheels and will slide
into position easily. Movement of your cooker is most easily
achieved as follows. Open the grill/oven door sufciently to
allow a comfortable grip on the underside front edge of the
oven roof, avoiding any grill or oven interior furniture, and
then lift and slide back at the same time.
Your cooker must stand on a at surface so that the hob
is perfectly level, and the cooker is stable and cannot be
rocked, this is easily achieved by adjusting the three feet
which are under the front of the cooker and the 3 castors
under the rear of the cooker, if necessary.
NOTE: If the cooker is to be placed on a base, precautions
must be taken to prevent it from slipping off the base.
The cooker is designed to match the depth of standard
600mm worktops. An adaptor backplate should, therefore,
be tted within the shaded area shown to allow the cooker
to be pushed fully to the wall. If a forward facing backplate
is used, it must be chased into the wall.
180
370
450
250
750
750


