


6
Installation
Choose where you want to install
your dishwasher, you can place it
so that its sides or back panel are
side by side with furniture or up
against the wall. The dishwasher is
provided with water supply and drain
hoses, which can be directed
towards the left or right to facilitate
appropriate installation.
Levelling.
Once the appliance is positioned,
adjust the feet by screwing them in
or out depending on how high you
want it and to level it so that it is
horizontal. Make sure that it is not
inclined more than 2 degrees. If the
appliance is level, it will help ensure
its correct operation.
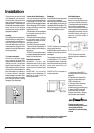
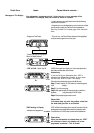
Cold water connection.
Connect the cold water supply
hose, inserting the small filter
supplied with the dishwasher and
making sure that it is fastened
tightly in place (see figure 2). If the
water hoses are new or have been
out of use for an extended period of
time, let the water run to make sure
it is clear and free of impurities
before making the connection. If this
precaution is not taken, the water
inlet could get blocked, causing
damage to your dishwasher.
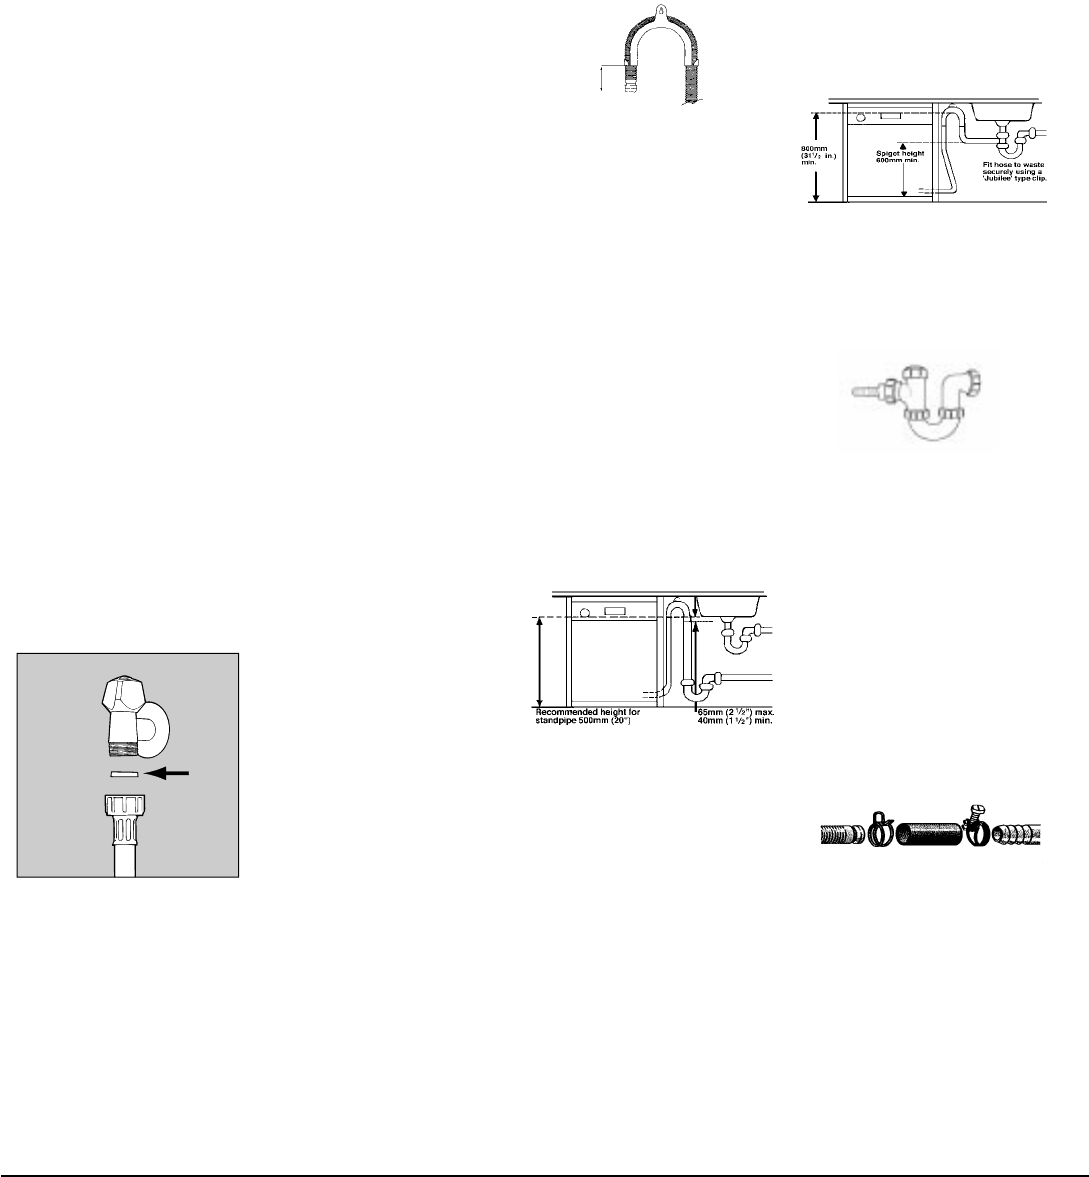
Standpipe:
Ensure that the hose is not pushed
too far down the standpipe.
If the end of your drain hose is fitted
with ‘retaining flaps’, ensure they are
inserted fully into the standpipe. This
will prevent the pipe from jumping
out during installation and use.
DO NOT position the standpipe
near an electrical outlet.
ENSURE that the drain hose is not
kinked and it is routed as shown in
the diagram.
The standpipe should have a bore
of at least 38mm (11/2”). It should
be installed as shown, have a trap
fitted and must discharge into the
same drain system as your
household sink.
It MUST NOT be connected to a
surface water drain.
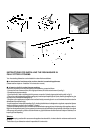
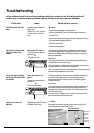
Sink Waste System:
For under sink drainage:
Before connecting the drain hose,
remove any internal restrictions -
This will prevent a build up of debris
which could cause a blockage.
Remove any restrictions from the
waste spigot and ensure that the
sealing bung is removed. The hose
should be routed, such that it is
raised to a minimum height of
800mm (31/2”).
NOTE: Ensure the sink outlet
pipe has a minimum diamtere of
32mm.
1. Untie the end of the GREY
drainage hose from the rear of the
appliance.
2. Reposition the ‘Hooked End
Support’ as required along the
GREY drainage hose.
3. If fitting an under sink waste
disposal unit, cut out the
membrane, bung or blanking plug.
4. Attach the GREY drainage
hose to the under sink waste
disposal unit securely, using the
clip and rubber tube supplied.
Ensure the drain hose is
securely attached, to prevent it
coming away while the
machine is in use and causing
a flood.
Connect to the Water Supply...
- For your dishwasher to operate
correctly it requires water pressures
in the range of 6-150 psi (100-
1000KPa). Most cold water supplies
will be in this range. NOTE: low water
pressure will lead to excessively
long fill times or no fill.
- Ensure that the new hose supplied
is connected and the old hose is
disposed of safely.
- Ensure the fill hose is only fitted to
the cold water supply. DO NOT
overtighten the hose connector,
hand tight is sufficient.
- Ensure the fill hose is not kinked.
- Tap connections (if applicable): A
range of adaptors are available to
suit your tap.
- DO NOT connect the dishwasher
to a single outlet instantaneous water
heater or an electric heater.
Drain hose connection.
WARNING: Connect your
dishwasher drain hose to pipes
which connect to the foul drain
system and not to surface water
drains.
IMPORTANT: For the correct
operation of your dishwasher, it is
essential to comply with the
following information:
Remember you will be charges for a service call is a problem with
your appliance is caused by incorrect installation or misuse.
A
Fig.2