Care and Cleaning
21
Warning: Always switch your appliance OFF at the mains supply and allow to cool before cleaning.
Note: The door can be wedged open using a towel between
the door and the side trim thus leaving your hands free.
Warning: Care must be taken when closing the door inner
panel as the door will attempt to snatch shut, without the
weight of the handle/outer glass assembly avoid trapping
your fingers.
Never operate the ovens without the outer glass panels cor-
rectly refitted.
Fig. 1
Fig. 2
Fig. 3
TWO SCREWS/
WASHERS
DOOR
FIXING
TAG
DOOR
OUTER
GLASS &
HANDLE
DOOR
INNER
PANEL
RUBBER
GROMMETS
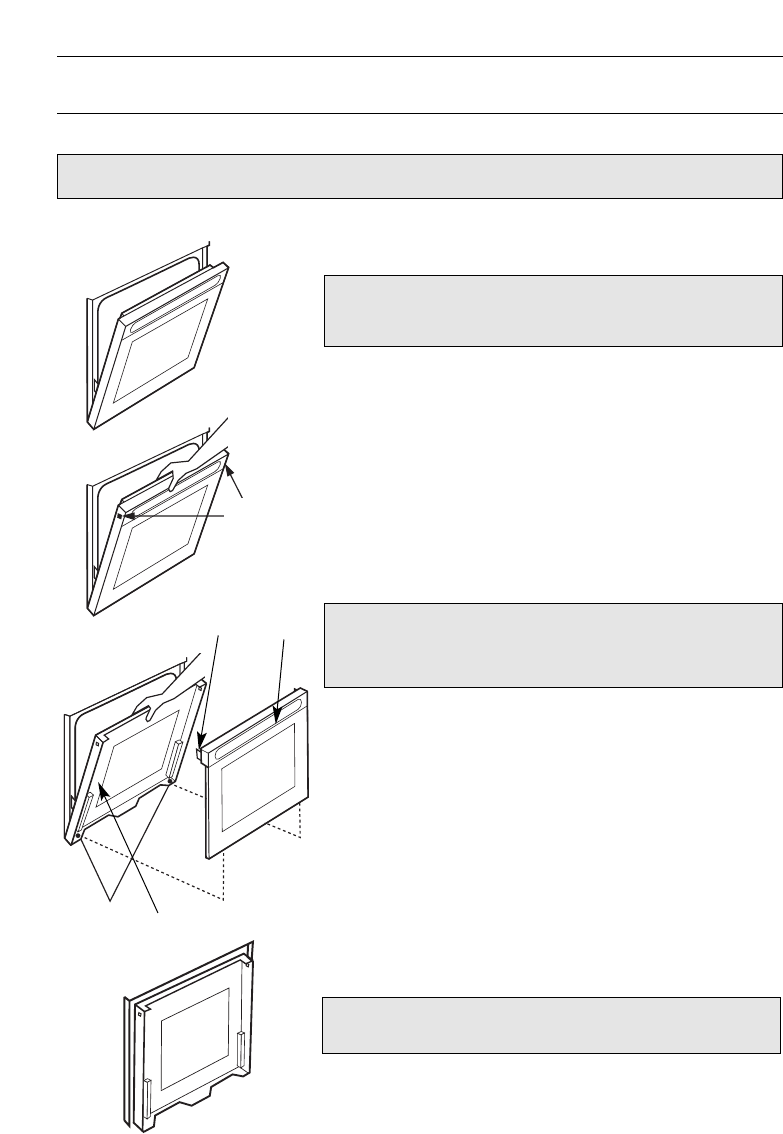
TO CLEAN THE INSIDE OF OUTER AND INNER GLASS PANELS
1. Position top or main oven door as shown in fig. 1.
2. Grip inner door panel and handle/outer glass assembly.
Remove two screws and fibre washers (put to one side)
as shown in fig. 2.
3. Pull handle/outer glass assembly at the top outwards
while still holding the inner door panel and unhook
handle/outer glass assembly at the bottom by lifting
handle/outer glass assembly upwards as shown in fig. 3.
Take care not to dislodge rubber grommets in bottom
of door.
4. Return the inner door panel to the closed position as
shown in fig. 4.
5. The inside of inner and outer door glass can now be
cleaned using a clean, damp cloth and polished using a
clean, dry cloth.
6. Refit the handle/outer glass assembly by opening the
oven door and hold taking care not to trap your fingers,
see fig. 3. Hook the handle/outer glass assembly back
into the rubber grommets at the bottom of the inner
door panel, see fig. 3.
Fit the handle/outer glass assembly back in position at
the top ensuring the fixing tags on the handle/outer
glass assembly fit inside the door inner panel. While still
holding door together, refit the two screws and
washers, see fig. 2.
Fig. 4


