Caution: Accessible parts may
be hot when the grill is used,
young children should be kept
away.
Grill ignition
Important: The door must be fully
open when the grill is used.
Open the door.
Push in and turn the grill control knob
clockwise to the “on” position. Ensure
that the grill burner is alight before
leaving it unattended.
Do not operate the grill between
the
“on” setting and the “off” position - use
the “on” setting only.
To switch off, turn the control knob
anti-clockwise to return it to the “●” off
position.
If for any reason the burner does not
light within 15 seconds turn the control
off and wait for one minute before
beginning a further ignition attempt.
Aluminium foil
Never cover the grill pan or grill trivet
with cooking foil, or allow fat to build
up in the grill pan, as this creates a
fire hazard.
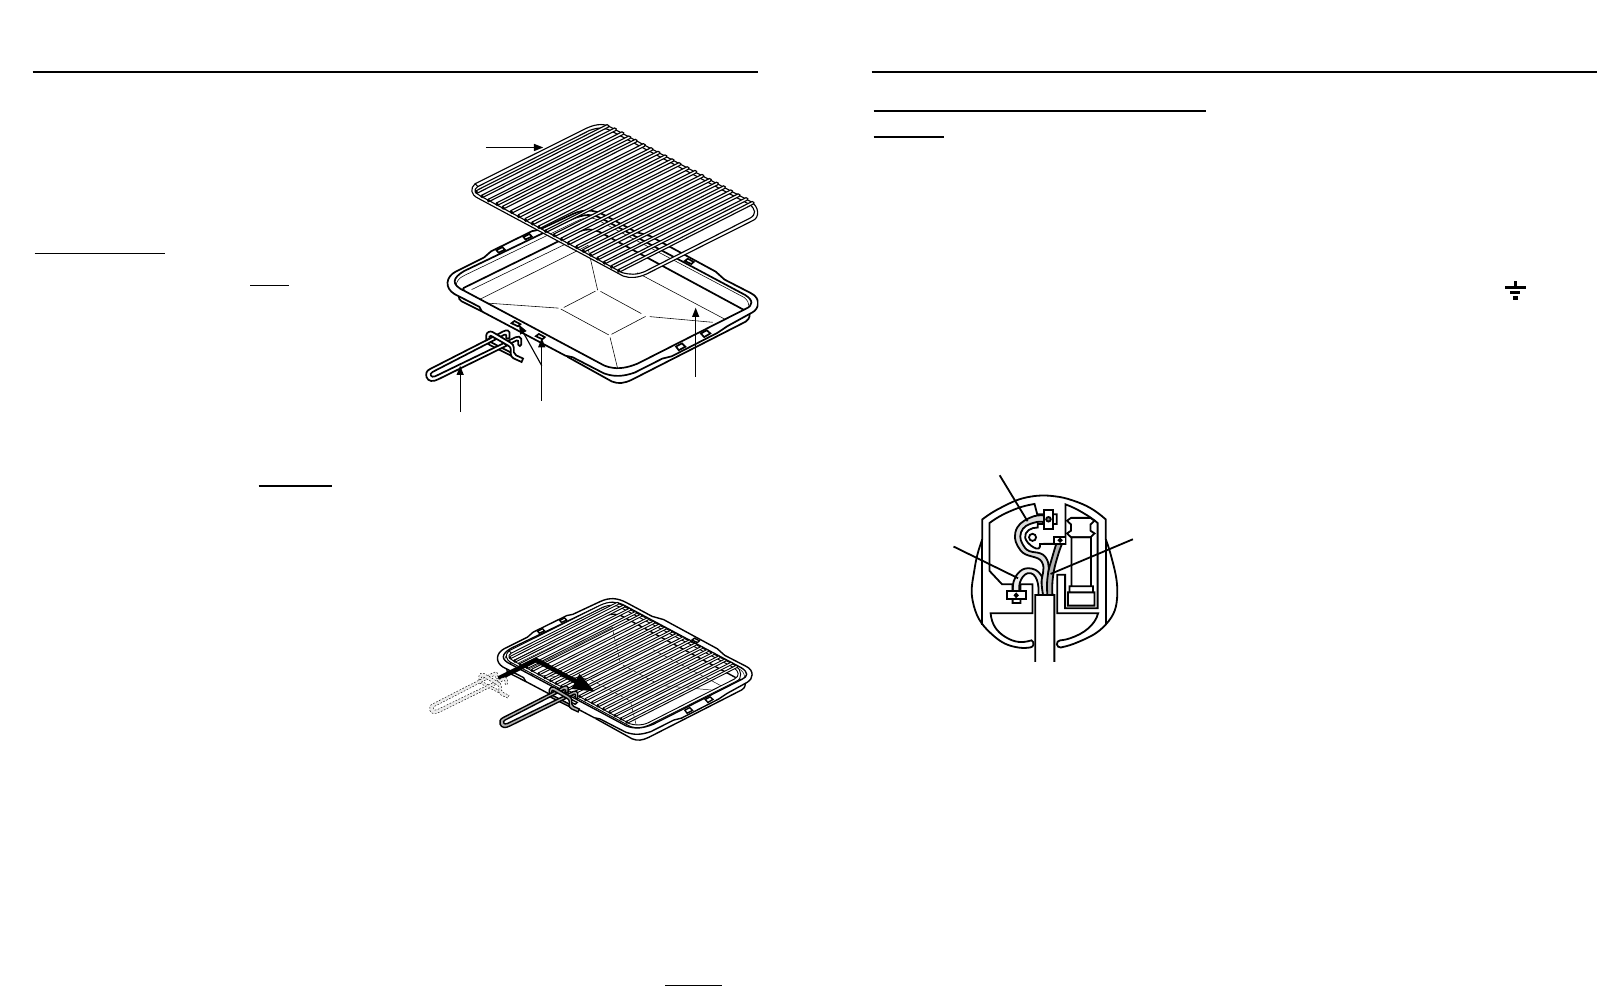
Detachable grill pan handle
Place the handle over the edge of the
grill pan, at the narrow side edges.
Slide the handle to the centre, and
locate between the handle position
indicators.
The handle should be removed from
the pan during grilling, to prevent
overheating.
The handle is designed for removing /
inserting the grill pan under the grill
when grilling.
If cleaning the grill pan when it is hot,
use oven gloves to move it. Do not
use
the handle to pour hot fats from the
grill pan.
Food for grilling should be positioned
centrally on the trivet.
6
Using the Grill
handle
grill pan
trivet
handle position
indicators
27
Installation Instructions
Step 3: Connect to the electricity
supply
Warning: This appliance must be
earthed.
The flexible mains lead is supplied
connected to a BS 1363 fused plug,
having a fuse of 3 amp capacity.
If this plug does not fit the socket in
your home, it should be replaced with
a suitable plug as outlined below.
The wires in the mains lead are
coloured in accordance with the
following code:
Green and yellow = Earth,
Blue = Neutral,
Brown = Live.
As the colours of the wires in the
mains lead for the appliance may
not correspond with the coloured
markings identifying the terminals in
your plug, proceed as follows:
1. The wire which is coloured green
and yellow must be connected to
the terminal marked E (Earth)
or coloured Green.
2. The wire which is coloured blue
must be connected to the terminal
marked N (Neutral), or coloured
Black.
3. The wire which is coloured brown
must be connected to the terminal
marked L (Live), or coloured Red.
The plug and socket must be
accessible after installation.
Should the mains lead of the
appliance ever require replacing, we
recommend that this is carried out by
a qualified electrician who will
replace it with a lead of the same size
and temperature rating.
Important: - ensure that you route
all mains and electrical cables and
flexible tubing well clear of any
adjacent heat source.
E (Earth)
GREEN / YELLOW
L (Live)
BROWN
N (Neutral)
BLUE


