


Rev.0210
5
SETTING AND JOINING
The sectional construction of these models enable them
to be joined in line to give the effect of one continuous
display. A joint trim kit is supplied with each joint.
LEVELING
IMPORTANT! IT IS IMPERATIVE THAT
CASES BE LEVELED FROM FRONT TO
BACK AND SIDE TO SIDE PRIOR TO JOIN-
ING. A LEVEL CASE IS NECESSARY TO IN-
SURE PROPER OPERATION, WATER
DRAINAGE, GLASS ALIGNMENT, AND OP-
ERATION OF THE HINGES SUPPORTING
THE GLASS. LEVELING THE CASE COR-
RECTLY WILL SOLVE MOST HINGE OPERA-
TION PROBLEMS.
NOTE: A. To avoid removing concrete flooring, begin lineup
leveling from the highest point of the store floor.
B. When wedges are involved in a lineup, set them first.
All cases were leveled and joined prior to shipment to
insure the closest possible fit when cases are joined in the
field. When joining, use a carpenters level and shim legs
accordingly. Case must be raised correctly, under legs
where support is best, to prevent damage to case.
1. Check level of floor where cases are to be set.
Determine the highest point of the floor; cases will
be set off this point.
2. Set first case, and adjust legs over the highest part of
the floor so that case is level. Prevent damage – case
must be raised under leg or by use of 2x6 or 2x4 leg
brace. Remove side and back leg braces after case is
set.
3. Set second case as close as possible to the first case,
and level case to the first using the instructions in
step one.
4. Apply masking tape 1/8" in from end of case on
inside and outside rear mullion on both cases to be
joined.
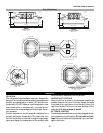
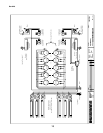
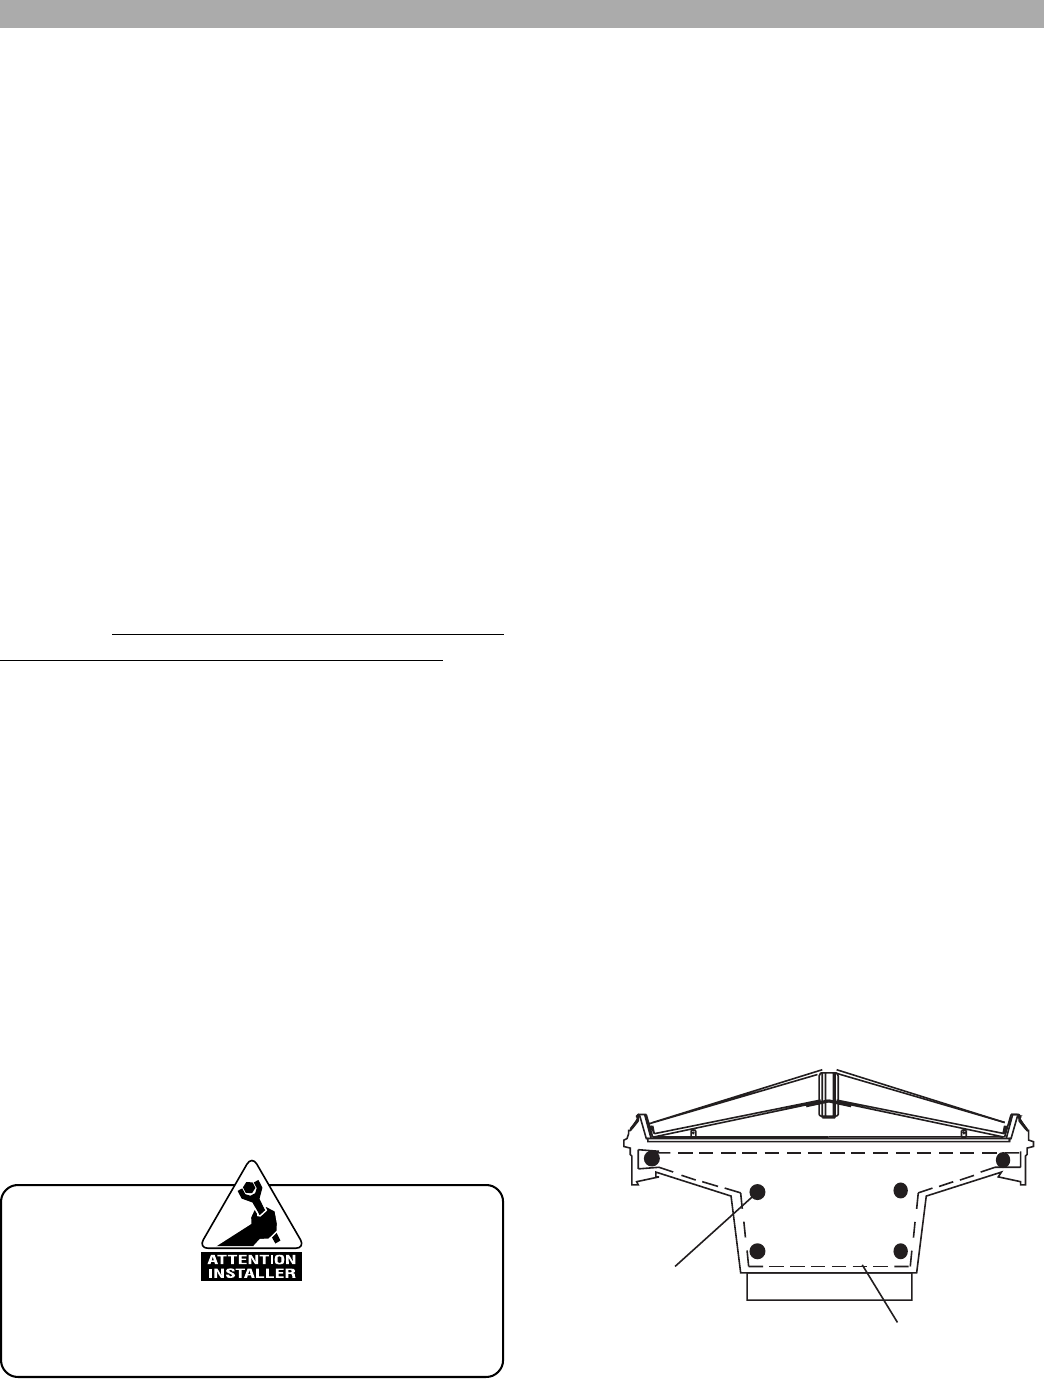
5. Apply liberal bead of case joint sealant (butyl) to
dotted area shown in (Fig.2, #1) of first case. Apply
heavy amount to cover entire shaded area.
DO NOT USE PERMAGUM!
It is the contractor’s responsibility to install
case(s) according to local construction and
health codes.
6. Slide second case up to first case snugly. Then level
second case to the first case so glass front, bumper
and top are flush.
7. Apply bead of silicone to side of either half of case (if
case is built in two pieces). Also apply silicone to
seam between overhead light tubes.
8. Slide second half up to first case snugly. To compress
silicone at joint, use two Jurgenson wood clamps to
pull the inside of the bulkheads together. Make sure
case is level from front to back and side to side at
joint. DO NOT USE BOLTS TO DRAW CASES UP
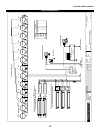
TIGHT! DAMAGE MAY OCCUR!6. Make sure cases
are tight and bolted together in all locations (see
diagram next page). Remove clamps. Cleanup excess
silicone.
9. There may be an interlock system built into the tower,
depending on the height of it. Joining involves a
number of bolts, again dependent on the height.
10.Attach joint trim pieces, that will hide the loose joint
where the case halves come together.
11.Connect case to field electrical, refrigeration, and
pipe to floor sink.
12. Install body covers.
13. Attach cart bumper, if applicable.
SPLASH GUARD
After cases have been leveled and joined, and refrigera-
tion, electrical, and wasted piping work completed, install
the splashguards. Fasten along the top edge, or center, with
#10 X 3/3" sheet metal screws.
DO NOT SEAL JOINT T RIM T O FLOOR!
Installation (cont.)
BOLT LOCATIONS
SEALANT APPLICATION