ColdFusion Icemaker Adapter Kit Installation Instructions
Publication Number: 629096828INS 2 of 4 © 2008-2010, IMI Cornelius Inc.
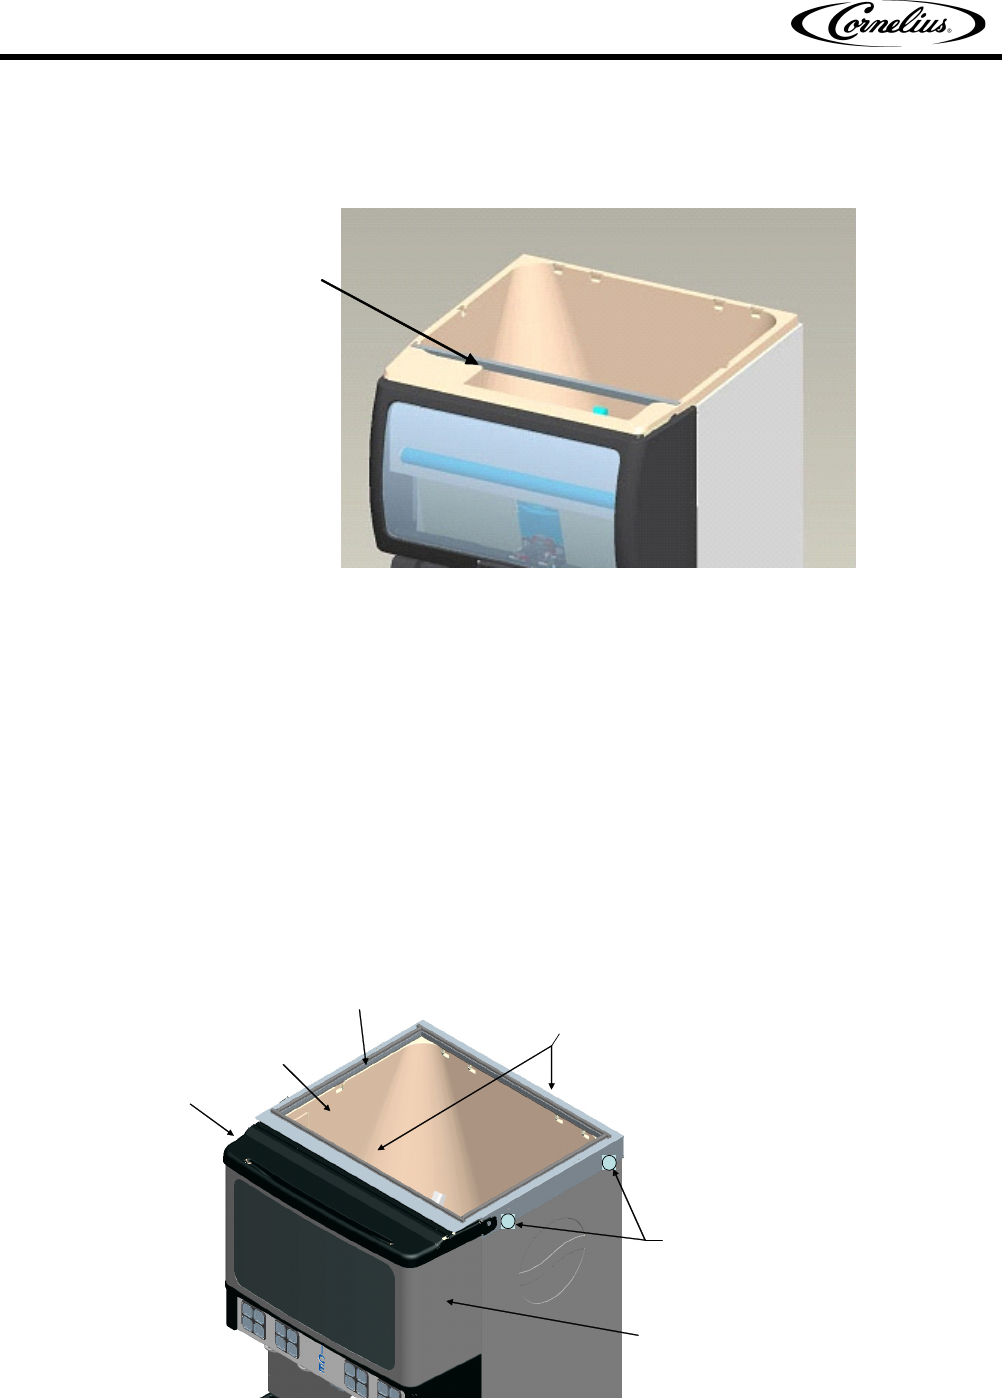
1. First step is to position and secure the kit to the dispensing unit. Whenever possible, this should be done
prior to lifting the dispenser onto the counter to allow sufficient access and also provide easier and faster
installation.
Figure 2
2. Place ice maker support rail into the front set of pockets in the ice bin as shown in Figure 2.
3. Position the adapter kit onto the drink dispenser so that it is pulled as far forward as it can be. The gaskets
on the inside of the kit (that rest on the hopper) must also be compressed as far down as they can go. One
design feature of the kit is to support the weight of the icemaker. The support rails (internal to the kit) resting
on the hopper provide this support. Therefore, compressing the gaskets replicate the weight of the icemaker
and should be done prior to drilling any holes, as mentioned in the next step.
4. Using the four holes in the adapter cover as templates, drill 9/64" (.140" Dia.) holes in the sides of the
dispenser (2 holes per side). USE EXTREME CAUTION NOT TO DRILL INTO ANY OTHER
COMPONENTS. Maximum drill depth from the face of the kit should not exceed 3/8" (just enough to go
through the material being drilled). Remember, the kit should be all the way forward and compressed down
before drilling the holes. Otherwise, undesirable gaps may result (lid to merchandiser) and the internal latch
feature for the lid may not function properly. After holes are drilled, secure the kit to the machine using the
screws provided (refer to Figure 3).
Figure 3
HOLES FOR SECURING
KIT ARE LOCATED ON
THE SIDES (2 PER)
KIT MUST BE POSITIONED ALL THE WAY
FORWARD AND COMPRESSED DOWN
PRIOR TO DRILLING HOLES.
LID
MERCHANDISER
F
O
R
W
A
R
D
DOWN
HOPPER
SUPPORT RAILS
