


Ice Slide for ED/DF200/250 Units Installation Instructions
© 2004, IMI Cornelius Inc. - 1 - Publication Number: 629088508INS
INSTALLATION INSTRUCTIONS
Ice Slide for ED/DF200/250 Units with Icemaker Already Installed
Kit contains – ice slide (stainless steel), ice diverter kit, and instructions
RECOMMENDED TOOLS
• #2 phillips head screw driver
• Long pair of channel-lock or vise-grip style pliers
• 11/32 & 3/8 nut drivers or socket head equivalents
• Small head flat screw driver or equivalent
Other items – should be available at store location upon request
• Step ladder
• Keys to dispenser – use to ‘lock out’ unit
• 5 gallon bucket or equivalent
NOTE: If installation is to be done in the morning hours, the store should be contacted the day
before install and have them shut off icemaker on top of unit before closing for the day. This will
minimize the amount of ice that will have to be removed from hopper to install the ‘ice slide’.
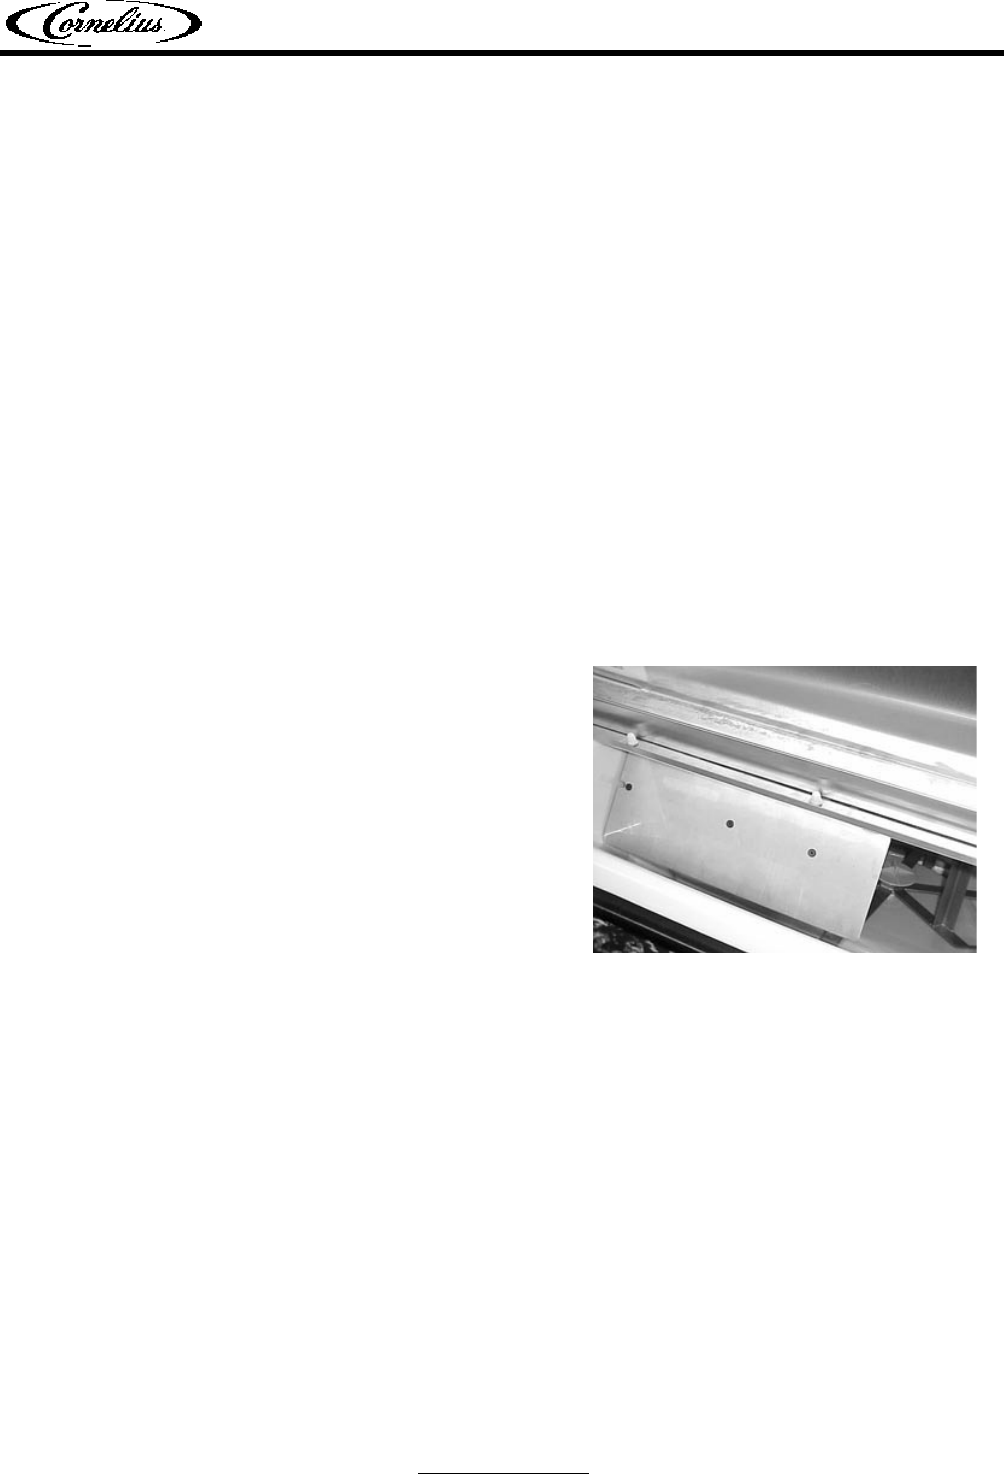
1. Remove manual ice fill lid from Icemaker adapter.
2. Remove ice baffle (see FIGURE 1) from icemaker
adapter using 11/32 nut driver.
3. Dispense ice out of hopper into bucket via ice
chute to empty hopper of ice.
4. Using bucket – fill with ‘warm’ water and melt
remaining ice in hopper area; Note: this water will
also melt ice existing on the cold plate.
FIGURE 1. Ice Baffle
CAUTION: Unit should be unplugged at this time to ensure ‘off cycle’ agitation does not occur
while accessing interior hopper area to remove agitator.
Release Date: November 16, 2004 www.cornelius.com Revision: A