


Ice Slide for ED/DF200/250 Units Installation Instructions
© 2004, IMI Cornelius Inc. - 3 - Publication Number: 629088508INS
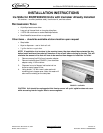
7. Reinstall agitator to motor shaft and secure with retainer (see FIGURE 6) removed during step 5.
8. Manually rotate agitator within hopper area to check for any interference between agitator arms and
‘ice slide’. If agitator arm(s) hit ‘ice slide’ – gently bend agitator arm(s) up to eliminate interference.
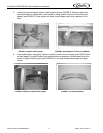
FIGURE 6. Agitator with Ice Slide Installed FIGURE 7. Timer Board Settings Reset
9. Remove merchandiser and gain access to electrical box by removing 2 screws above light bulb and
main screw located at top of white reflector panel. Locate timer board and reset Agitation timer
settings to 2 seconds ‘ON’ and 3 hours ‘OFF’ (see FIGURE 7).
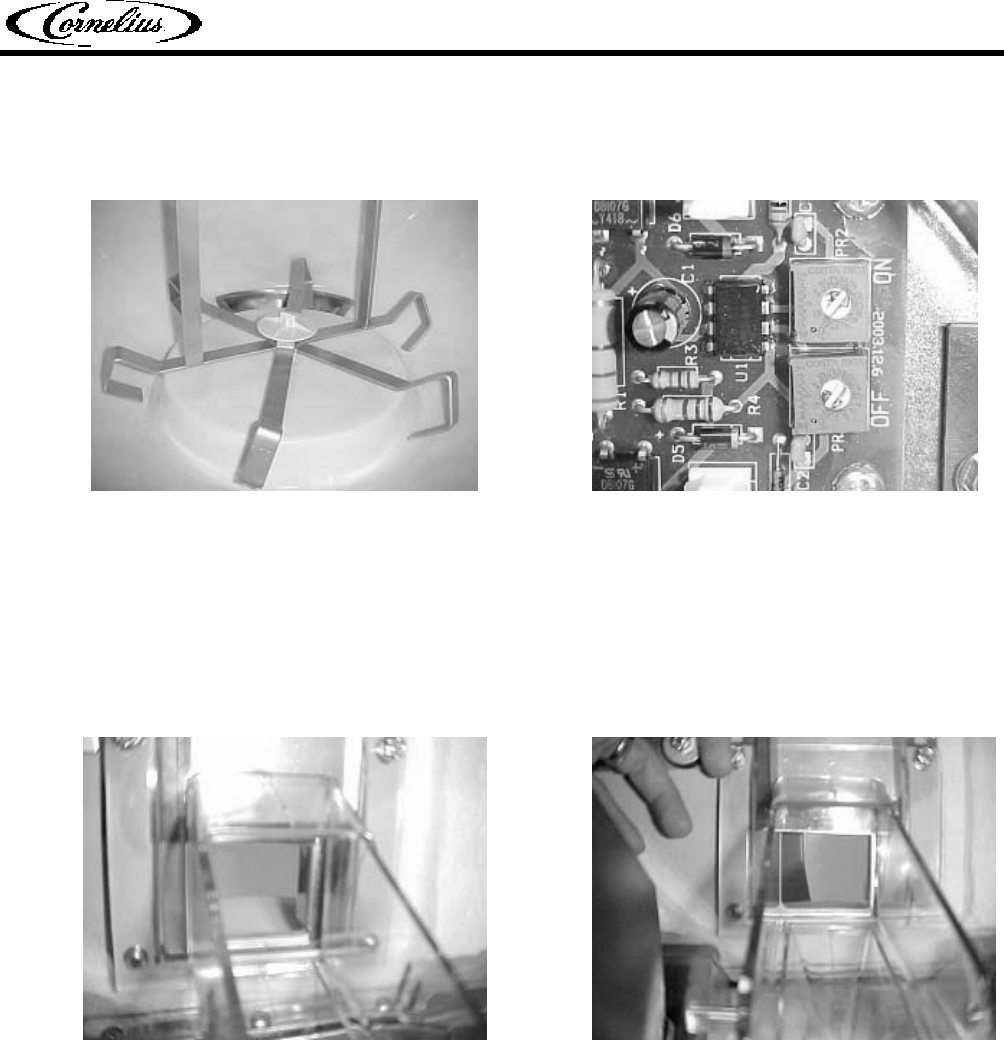
10. Check ice chute for installation of ‘ice diverter’ (see FIGURE 8). Install ice diverter if not already
installed per instructions with ice diverter kit. Note that ‘gate restrictor’ may be left installed behind
ice chute (between ice diverter and gate slide), but ice chute opening should be set at least 1 ½”
(see FIGURE 9) if gate restrictor is left installed.
FIGURE 8. Ice Diverter (Metal Plate with Flange) Installed FIGURE 9. Gate Restrictor Set at 1 1/2” Opening
NOTE: Upper ice chute removed in FIGURE 8 and FIGURE 9 to clearly show installed
components.
11. Reconnect power to unit and double-check for interference between agitator arms and ‘ice-slide’.
Be sure that key switch remains in ‘OFF’ position.
12. Reinstall ice baffle to icemaker adapter and manual fill lid. Turn on ice machine and turn key switch
on dispenser to ‘ON’ position.
It is recommended that a minimal of 45 minutes elapse after turning on ice machine before
dispensing ice or product. This will ensure that sufficient ice has filled hopper and cold plate
areas.
Unit should now be ready to dispense ice and product for customer use.