


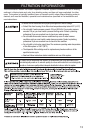
Electric Shock Hazard: To prevent electrical shock, disconnect power before
servicing unit. Use only a properly grounded and polarized electric outlet.
CARE AND USE
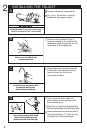
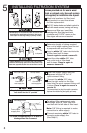
Scalding Hazard: Do not allow
water to boil. May result in
severe burns.
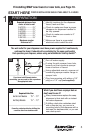
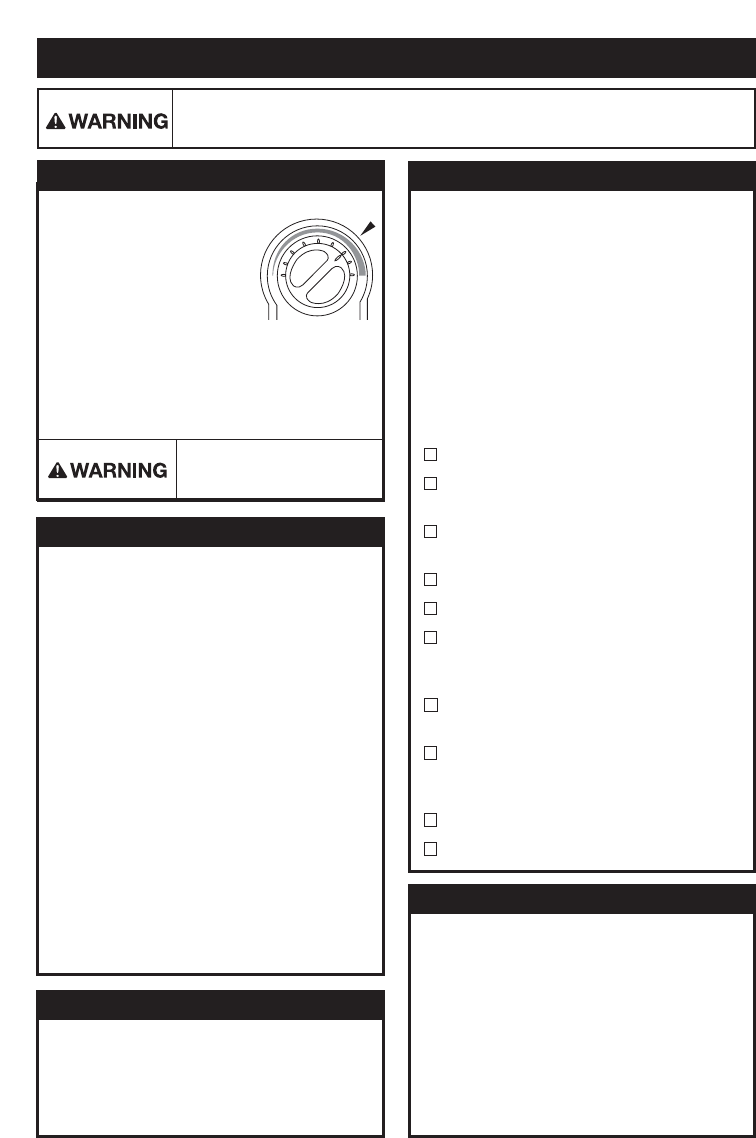
Factory temperature pre-set is
200˚F. To reset the thermostat
to 200°,turn the indicator two
notches to the right of vertical.
■■ Adjust the thermostat
slowly, turning the dial
clockwise to increase
temperature or counter clockwise to decrease
temperature, then activate faucet handle for
20 seconds to bring in fresh water to be
heated at the new setting. Allow 5-7 minutes
for water to reach new temperature.
ADJUSTING THE THERMOSTAT
■■
Only use mild cleaners to clean the faucet
and plastic components.
■■
Cleaners with acids, abrasives, alkaline or
organic solvents will result in deterioration of
the plastic components and void the warranty.
CLEANING THE FAUCET AND TANK
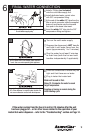
Replace filter cartridge when there is an obvious
decrease in water flow to the faucet or if there is an
objectionable taste or odor to the water.
When the inlet and outlet ports have been closed
and the filter’s internal pressure has been relieved,
water (about 2 oz) will discharge from vent line.
If the new filter cartridge cannot be inserted,
insert the old one and turn until it stops, remove it
and then retry the new cartridge.
Carbon filters should be replaced within 12 months.
FILTER GUIDE AND REPLACEMENT
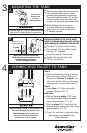
Filter replacement instructions:
Replace with an InSinkErator
®
filter.
Place pan or dish towel under the filter to
catch water drainage during change.
Slowly turn the cartridge counter-clockwise
completely until it stops (1/4 turn).
Pull cartridge straight down and discard.
Insert new cartridge into filter head.
Top surface of cartridge will become flush
with the bottom of the filter head when
fully engaged.
Turn the cartridge clockwise until it stops
(1/4 turn).
Align the in/out arrow on the head and
bracket assembly to the in/out arrow on
the cartridge.
Open faucet to expel trapped air.
Run water for 3 minutes before usage.
■■
Regularly inspect the unit for any signs of
leakage. If there are signs of water damage,
immediately remove the unit from service.
■■
To avoid water damage from leakage,
replace all cut, loose or split tubing.
■■
A drain pan, plumbed to an appropriate
drain or outfitted with a leak detector,
should be used in those applications where
any leakage could cause property damage.
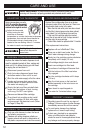
PROPERTY DAMAGE
Anytime the instant hot water dispenser is not
used for extended periods of time, unplug and
drain unit. If it is below freezing you will need
to unplug the unit and drain it.
■■
Disconnect power from unit.
■■
Push hot water dispenser faucet lever
and allow water to flow until it is cool.
■■
Shut the cold water supply off at the valve.
■■
Locate and remove drain screw from
bottom center of water tank and drain
the water into empty pail.
■■
Empty the tank and then reinstall drain
screw into the bottom of tank, turning
until snug. Do NOT over tighten.
■■
Remove and discard filter cartridge.
■■
To put back into working order, install
new filter cartridge, fill tank with water
and reconnect the electrical cord. (Refer
to Page 9, Step 6B)
SEASONAL STORAGE/DRAINAGE
12
approx. 200°