


T-fitting
1/4" Diameter
Tube
Cold Water
Supply Line
Mounting
Nut
Rubber
Gasket
Wing
Nut
Spout
Rubber
Seal
Mounting
Nut
Rubber
Gasket
Wing
Nut
Spout
Rubber
Seal
T-fitting
1/4" Diameter
Tube
Cold Water
Supply Line
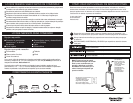
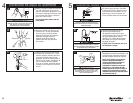
6
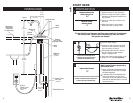
Compression valve or T-fitting option
(not supplied):
■■
Ensure that a shutoff valve is installed
on the cold water supply line. If so, a
T-fitting or compression valve can be
used to connect the dispenser.
■■
Connect the 16" (40.6 cm) long, 1/4"
diameter copper tube on the
dispenser to the T-fitting as shown
(see step 4).
3
WATER CONNECTION OPTIONS
Attach the valve to a
cold water supply line
.
Shutoff valve option (not supplied):
■■
The water connection can be made
using a shutoff valve. This is a more
complex installation and should only
be attempted by an experienced
installer with the proper knowledge
and tools.
Saddle valve option (not supplied):
■■
Follow the directions for
“self-piercing attachment”
included with the valve.
■■
Connect the 16" (40.6 cm) long, 1/4"
diameter copper tube on the dispenser
to the saddle valve as shown (see step 4).
■■
Open the valve and let a small amount
of water run through it into a pan.
This will flush the line of sediment.
■■
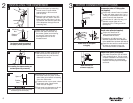
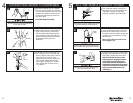
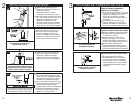
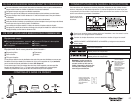
2
■■
Remove the spout by loosening
the set screw in spout holder
approximately 2 full turns and
pull out spout.
■■
Mount the unit through the 1 3/8"
diameter (35 mm) hole in the sink.
Make sure the valve lever is in the
up position and feed the spout end
of the dispenser through the sink
mounting hole.
A
C
INSTALLING THE DISPENSER
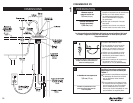
■■
While holding the dispenser in
place with spout removed, slip
the rubber gasket and mounting
nut over the valve lever and
hand tighten the nut on the
threaded barrel.
✢
■■
Align spout so water runs into the
sink and secure the dispenser by
tightening the wing nut from the
underside of the sink.
B
Personal Injury: Failure to tighten set screw allows easy
removal of spout. Operation of unit with spout removed
could cause injury from hot water spray.
Mounting
Nut
Rubber
Gasket
Wing
Nut
Spout
Rubber
Seal
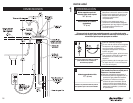
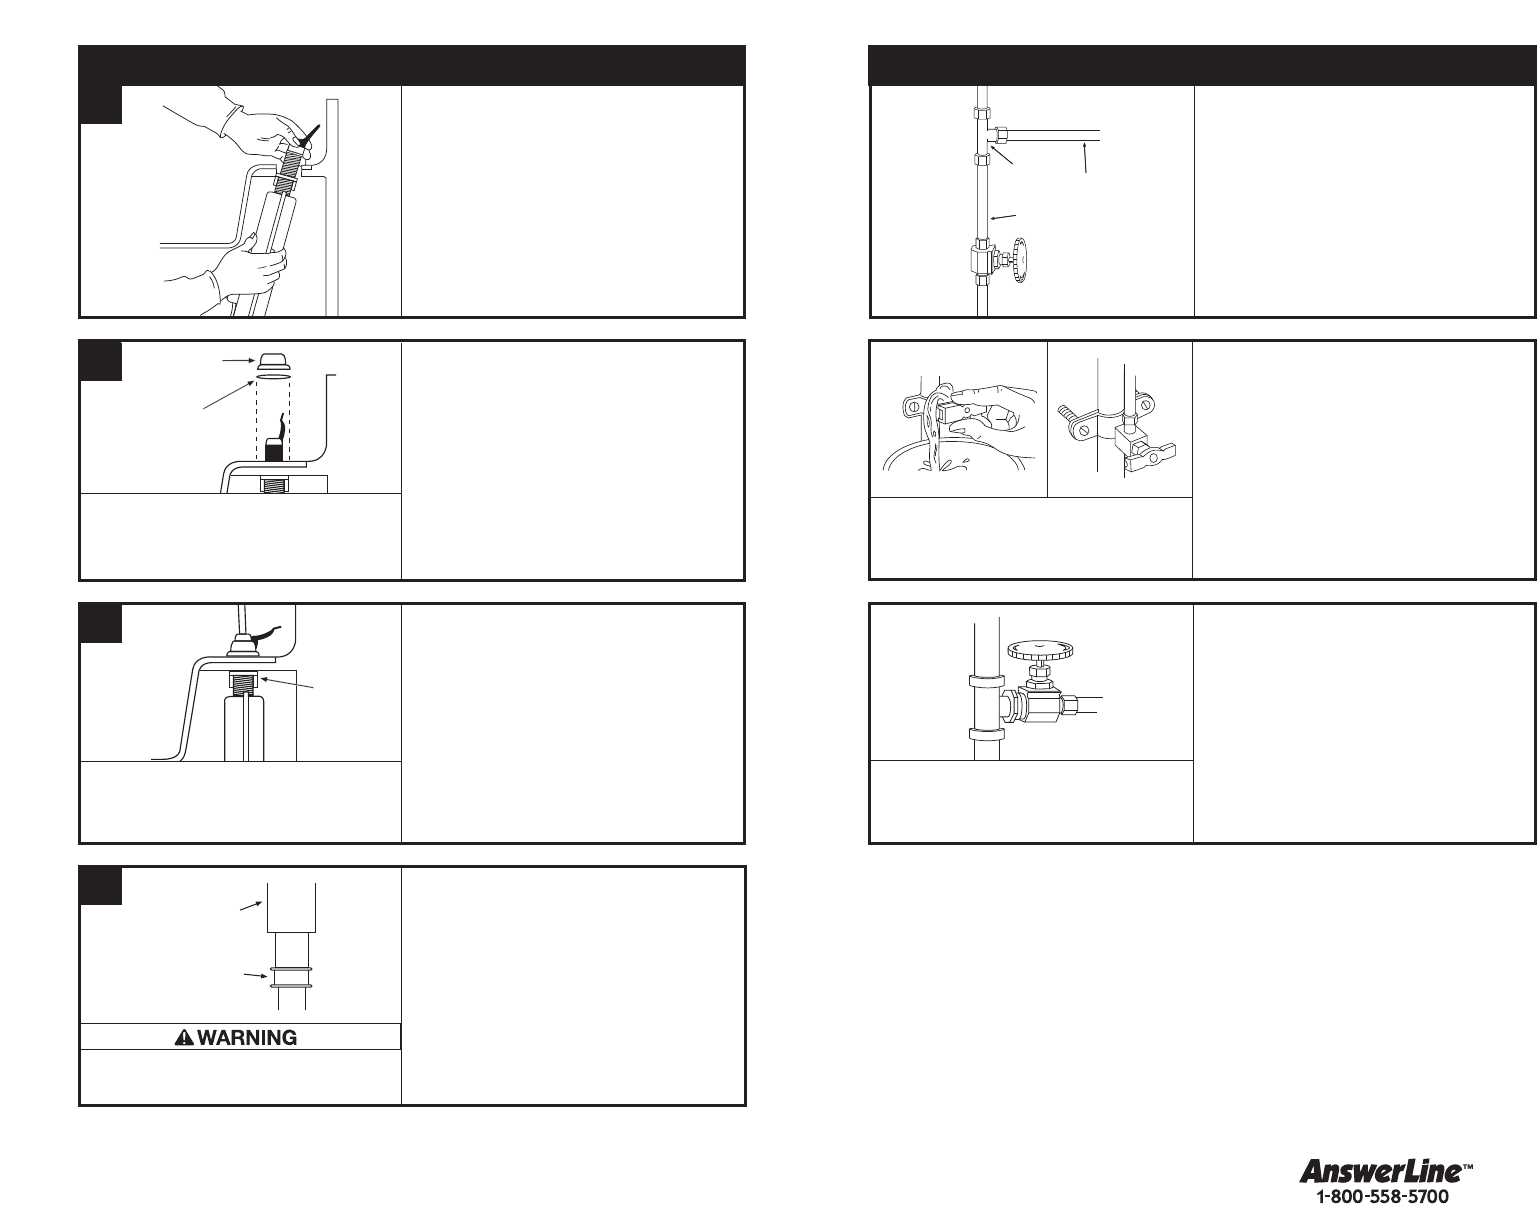
7
D
■■
Reassemble the spout ensuring
the rubber seal is in place on inner
spout tube grove before re-inserting
spout into tank outlet.
■■
If rubber seal is not on spout, check
inside tank outlet. Remove and
install seal per diagram.
■■
Push spout into dispenser as far as
it will go and tighten set screw.
Mounting
Nut
Rubber
Gasket
Wing
Nut
Spout
Rubber
Seal
Saddle valves are susceptible
to clogging
.
The dispenser must be mounted in
the upright (vertical) position only.
T-fitting
1/4" Diameter
Tube
Cold Water
Supply Line
Ferrule
Nut
Spout and spout holder should not be loose
after mounting. First tighten mounting nut
and then tighten wing nut securely.