


Transfer Bench 2 Part No 1075940
ƽ SPECIFIC WARNINGS (CONTINUED)
Most tub floors are higher than the bathroom floor. Before using, ensure that
the two (2) legs of the transfer bench inside the tub are adjusted to the same
height and the two (2) legs outside the tub are adjusted to the same height,
so as to achieve an even height adjustment. DO NOT use if wobbly or
unstable.
After ANY adjustments, repair or service and BEFORE use, make sure all attaching
hardware is securely tightened - otherwise injury or damage may result.
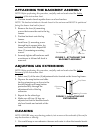
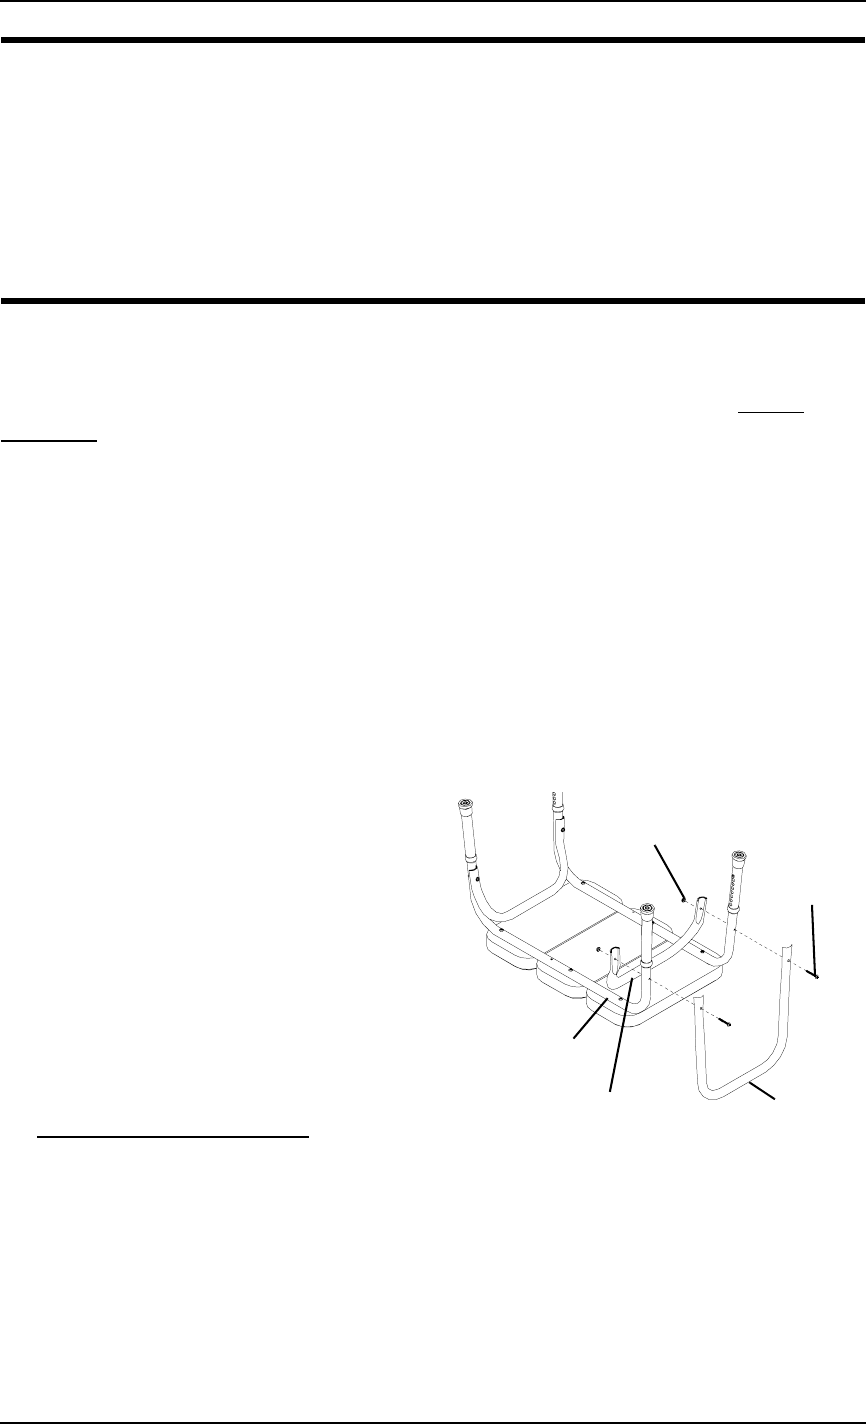
INSTALLING THE SEAT ARM
NOTE: Before performing this procedure, carefully read and understand the Safety
Summary of this instruction sheet.
NOTE: The end rail is already installed on the transfer bench and must be removed when
installing the seat arm.
1. Remove the two (2) LONGER mounting screws and locknuts that secure the leg
frame to the end rail.
NOTE: The LONGER mounting screws are the ones that have more exposed threads
beyond the lock nut.
2. Position the seat arm on the side of the transfer bench where backrest is
attached.
3. Install one (1) LONGER mounting screw through seat arm and leg frame.
4. Secure seat arm to the leg frame
with the locknut.
NOTE: Locknut located on inside or end
rail side of product.
5. Repeat STEPS 3 AND 4 for opposite
side.
6. Securely tighten all hardware until
a resistance is felt and all slack is
removed.
7. Adjust leg extensions. Refer to
Adjusting Leg Extensions on
page 3.
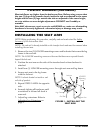
FIGURE 1 - INSTALLING THE
SEAT ARM
Leg Frame
End Rail
Seat Arm
LONGER
Mounting
Screw
Locknut