11
4. Use UL listed wire connectors and connect white wires (A)
together.
5. Connect green (or bare) ground wire from home power supply
to the green/yellow ground wire (D) in terminal box using UL
listed wire connectors.
6. Install terminal box cover.
7. Check that all light bulbs are secure in their sockets.
8. Reconnect power.
Complete Installation and Check
Operation
1. Install grease filters. See the “Range Hood Care” section.
2. Install heat lamps into heat lamp sockets.
3. Check operation of the range hood blower and lights. See the
“Range Hood Use” section.
4. If range hood does not operate, check to see whether a
circuit breaker has tripped or a household fuse has blown.
Disconnect power supply and check that the wiring is
correct.
NOTE: To get the most efficient use from your new range hood,
read the “Range Hood Use” section.
RANGE HOOD USE
The range hood is designed to remove smoke, cooking vapors and
odors from the cooktop area. For best results, start the hood
before cooking and allow it to operate several minutes after the
cooking is complete to clear all smoke and odors from the kitchen.
The hood controls are located on the right-hand underside of the
range hood.
Range Hood Controls
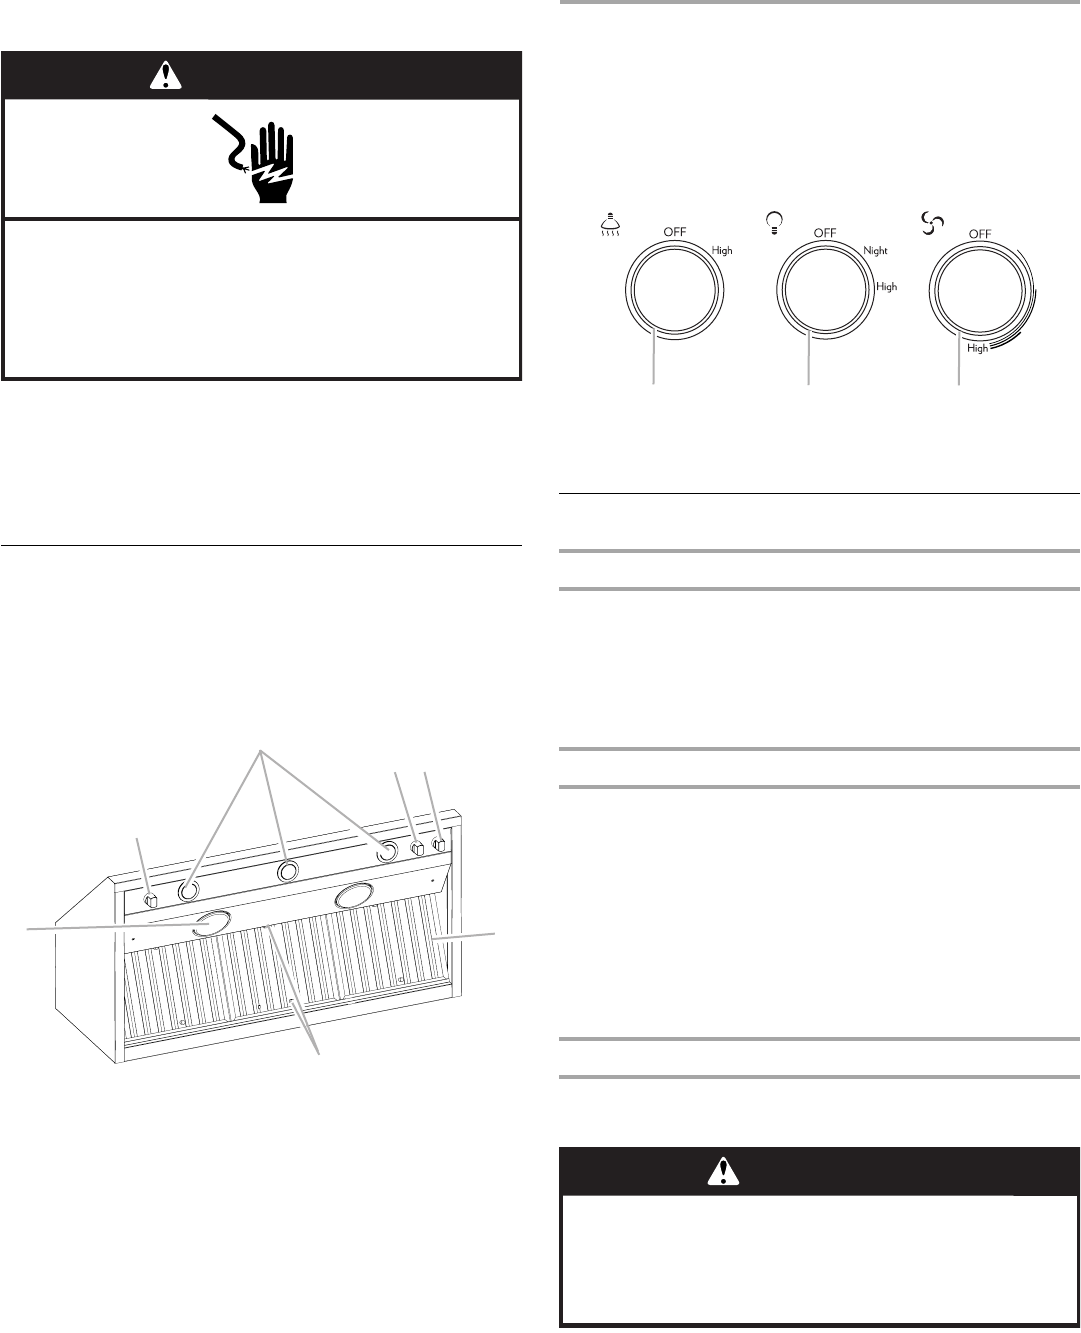
Operating the lights
1. Turn the light switch to the “Night” position to use the range
hood lights as a night light.
2. Turn the light switch to the “High” position to turn the range
hood lights On.
3. Turn the light switch to the “Off” position to turn the range
hood lights Off.
Operating the blower
1. Turn the blower switch to the first position to turn the range
hood on Low.
2. Turn the blower switch to the second position to turn the
range hood on Medium.
3. Turn the blower switch to the third position to turn the range
hood on Medium - High.
4. Turn the blower switch to the High position to turn the range
hood on High.
5. Turn the blower switch to the “Off” position to turn the range
hood blower Off.
Operating the heat lamp
NOTE: Heat lamp bulbs should be rated to a maximum of
175 watts each.
1. Turn the heat lamp switch to the “High” position to turn the
heat lamps On.
2. Turn the heat lamp switch to the “Off” position to turn the
heat lamps Off.
A. Infrared lamp
B. Grease filter handles
C. Grease filter
D. Blower control switch
E. Halogen light switch
F. Halogen lights
G. Infrared lamp controls
WARNING
Electrical Shock Hazard
Electrically ground blower.
Connect ground wire to green and yellow ground wire
in terminal box.
Failure to do so can result in death or electrical shock.
A
B
D
E
F
G
A. Infrared lamp switch
B. Halogen light switch
C. Blower control switch
A
B
C
WARNING
Food Poisoning Hazard
Do not let food sit for more than one hour before or
after cooking.
Doing so can result in food poisoning or sickness.


