


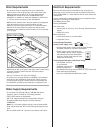

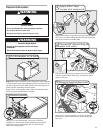
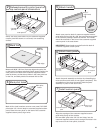

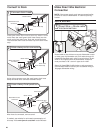
Built-up floors (Kitchen floor height is higher than
cabinet opening.) Example: Kitchen floor tile does not
extend into cabinet opening. Add shims as needed in the
area shown to bring the dishwasher up to 34” (86.4 cm)
below the countertop.
NOTE: Shims must be securely attached to floor to avoid
movement when the dishwasher is in use.
2-3/4”
(7
cm)
4”
(10.1 cm
)
2”
(5 cm
)
Built-up Floors—Add
shims as needed
3
14
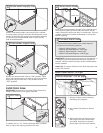
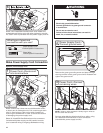
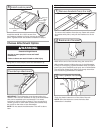
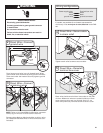
IMPORTANT: Do not scratch the front panel during this
procedure.
Remove the door handle and hardware bag containing
the setscrews and Allen wrench from the cardboard box.
Setscrews are already installed in the handle. Place
handle on mounting studs with the setscrews facing
down. Push the door handle tightly against the door.
Insert the short end of the Allen wrench into the
setscrews. Tighten the setscrews 1/4 turn past snug.
Retain Allen wrench with Installation Instructions.
Install door handle
Mounting stud
Handle
Setscrew
(in bottom
of handle)
Allen wrench
Mounting
stud
Handle
Setscrew
(in bottom
of handle)
Allen wrench
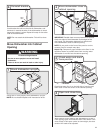
Install the Door Handle
(on some models)
(Model JDB3600AWX)
NOTE: The handle for the custom panel is not included.
IMPORTANT: If the handle is attached from the back of
the custom panel, the screw holes should be countersunk
for the screws heads to be flush with the panel. If the
handle is attached to the front of the custom panel, the
screw lengths cannot exceed the panel thickness. For
more information on Jenn-Air custom handle selection,
refer to the Jenn-Air Catalog, visit www.jenn-air.com, or
call 1-800-688-1100.
NOTE: A customer-supplied full front panel must weigh
no more than 16 lbs (7.3 kg) and must be made to
specific dimensions. It is recommended that a
cabinetmaker cut the custom panel because of the
precise dimensions needed.
NOTE: All mounting hardware supplied is for a 3/4"
(19.1 mm) thick wood panel. If a thinner wood panel, or
materials other than wood are used, it is the customer’s
responsibility to obtain the proper length screws and
adjust the pilot holes accordingly.
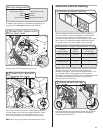
IMPORTANT: Use a moisture-resistant sealer on both
sides and all edges of the panel to avoid damage from
humidity.
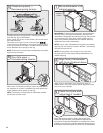
With a TORX
®
screwdriver, remove three screws from both
sides, as shown; hold the outer panel up while removing
the screws. Save screws for reinstallation.
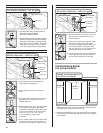
Custom panel installation -
Dishwashers with control
panel on the top
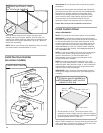
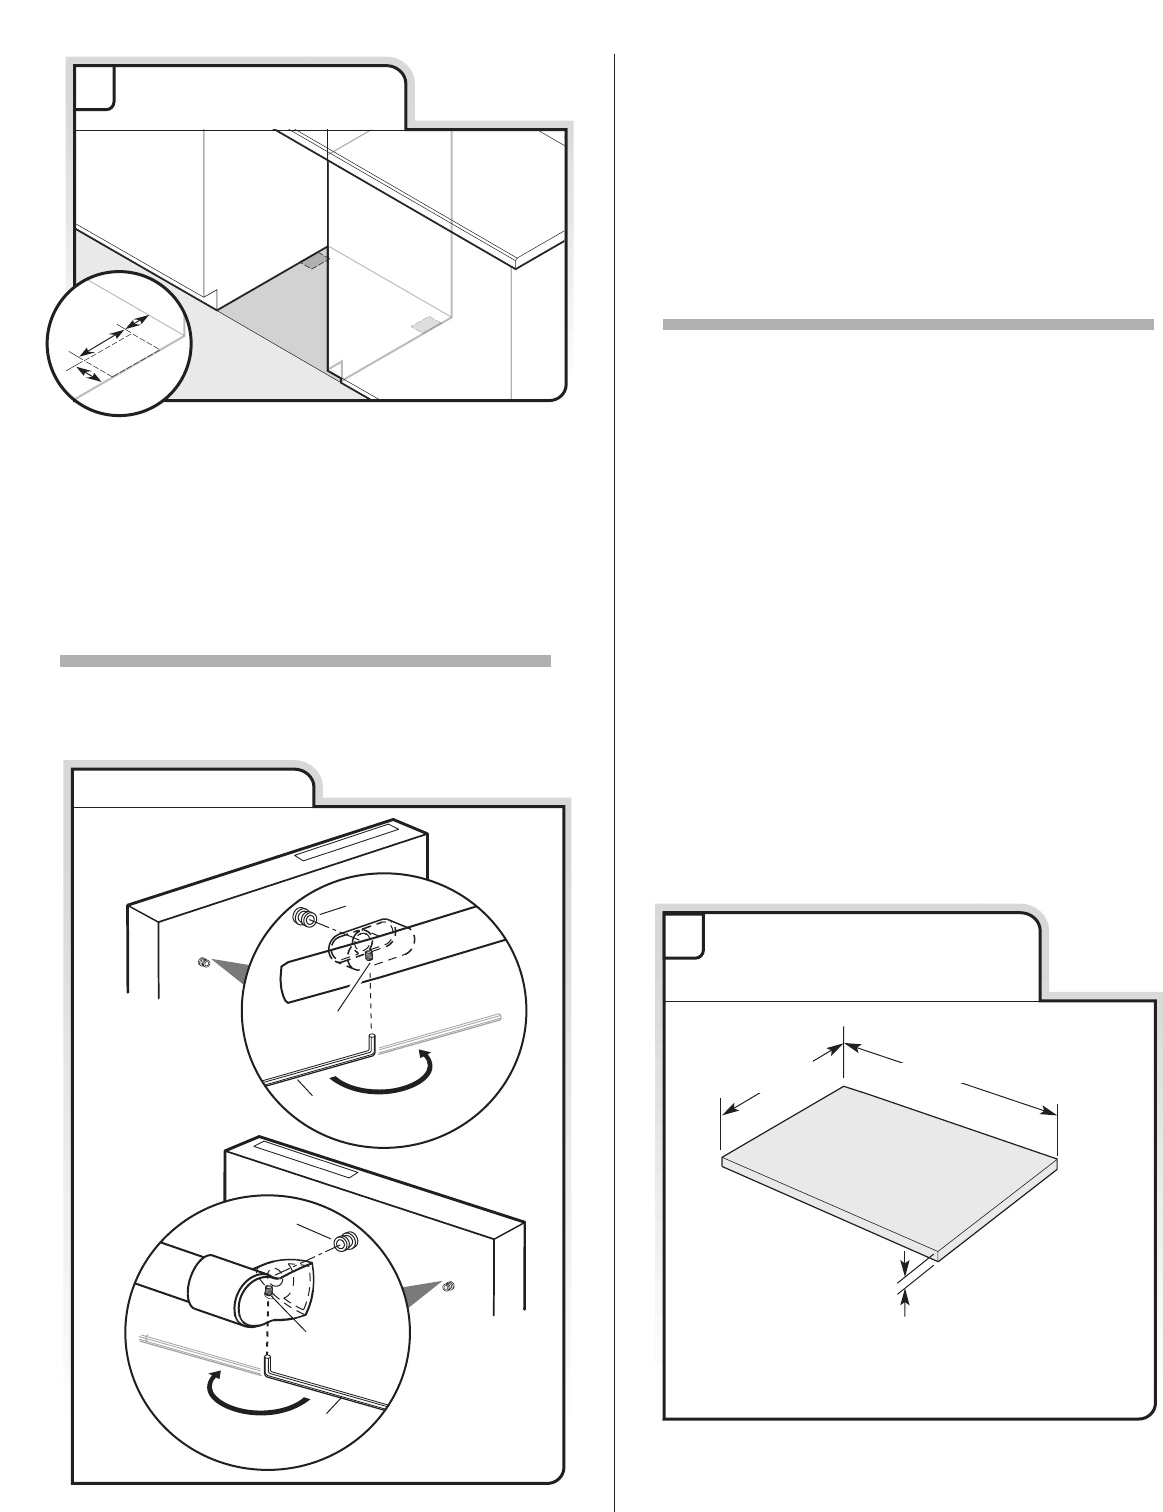
This dimension is for 4” (10.2 cm) toe kick. If the
installation needs a higher toe kick, adjust the height
of the wood panel accordingly. Not recommended for
toe kicks greater than 6” (15.2 cm).
*
1
23 1/2”
(59.7 cm)
*30 3/16” (76.7 cm)
3/4” (19.1 mm)
Install Custom Panel