


19
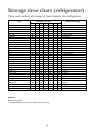
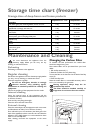
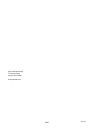
Storage time chart (freezer)
Storage time of deep-frozen and frozen products
Maintenance and Cleaning
Defrosting
Defrosting is automatic in this appliance.
Regular cleaning
Disconnect the appliance from the electricity supply, before
you carry out any cleaning or maintenance work.
Clean the equipment regularly.
Do not use detergents, abrasive or strongly
odorous cleaners, waxy polishing agents,
disinfectants or alcoholic products for cleaning the
equipment.
Pull out the wall plug of the equipment from the outlet.
Internal cleaning
Clean the internal parts of the equipment and the
accessories with warm water and Bicarbonate of Soda (5 ml
to 0.5 litre of water).
Rinse and dry everything thoroughly.
Clean the door seal with clean water.
External cleaning
Clean the external parts of the equipment with warm water
and Bicarbonate of Soda (5 ml to 0.5 litre of water).
Dust will build up on the condenser (the black grill at the
back of the appliance) and the reservoir; this can inhibit the
efficiency of the fridge freezer. It is recommended to clean
both on a six monthly basis.
After cleaning, reconnect the equipment to the mains
supply.
You must disconnect the appliance from the
electricity supply, before you can carry out any
cleaning or maintenance work.
Foods In the fresh food In the **** frozen food
compartment +2 - +7°C compartment -18°C
Vegetables:
green beans, green peas, mixed vegetables, marrow, corn, etc. 1 day 12 months
Ready-cooked foods:
vegetable dish, trimmings, with meat, etc. 1 day 12 months
Ready-cooked foods:
sirloin steaks, 1 day 6 months
Foods from potatoes, pasta:
mashed potato, gnocchi, dumplings, filled pasta 1 day 12 months
Soups:
vegetable soup 1 day 6 months
Fruits:
cherries 1 day 12 months
Meat:
chicken, duck, goose 1 day 5 months
fillets, tuna fish 1 day 6 months
Ice-cream 1 day 3 weeks
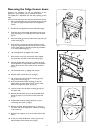
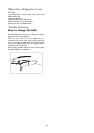
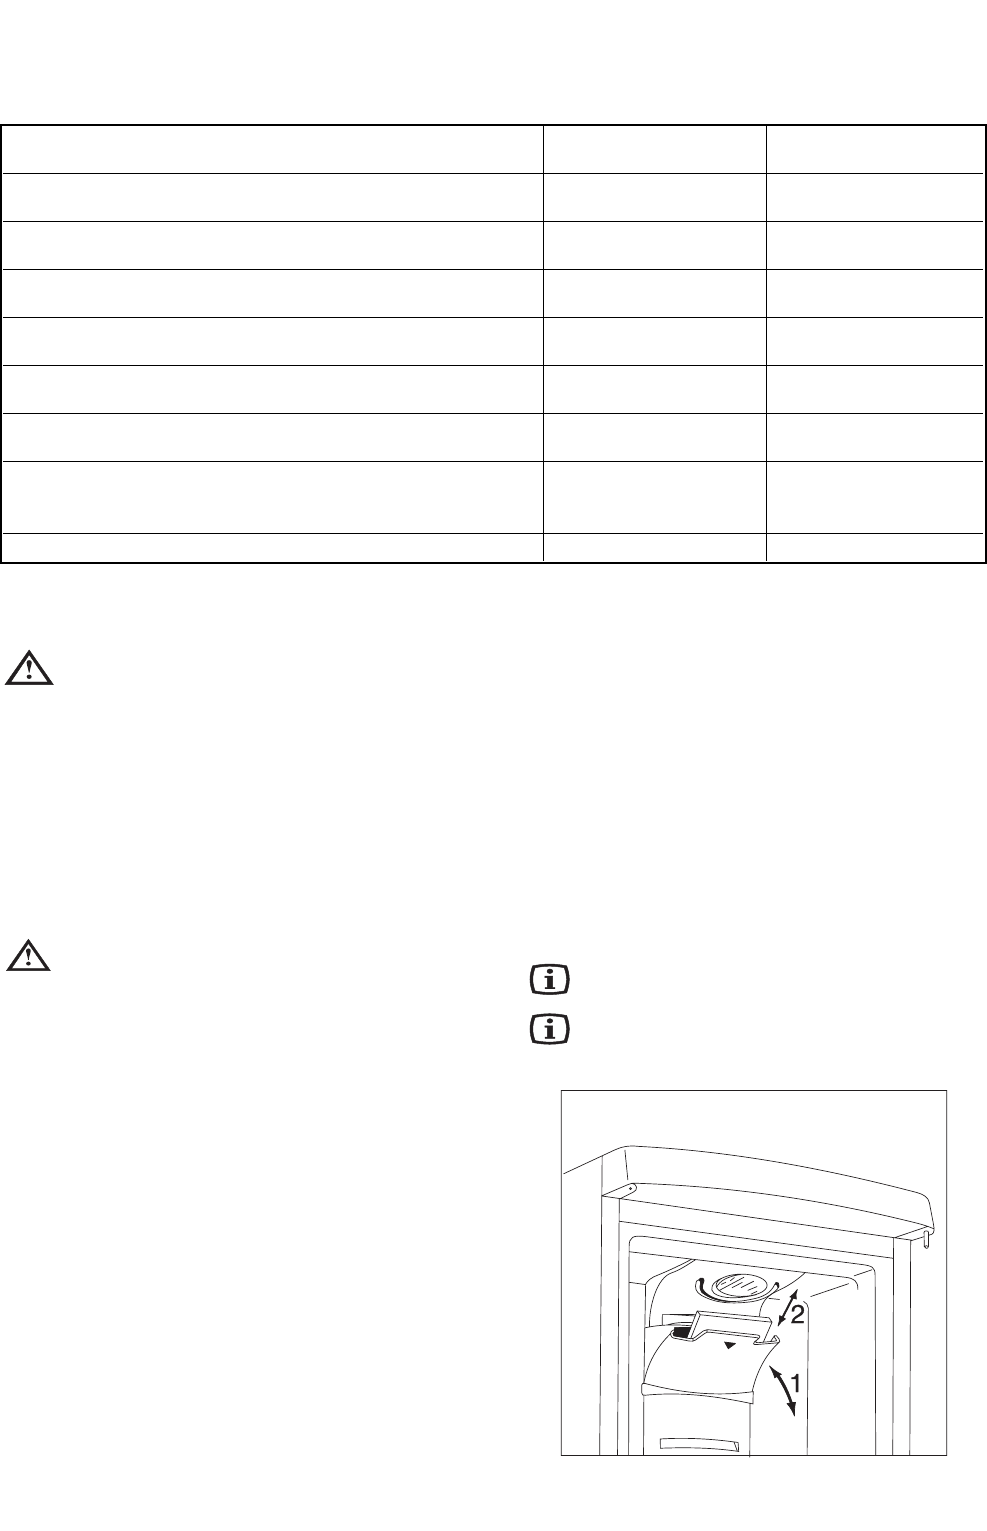
Changing the Carbon Filter
To maintain the best performance the carbon filter
should be changed every year.
New carbon filters can be purchased from your local
dealer.
1. Pull the flap outwards. (1)
2. Remove the filter from the plastic bag.
3. Insert the filter in the slot found in the back of the flap
cover (2).
4. Close the flap cover.
Note: the carbon filter is a consumable accessory and as
such is not covered by the guarantee.
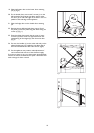
During operation, always keep the air
ventilation flap closed.
The filter should be handled carefully so
fragments do not loosen from the surface.