


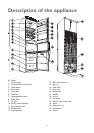


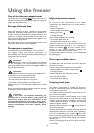
9
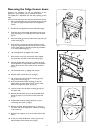
Should it be necessary, to suit the placement of the
appliance in your kitchen, you can reverse the doors.
The appliances is delivered with the door opening to the
right.
Carry out the steps as per the pictures and the instructions.
1. We recommend that you have another person to help
you who can safely hold the doors of the appliance
secure.
2. Disconnect the appliance from the electrical supply.
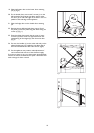
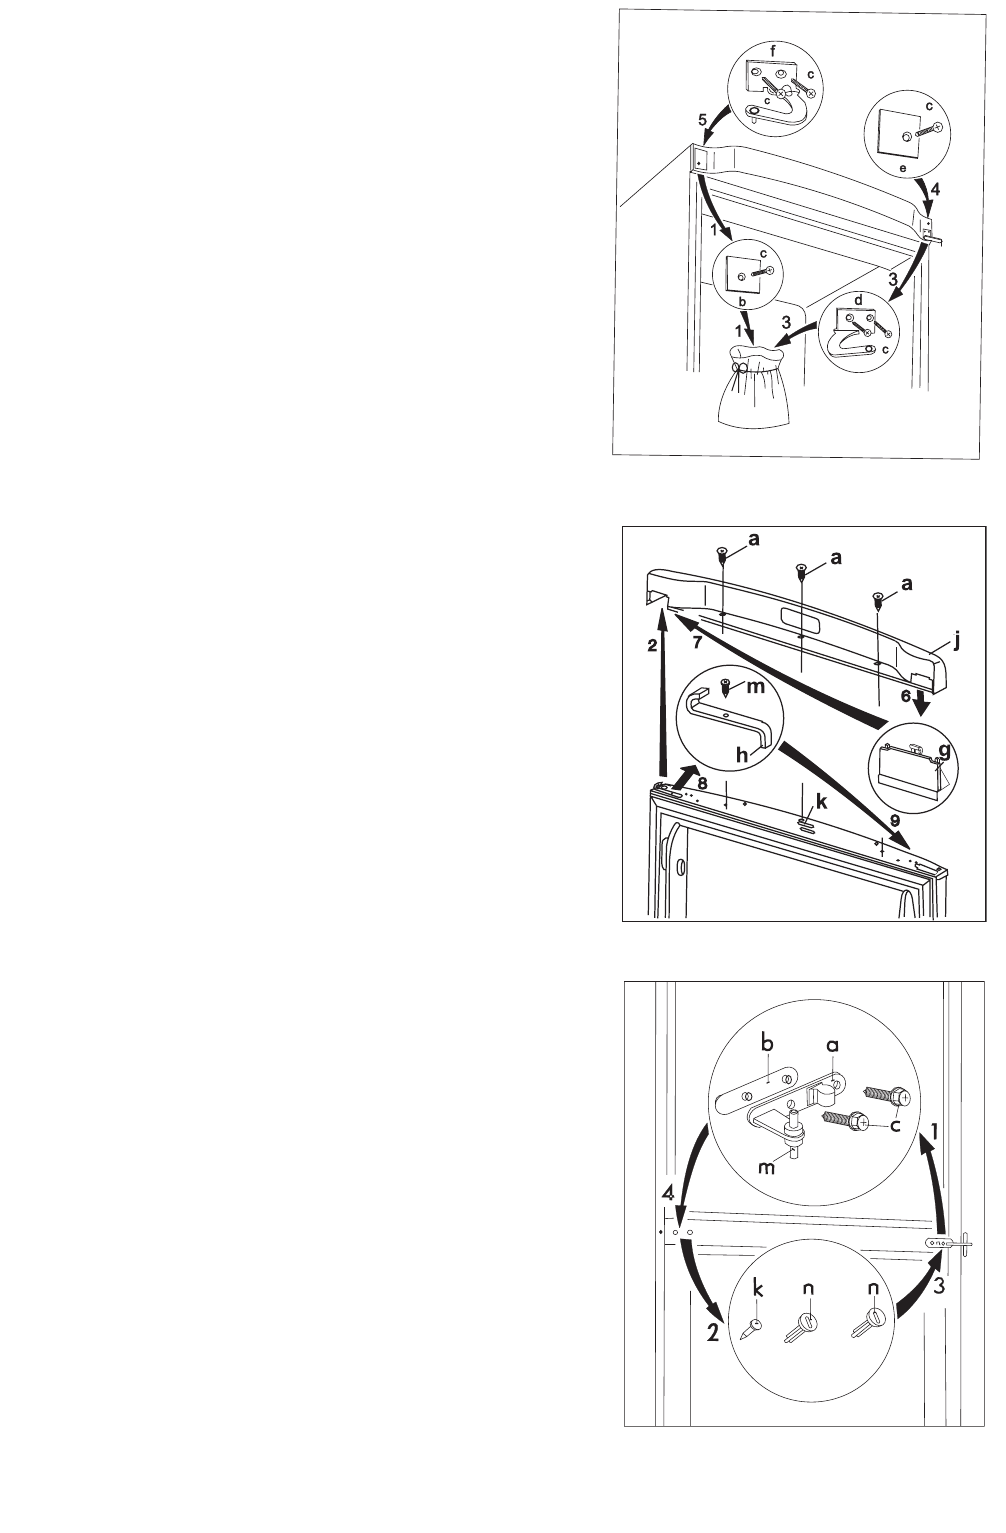
3. Open the door of the fridge, dismantle the top cover
(j) by removing the 2 screws (a), then close the door
(Fig. 2).
4. Move the panel (g) from one side of the top cover (2)
to the other (Fig. 2).
5. Unscrew the 2 screws (c), remove the door mount
at the top right-hand side (d), and unscrew the screw
on the other side (c), remove the panel (b) and place
in an empty plastic bag (Fig. 1).
6. Lift the fridge door up slightly and remove.
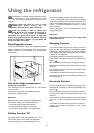
7. Unscrew the screw (m), remove the door stopper
(h) and attach reversed on the other side (Fig. 2).
8. Remove double door mount (a, b, c) from the body
of the appliance in steps. Please make sure the plastic
spacer (b) under the door mount is also removed
(Fig. 3).
9. Lift the freezer door up slightly and remove.
10. Remove stops in both doors (t, z) (Fig. 5).
11. Lift out the insert for the lower covering grid (e)
using a screw driver (Fig. 4).
12. Unscrew the bottom door retaining pin for the
freezer door (h, f) and then screw in on the other
side. Don't forget the spacer (h) (Fig. 4).
13. Insert the insert for the lower covering grid (e) on
the other side.
14. Remove the left-hand cover pin of the double door
mount (3 pieces, n, k) and move to the other side
(Fig. 3).
15. Disassemble the door locking elements (u, v) by
unscrewing the screw (s) (Fig. 5).
16. Reverse the door locking elements (u, v), move to
the other side of the other door and fix by screwing
in the screw (s).
17. Re-insert the stoppers (t, z) on the other side of the
doors.
18. Fit the pin of the double door mount (m) into the
left-hand hole of the freezer door (Fig. 3).
fig. 3.
Reversing the fridge freezer doors
fig . 2.
fig. 1.