


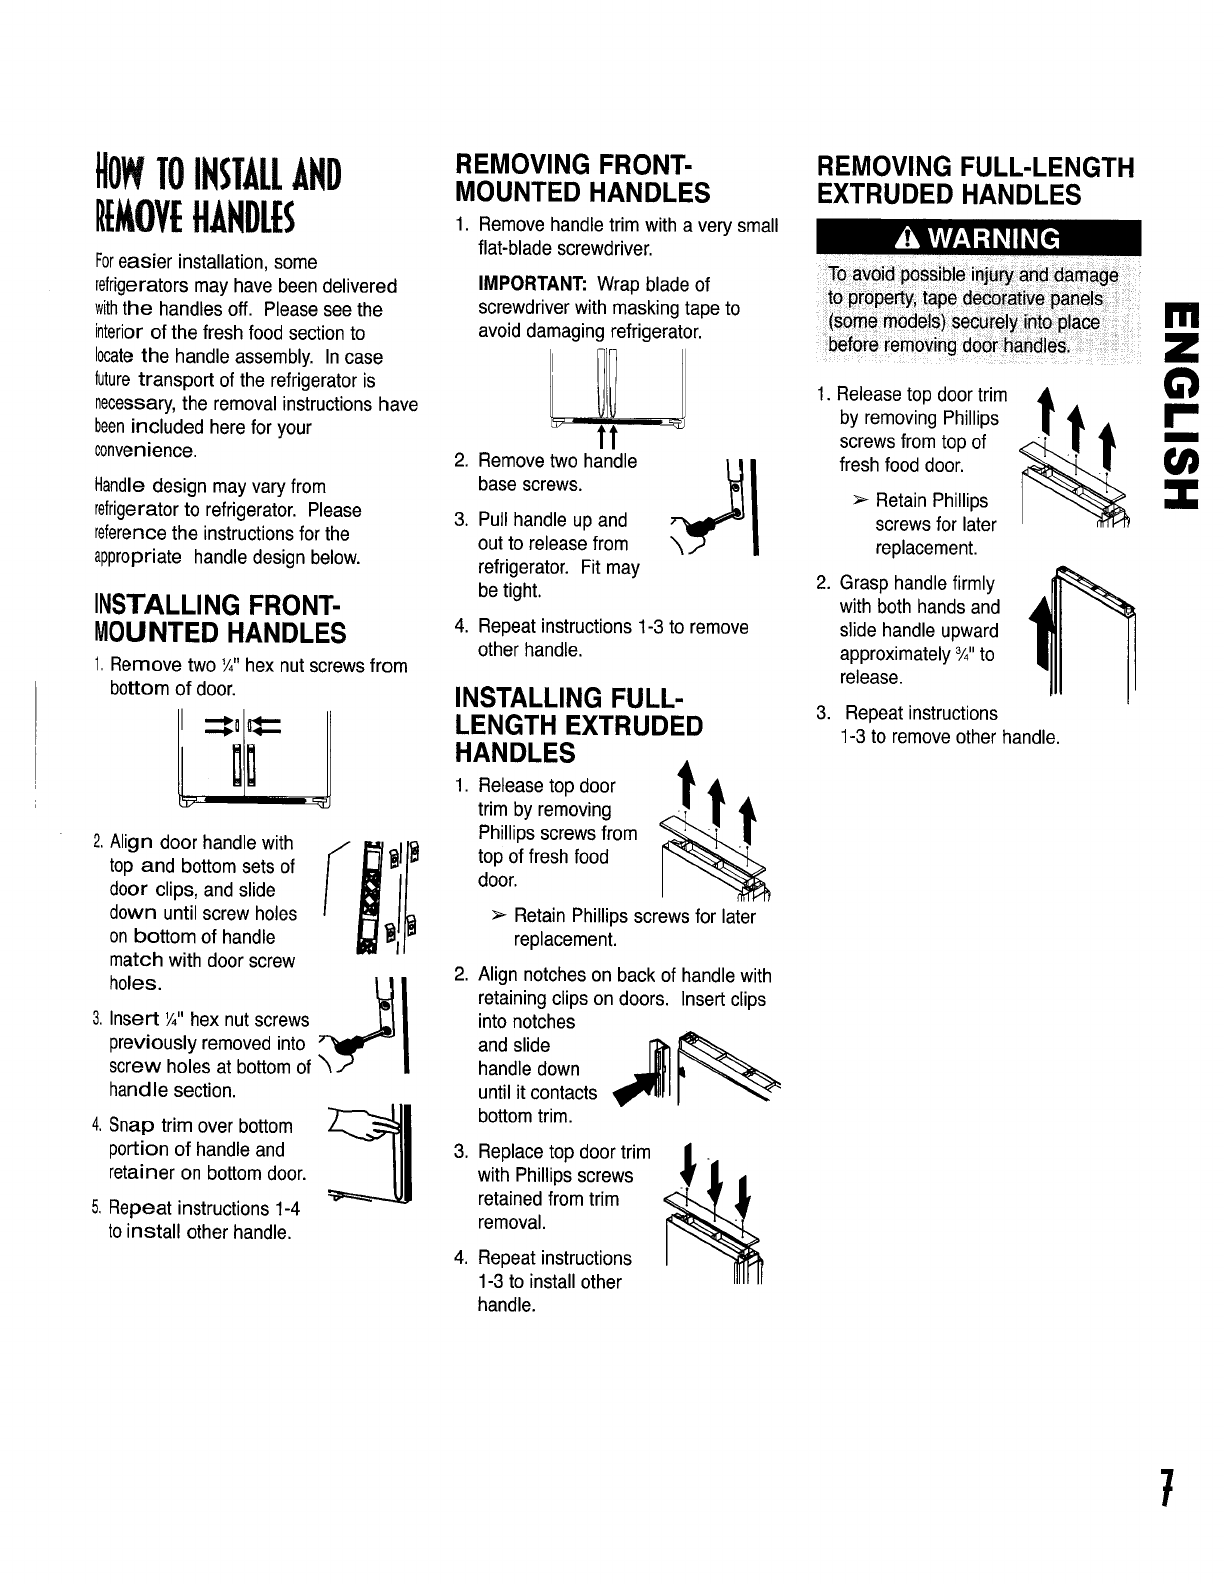
HOWTOINSTALLAND
RE, OVEHANDLES
Foreasier installation, some
refrigerators may have been delivered
withthe handles off. Pleasesee the
interiorof the fresh food section to
locatethe handle assembly. In case
futuretransport of the refrigerator is
necessary,the removal instructions have
beenincluded here for your
convenience.
Handledesign may vary from
refrigeratorto refrigerator. Please
referencethe instructions for the
appropriate handle design below.
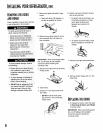
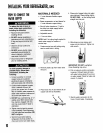
INSTALLING FRONT-
MOUNTED HANDLES
1,Remove two V,"hex nutscrewsfrom
bottom of door.
,
Align door handle with
top and bottom sets of
door clips, and slide
down until screw holes
on bottom of handle
match with door screw
holes.
Insert ¼" hex nut screws
previously removed into
screw holes at bottom of
handle section.
Snap trim over bottom
portion of handle and
retainer on bottom door.
Repeat instructions 1-4
to install other handle.
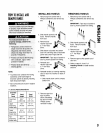
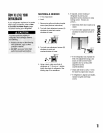
REMOVING FRONT-
MOUNTED HANDLES
1. Remove handle trim with a very small
flat-blade screwdriver.
.
.
,
IMPORTANT: Wrap blade of
screwdriver with masking tape to
avoid damaging refrigerator.
tt
Remove two handle It
base screws.
Pull handle up and
out to release from
refrigerator. Fit may
be tight.
Repeat instructions 1-3 to remove
other handle.
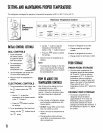
INSTALLING FULL-
LENGTH EXTRUDED
HANDLES
,A
top door 1Ik
1. Release
trim by removing
q
Phillips screws from
top of fresh food
door.
t
,
> Retain Phillipsscrews for later
replacement.
Align notches on back of handle with
retaining clips on doors. Insert clips
into notches
and slide _
handle down
until it contacts
bottom trim.
,
,
Replace top door trim
with Phillips screws
retained from trim
removal.
Repeat instructions
1-3 to install other
handle.
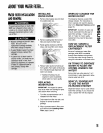
REMOVING FULL-LENGTH
EXTRUDED HANDLES
b ai old possible inju_ _d d_m_ge
to _o_y, t_pe de_iat _# paSels
(so_e moael_)_e_Ore_ _ _c_
1. Release top door trim • _w
by removing Phillips [
screws from top of _"
fresh food door.
Retain Phillips
screws for later
replacement.
2. Grasp handlefirmly
with both hands and
slide handle upward
approximately _/4"to
release.
3. Repeat instructions
1-3 to remove other handle.
7