Setting
To Broil:
1.
2.
3.
,
Oven Controls (cont'd)
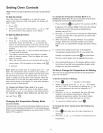
Slide broiler drawer out to the stop position.
Remove broiler pan and insert (See Fig. 1).
Always postion rack before setting control, while range is
cool.
Postion rack bytilting front of rack and pulling rack out from
locating holes in rear of broiler drawer. Repostion back of
rack inthe desired locating holds and allow front of rack to
slide down into the corresponding slots in front of broiler
drawer (See Fig. 2).
For rare meats, position the rack closer to the burner
(upper position). For medium foods use middle position.
For well-done foods such as chicken, lobster tails or
thick cuts of meat, position the rack further from the
burner (lower position).
Position the rack and adjust the Broil settings as
suggested inthe chart provided below:
Position
HI
Middle
Low
Food category
Medium-rare steaks/medium-well hamburgers
Fish, medium steaks & pork chops
Well-done foods such as chicken & lobster
5. Place broiler pan on rack; make sure the broiler pan
with the insert is positioned as shown (See Fig. 1). Be
sure front of pan is positioned correctly in rack.
6. Slide the broiler drawer all the way into the range.
7. Press _." =- " will appear in the display.
8. Press A or v once to Broil with a normal setting (nor
will appear inthe display).
9. To Broil with a high setting press A twice (hiwillappear
in the display). To Broil with a low setting press the
v arrow twice (Io will appear in the display).
10. The oven is properly set for Broil when the indicator light
over the, pad stops flashing and glows steady. Broil
may be canceled by pressing (_ at anytime.
11. Broil on one side until food is browned; turn and cook on
the 2nd side. Note: Always pull the oven rack out to the
stop position before turning or removing food.
12. When broiling is finished, press,
13. When removing broiler pan from broiler drawer always
use pot holders.
Note: The Broil level setting may be changed anytime while
broiling. To change the level press _ i and press A one
time for each increment of higher levels or v for each
desired lower level increment. Select the LO broil setting to
avoid excess browning or drying of foods that should be
broiled to the well-done stage.
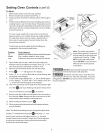
PICK U P BROIL PAN
AND INSERT
FROM SIDES
Fig. 1
Fig. 3
3 REAR HOLE TILT UP FRONT OF RACK
POSITIONS TO ADJUST
Fig. 2
Note: The broiler pan and the
insert allows grease to drain and
be kept away from the high heat ";"
of the broiler (See Fig. 3). DO
NOT use the pan without the _....
insert. DO NOT cover the insert
DO NOT use the broiler drawer for storage.
Items placed in the broiler drawer will catch fire.
Should an oven fire occur, close the oven
door and turn off the oven. If the fire continues, use a fire
extinguisher. DO NOT put water or flour on the fire. Flour
may be explosive.
with foil; the exposed grease
could ignite.


