


CONNECT DISPOSER TO ELECTRICAL SUPPLY
Electric Shock
o Improper connection of the equipment-grounding
conductor can result in a risk of electric shock.
Check with a qualified electrician or serviceman if
you are in doubt as to whether the appliance is
properly grounded. Do not modify the plug provided
with the appliance - if it will not fit the outlet, have a
proper outlet installed by a qualified electrician.
o This disposer must be properly grounded.
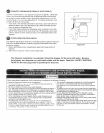
o Do not attach ground wire to gas supply pipe.
o Disconnect power before installing or servicing dis-
poser.
* If three-prong, grounded plug is used, plug must be
inserted into three-hole, grounded receptacle.
,, All wiring must comply with local electrical codes.
o Do not reconnect electrical current at main service
panel until proper grounds are installed.
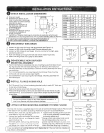
There are two ways to connect electrical power to your disposer:
1.) Direct wire
2.) Plug in cord - installed at factory, or from Kenmore Kit #60686 (for all models listed in this manual)
Disposer Circuit Requirements
Ensure the following electrical requirements are met before connecting
wired electrical circuit diagram):
- Remove fuse (or open the circuit breaker) before connecting °
d_sposer to circuit.
• Batch feed disposers do not require a separate wall switch
- switch is built into disposer and disposer is wired directly °
into circuit.
o If junction box is used, connect the junction box to the switch
on a separate 15 or 20 Amp, 115 Volt c_rcuit with the appropri-
ate cable. (Use 14 gauge wire with 15 Amp circuit, and 12
gauge wire with 20 Amp circuit).
w
disposer to switch (see Figure 9-1 for typical direct
If you install a double receptacle to handle other small kitchen
appliances, include a wall switch in disposer receptacle c_rcuit
and wire other receptacle directly to power source.
This d_sposer requires a switch with a marked "Off" position
(wired to disconnect all ungrounded supply conductors)
installed within sight of the disposer sink opening (1 HP mini-
mum rating).
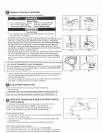
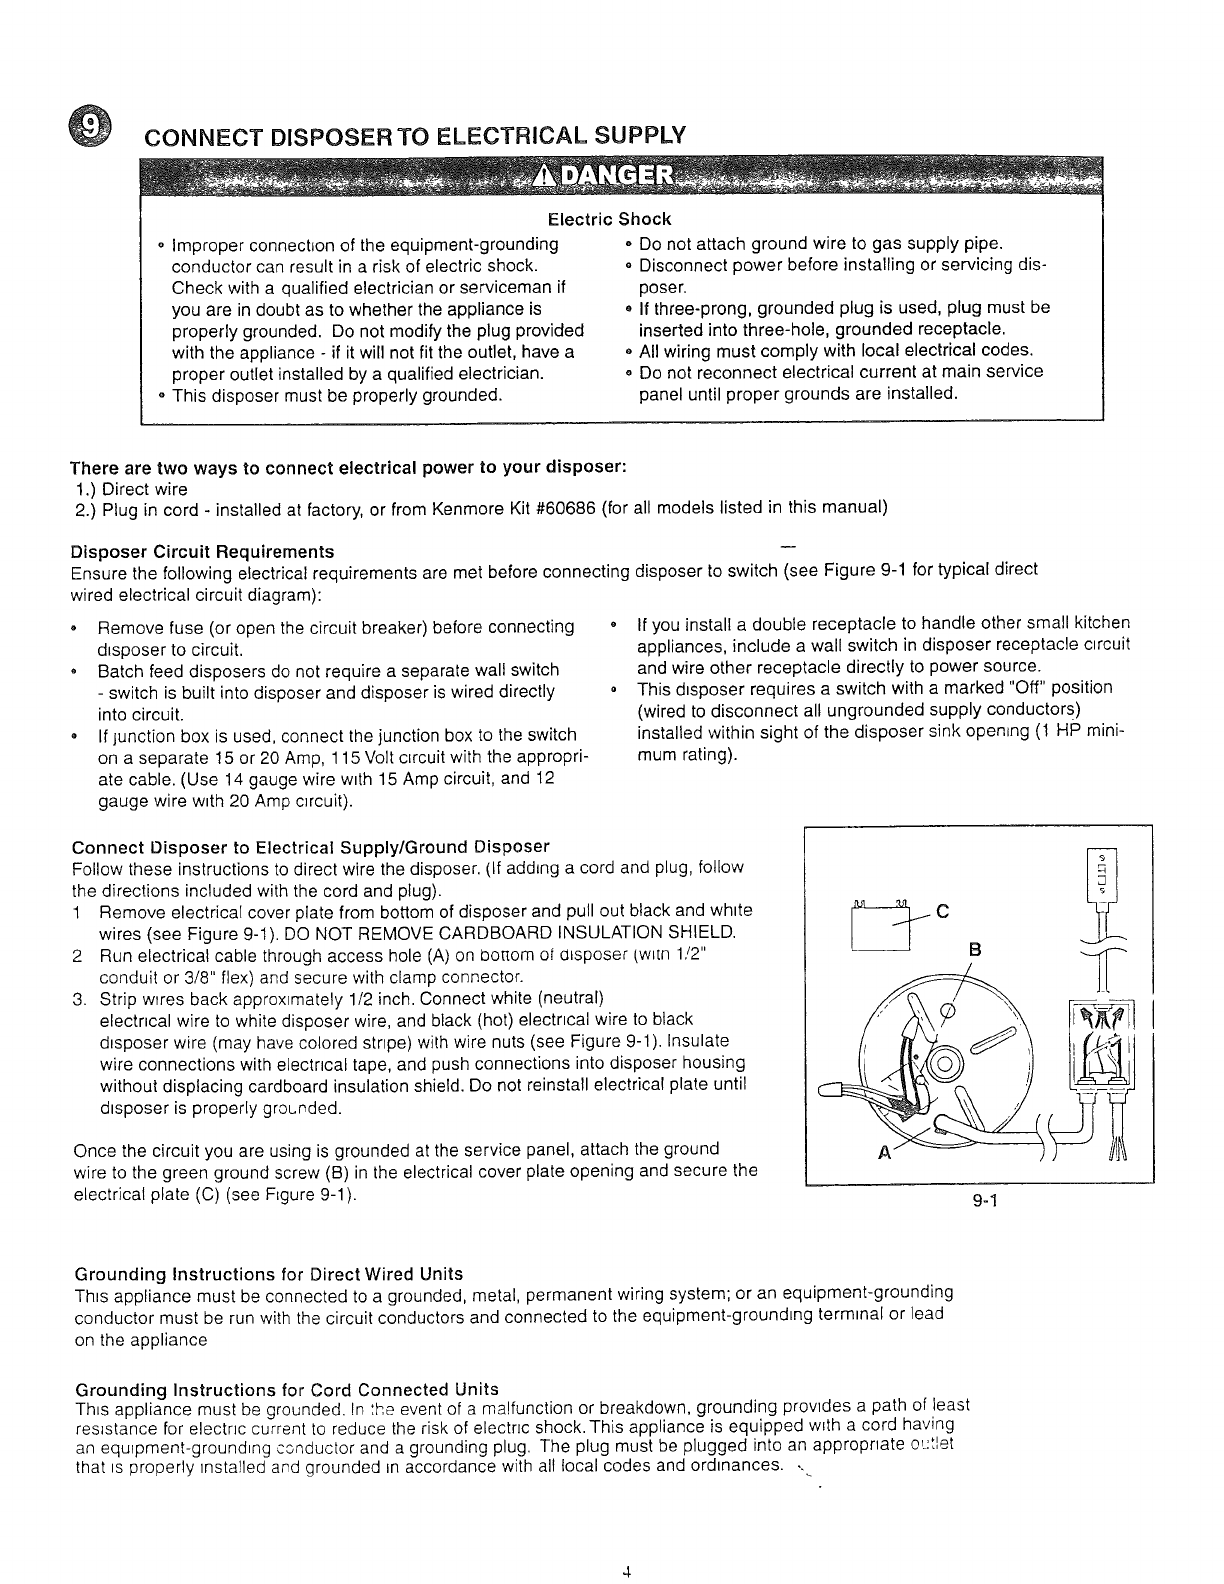
Connect Disposer to Electrical Supply/Ground Disposer
Follow these instructions to direct wire the disposer. (if adding a cord and plug, follow
the directions included with the cord and plug).
1 Remove electrical cover plate from bottom of disposer and pull out black and white
wires (see Figure 9-1). DO NOT REMOVE CARDBOARD INSULATION SHIELD.
2 Run electrical cable through access hole (A) on bo[tom ot cihsposer/w_[n 1/2"
conduit or 3/8" flex) and secure with clamp connector.
3. Strip wTres back approximately 1/2 inch. Connect white (neutral)
electrical wire to white disposer wire, and black (hot) electrical wire to black
disposer wire (may have colored stripe) with wire nuts (see Figure 9-1). Insulate
wire connections with electrical tape, and push connections into disposer housing
without displacing cardboard insulation shield. Do not reinstall electrical plate until
disposer is properly grourded.
Once the circuit you are using is grounded at the service panel, attach the ground
wire to the green ground screw (B) in the electrical cover plate opening and secure the
electrical plate (C) (see FEgure9-1).
B
9-1
Grounding Instructions for Direct Wired Units
Ths appliance must be connected to a grounded, metal, permanent wiring system; or an equipment-grounding
conductor must be run with the circuit conductors and connected to the equipment-grounding terminal or lead
on the appliance
Grounding Instructions for Cord Connected Units
Th_s appliance must be grounded. In ',he event of a malfunction or breakdown, grounding provides a path of least
resistance for electric current to reduce the risk of electric shock. This appliance is equipped with a cord having
an equipment-grounding conductor and a grounding plug. The plug must be plugged into an appropriate o,_:tlet
that _sproperly installed and grounded in accordance with all local codes and ordinances...