


General Cleaning
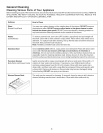
Cleaning Various Parts of Your Appliance
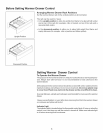
Beforecleaning anypart of thewarmerdrawer, be sure all controls are turned OFFand thewarmerdrawer is COOL. REMOVE
SPILLOVERS AND HEAVY SOILING AS SOON AS POSSIBLE. REGULAR CLEANINGS NOW WILL REDUCE THE
EXTENT AND DIFFICULTY OF MAJOR CLEANING LATER.
Surfaces How to Clean
Glass You may use a glass cleaner on the outside glass of the drawer. DO NOT immerse
Drawer Front Panel the drawer inwater. DO NOT spray or allow water or the glass cleaner to enter
behind the drawer glass panel. DO NOT use oven cleaners, cleaning powders or
any harsh abrasive cleaning materials on the outside of the drawer.
Plastic
Control Knobs
Stainless Steel
Porcelain Enamel
Body Parts and Drawer Cavity
Warmer Drawer Rack
fd, i
• JJJ i
.z_Z" i
J
jJ
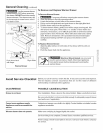
To remove control knob, turn to the OFF position; grasp firmly and pull straight off
the shaft. Clean with a cloth soaked in soapy water. Rinse with a clean water and a
dishcloth. To replace knob after cleaning, line up the flat sides of both the knob and
the shaft; then push the knob into place.
Note: Humidity controller knob cannot be removed.
Clean stainless steel with hot, soapy water and a dishcloth. Rinse with clean water
and a cloth. Do not use cleaners with high concentrations of chlorides or
chlorines. Do not use harsh scrubbing cleaners. Only use kitchen cleaners that are
especially made for cleaning stainless steel. Always be sure to rinse the cleaners
from the surface as bluish stains may occur during heating that cannot be removed.
Gentle scouring with a soapy scouring pad will remove most spots. Rinse with a 1:1
solution of clear water and ammonia, ff necessary, cover difficult spots with an
ammonia-soaked paper towel for 30 to 40 minutes. Rinse with clean water and a
damp cloth, and then scrub with a soap-filled scouring pad. Rinse and wipe dry with
a clean cloth. Remove all cleaners or the porcelain may become damaged during
future heating. DO NOT use spray oven cleaners.
The rack may be removed for cleaning. If removed, clean by using a mild, abrasive
cleaner following manufacturer's instructions.Rinse with clean water and dry.