


6
Important Safety Instructions
IMPORTANT INSTRUCTIONS FOR SELF-
CLEANING OVENS
• Clean in the self-cleaning cycle only the parts listed in
this Use & Care Manual. Before self-cleaning the oven,
remove the oven racks, broil pan, broil pan insert and
any cookware, cooking utensils or foods from the oven.
• Do Not Use Oven Cleaners — No commercial oven
cleaner or oven liner protective coating of any kind
should be used in or around any part of the oven.
• Do Not Clean Door Gasket — The door gasket is
essential for a good seal. Care should be taken not to
rub, damage or move the gasket.
• The health of some birds is extremely sensitive to the
fumes given off during the self-cleaning cycle of any
range. Move birds to another well-ventilated room.
IMPORTANT INSTRUCTIONS FOR CLEANING
YOUR RANGE
• Clean the range regularly to keep all parts free of
grease that could catch fire. Pay particular attention to
the area around each surface element. Do not allow
grease to accumulate.
• Kitchen cleaners and aerosols — Always follow the
manufacturer’s recommended directions for use. Be
aware that excess residue from cleaners and aerosols
may ignite causing damage and injury.
• Clean ventilating hoods frequently — Grease should not
be allowed to accumulate on the hood or filter. Follow
the manufacturer’s instructions for cleaning hoods.
Before manually cleaning any part of the
range, be sure all controls are turned OFF and the range is
COOL. The range may be hot and can cause burns.
In this space below, record the date of purchase, model
and serial number of your product. You will find the model
and serial number printed on an identification plate. See
bottom of this page for serial plate location.
Model No. _____________________________________
Serial No. _____________________________________
Date of Purchase ________________________________
Save sales receipt for future reference.
Product Record
790.
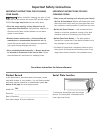
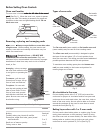
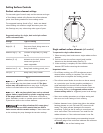
Serial Plate Location
To locate the serial plate open the storage
drawer. The serial plate is attached to the
lower right oven frame.
Save these instructions for future reference.