


4 5 6
using the attachments
knife blade/ dough tool
The knife blade is the most versatile of all the attachments. The length of the
p
rocessing time will determine the texture achieved. For coarser textures
u
se the pulse control.
Use the knife blade for cake and pastry making, chopping raw and cooked
meat, vegetables, nuts, pâté, dips, pureeing soups and to also make
c
rumbs from biscuits and bread.
U
se the dough tool supplied for yeasted mixes.
h
ints
knife blade
●
C
ut food such as meat, bread, vegetables into cubes approximately
2
cm/
3
⁄4i
n before processing.
●
Biscuits should be broken into pieces and added down the feed tube whilst
t
he machine is running.
●
W
hen making pastry use fat straight from the fridge cut into 2cm/
3
⁄4i
n.cubes.
●
Take care not to over-process.
d
ough tool
●
P
lace the dry ingredients in the bowl and add the liquid down the feed tube
whilst the machine is running. Process until a smooth elastic ball of dough is
formed this will take 45 - 60 secs.
●
R
e-knead by hand only. Re-kneading in the bowl is not recommended as it
may cause the processor to become unstable.
twin beater geared whisk
Use for light mixtures only eg egg whites, cream, evaporated milk and for
whisking eggs and sugar for fatless sponges. Heavier mixtures such as fat
and flour will damage it.
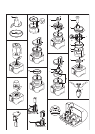
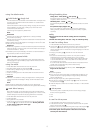
using the whisk
1 Fit the detachable drive shaft and bowl onto the power unit.
2 Push each beater securely into the drive head ¸.
3 Fit the whisk by carefully turning until it drops over the drive shaft.
4 Add the ingredients.
5 Fit the lid - ensuring the end of the shaft locates into the centre of the lid.
6 Select auto.
important
●
The whisk is not suitable for making one-stage cakes or creaming fat and
sugar as these mixes will damage it. Always use the knife blade for cake
making.
hints
●
Best results are obtained when the eggs are at room temperature.
●
Ensure the bowl and whisks are clean and free from grease before whisking.
maxi-blend canopy
When blending liquids, use the maxi-blend canopy with the knife blade. It
allows you to increase the liquid processing capacity from 1.4 litre to 2 litres,
prevents leaking and improves the chopping performance of the blade.
1 Fit the detachable drive shaft and bowl onto the power unit.
2 Fit the knife blade.
3 Add ingredients to be processed.
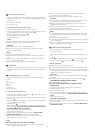
4 Fit the canopy over the top of the blade ensuring it sits on the ledge area
and the slot ¹ aligns with the tab inside the bowl. Do not push down
on the canopy, hold by the centre grip.
5 Fit the lid and switch on.
slicing/shredding discs
s
licing discs - thick (4mm) , thin (2 mm)
U
se the slicing discs for cheese, carrots, potatoes, cabbage, cucumber,
courgettes, beetroot and onions.
s
hredding discs - coarse , fine
U
se the shredding discs for cheese, carrots, potatoes and food of a similar
texture.
fine (Julienne style) chipper disc
U
se to cut: potatoes for Julienne style French fries; firm ingredients for
s
alads, garnishes, casseroles and stir fries (eg carrot, swede, courgette,
cucumber).
safety
●
Never remove the lid until the cutting disc has completely
s
topped.
●
Handle the cutting discs with care - they are extremely sharp.
to use the cutting discs
1 Fit the detachable drive shaft and bowl onto the power unit.
●
The midi bowl can be used with all the discs. Fit the midi bowl inside the
m
ain bowl - align the tabs with the groove on the side of the main bowl
chimney and slide down. To remove lift out using the finger grips on the side
of the midi bowl.
2
Holding by the centre grip Ƹ, place the disc onto the drive shaft.
3 Fit the lid.
4
Choose which size feed tube you want to use. The pusher contains a
smaller feed tube for processing individual items or thin food items.
To use the small feed tube – first put the large pusher inside the feed tube.
To use the wide feed tube – fit the small pusher into the wide pusher and
turn clockwise to lock in place.
Do not fill the feed tube above the maximum level as the processor will not
operate unless the wide feed tube pusher is fitted correctly.
5 Put the food in the feed tube.
6 Switch on and push down evenly with the pusher - never put your
fingers in the feed tube.
hints
●
Use fresh ingredients
●
Don’t cut food too small. Fill the width of the large feed tube fairly full. This
prevents the food from slipping sideways during processing. Alternatively
use the small feed tube.
●
When using the chipper disc, place ingredients horizontally.
●
When slicing or shredding: food placed upright ƹ comes out shorter than
food placed horizontally ƺ.
●
There will always be a small amount of waste on the disc or in the bowl after
processing.
citrus press
Use the citrus press to squeeze the juice from citrus fruits (eg oranges,
lemons, limes and grapefruits).
a cone
b sieve
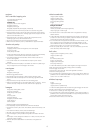
to use the citrus press
1 Fit the detachable drive shaft and bowl onto the power unit.
2 Fit the sieve into the bowl - ensuring the sieve handle is locked into position
directly over the bowl handle ƻ.
3 Place the cone over the drive shaft turning until it drops all the way down Ƽ.
4 Cut the fruit in half. Then switch on and press the fruit onto the cone.
●
The citrus press will not operate if the sieve is not locked
correctly into the interlock.
5
7
57
57
57
57
57
5
7
57
57
5
7
5
7