8 9
SECTION 4 Set-Up & Operation
CAUTION: Two sharp needles are used to puncture the
K-Cup
®
packs. One is above the K-Cup
®
Pack Holder and
the other is in the bottom of the K-Cup
®
Pack Holder. To
avoid risk of injury, do not put your fingers inside the
K-Cup
®
Pack Assembly Housing.
CAUTION: During the brewing process, the water
gets extremely hot. To avoid risk of injury, do not
lift the Handle or open the K-Cup
®
Pack Assembly
Housing until brewing is complete.
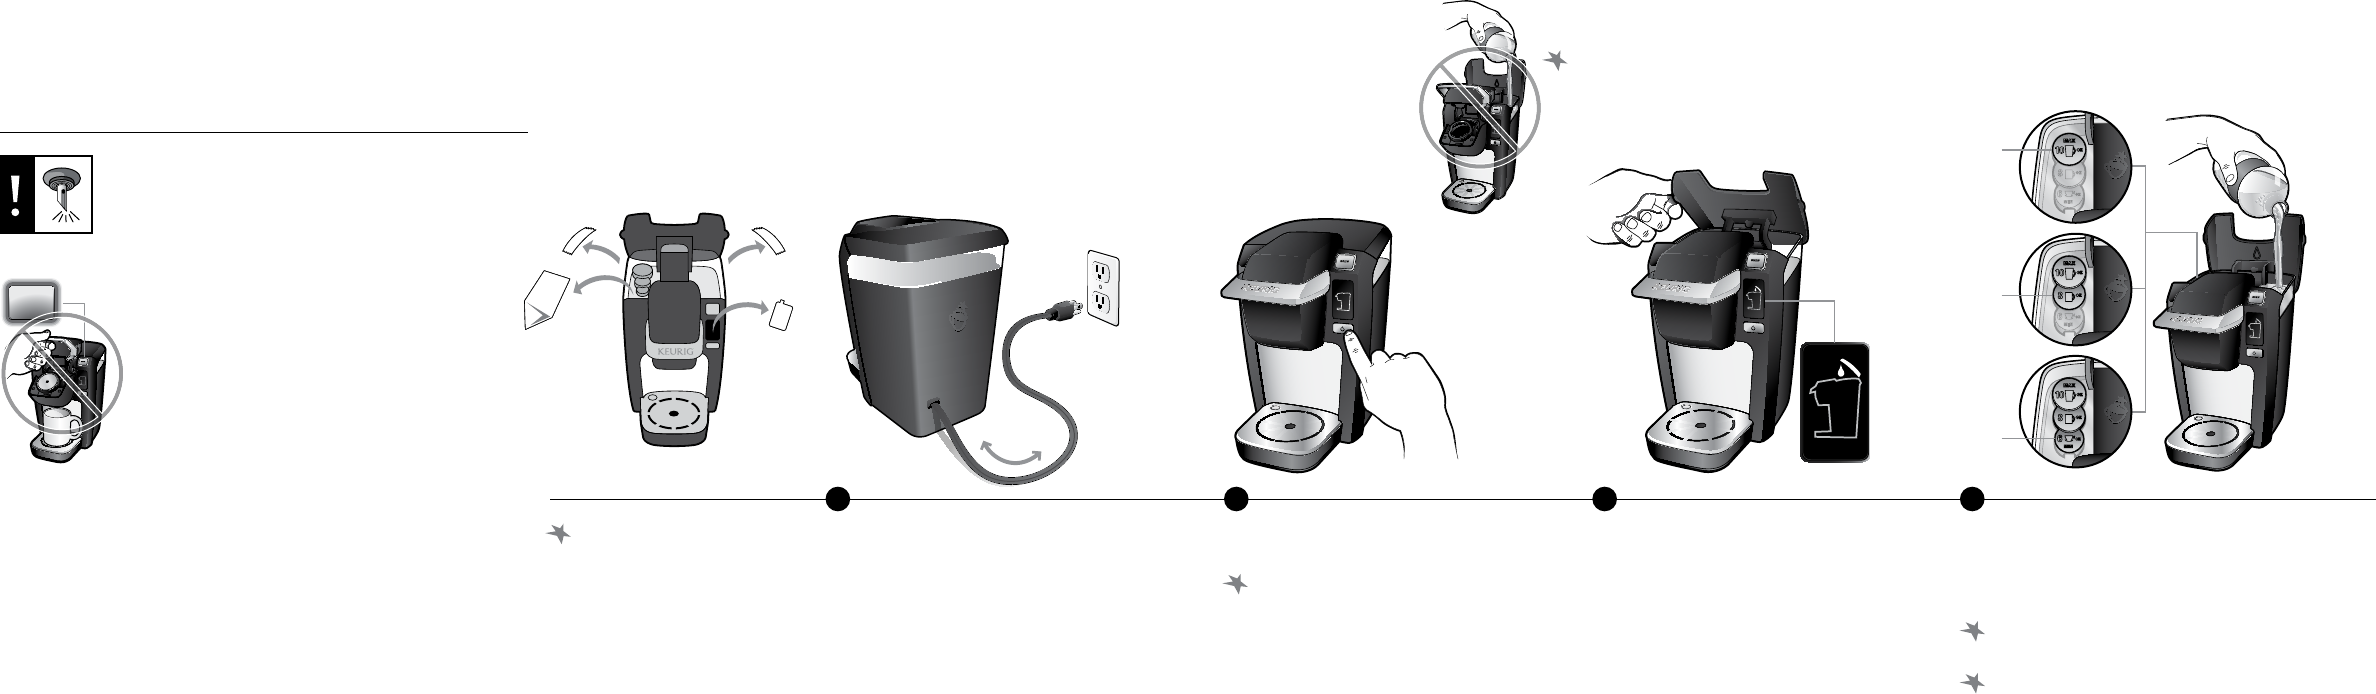
Plug the Power Cord into an
independent, grounded outlet.
Remove all tape and cardboard.
Perform an initial cleansing
brew before making your
first beverage. Follow these
instructions but do not insert
a K-Cup
®
pack.
Press the Power Button. The Add Water Indicator
will flash blue.
The Power Button does not illuminate.
Lift the Cold Water Reservoir Lid.
MAX
10 oz.
8 oz.
6 oz.
MIN
1 2
Pour water anywhere within the Cold Water
Reservoir until it reaches up to the rim of your
desired fill level on the Water Level Guide
(minimum of 6 oz.). Lower the lid.
For accurate measuring, do not fill if the
Handle is up.
Bottled or filtered water is recommended;
distilled or reverse osmosis water is not.
3 4
Initial Cleansing & First Brew
8
BREW
BREW
For accurate measuring, do not fill if the
Handle is up. In the down position it prevents
water from entering the lower heating
compartment.


