


16
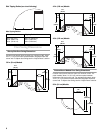
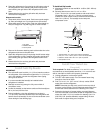
Move Refrigerator to Final Position
IMPORTANT: To prevent floor damage, make sure levelers are
raised (not touching floor) and refrigerator is on rollers before
moving.
1. Place top of cardboard carton or plywood under refrigerator.
Remove dolly.
2. Do not remove protective film.
3. Move the refrigerator straight back and evenly into the
opening. Check to make sure that water tubing is not kinked
and power supply cord is on top of refrigerator next to the
cover.
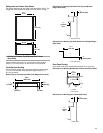
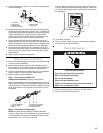
Lower Leveling Legs
NOTE: All four leveling legs must contact the floor to support and
stabilize the full weight of refrigerator. Rollers are for moving
refrigerator and not for permanent support.
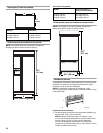
Use socket wrench to turn leg levelers on both sides of
refrigerator to the right (clockwise) until refrigerator weight is
supported by leveling legs. The rollers should be off the floor. To
avoid cabinet damage, do not apply more than 50 in./lbs.
(58 cm/kg) of torque to the leveling legs.
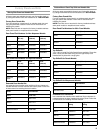
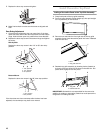
Install Door Panels
Panel Models:
1. Remove all tape and door bracing from refrigerator and
freezer doors. Remove screws attaching handles to door
frame.
2. Slide decorative door panels into door frames.
3. If needed, route door panels or install a filler panel between
doors and decorative panels. See the “Custom Top Grille and
Door Panels” section.
4. Replace door handles. Check that the top of both door
handles are aligned.
5. If door handles are not aligned, loosen all handle screws and
adjust door handles up or down. Tighten screws. If any of the
door screws are damaged, replace them with additional
screws provided in the parts package.
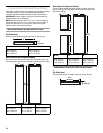
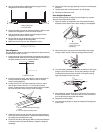
Level Refrigerator
NOTE: Door panels must be installed before leveling.
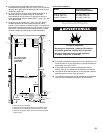
1. Open the doors and place the level on top of the refrigerator
frame as shown. Check to see whether the refrigerator is level
from left to right.
Side by Side
Bottom Mount
1. Rear leveling legs
2. Front leveling legs
1 2
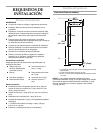
1. Filler panel
2. Nylon washer
3. Door handle
4. Door panel
1. Level to check left to right leveling
2. Level to check front to back leveling
1. Level to check left to right leveling
2. Level to check front to back leveling
4
1
3
2
1
2
2
1
2