14
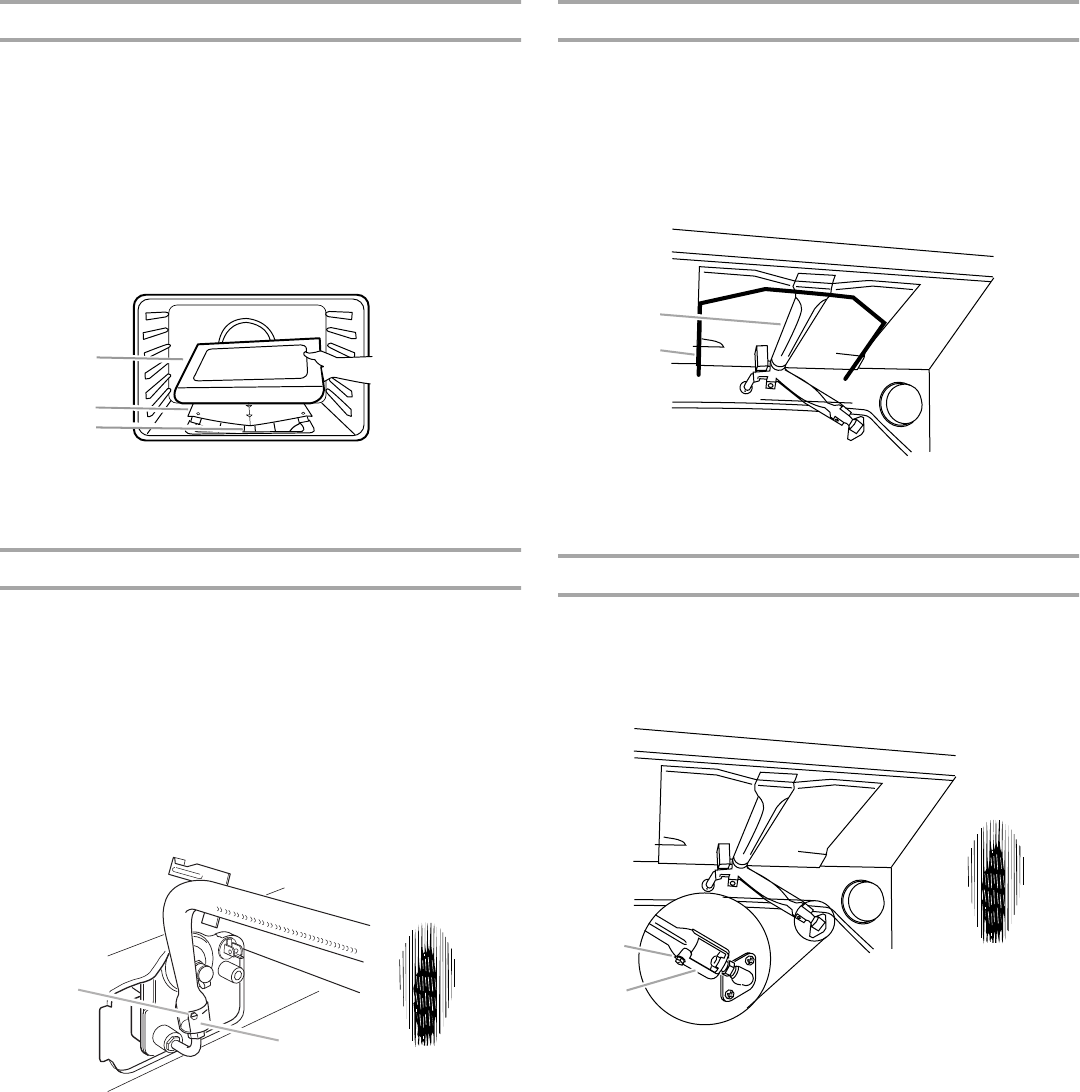
Check Operation of Oven Bake Burner
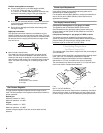
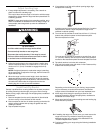
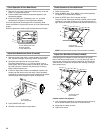
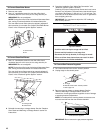
1. Remove the oven rack. Remove the bake burner cover and
place it on a protected surface.
2. Push the BAKE pad. Default temperature appears in the
temperature display.
3. Press the START pad. “Preheating” and “Lo” (or actual
temperature) will appear in the temperature display.
The oven bake burner should light within 8 seconds, under
certain conditions it may take the burner up to 50 to 60 seconds
to light.
Electronic igniters are used to light the bake and broil burners.
Adjust Oven Bake Burner Flame (if needed)
1. Remove access cover plate (1 screw) located on the upper
wall, inside the storage or warming drawer compartment.
2. Check the oven bake burner for proper flame.
This flame should have a ½" (1.3 cm) long inner cone of
bluish-green, with an outer mantle of dark blue, and should
be clean and soft in character. No yellow tips, blowing or
lifting of flame should occur.
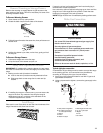
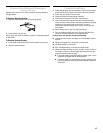
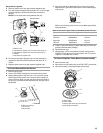
3. If the oven bake flame needs to be adjusted, locate the air
shutter near the center rear of the range. Use a flat-blade
screwdriver to loosen the locking screw. Rotate the air shutter
until the proper flame appears. Tighten locking screw.
4. Push CANCEL/OFF pad.
5. Reinstall oven bake burner access plate.
Check Operation of Oven Broil Burner
1. Close the oven door.
2. Press the BROIL pad. “FULL BROIL” and broil temperature
will appear in the temperature display.
3. Press the START pad. “ON” indicator will light.
The oven burner should light within 8 seconds, under certain
conditions it may take the burner up to 50 to 60 seconds to
light. On some models, an electric halo element also turns on.
NOTE: Oven door must be shut for broil burner to operate.
Adjust Oven Broil Burner Flame (if needed)
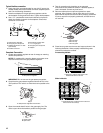
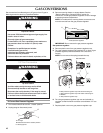
Look through oven window to check broil burner for proper
flame. This flame should have a ½" (1.3 cm) long inner cone of
bluish-green, with an outer mantle of dark blue, and should be
clean and soft in character. No yellow tips, blowing or lifting of
flame should occur.
If flame needs to be adjusted:
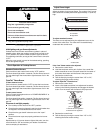
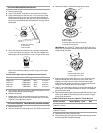
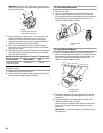
1. Use a flat-blade screwdriver to loosen the locking screw on
the air shutter located at the rear of the broil burner.
2. Adjust the air shutter as need.
3. Tighten lock screw.
A.Oven bake burner cover
B.Flame spreader
C.Oven bake burner
A.Air shutter
B.Locking screw
A
B
C
A
B
A.Gas burner
B.Electric halo element
A.Locking screw
B.Air shutter
A
B
A
B


