


13
English
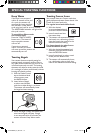
SPECIAL TOASTING FUNCTIONS
Toasting Sandwiches
Your toaster features an accessory and a
special setting to toast sandwiches made
with thinly sliced meats and cheese.
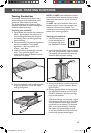
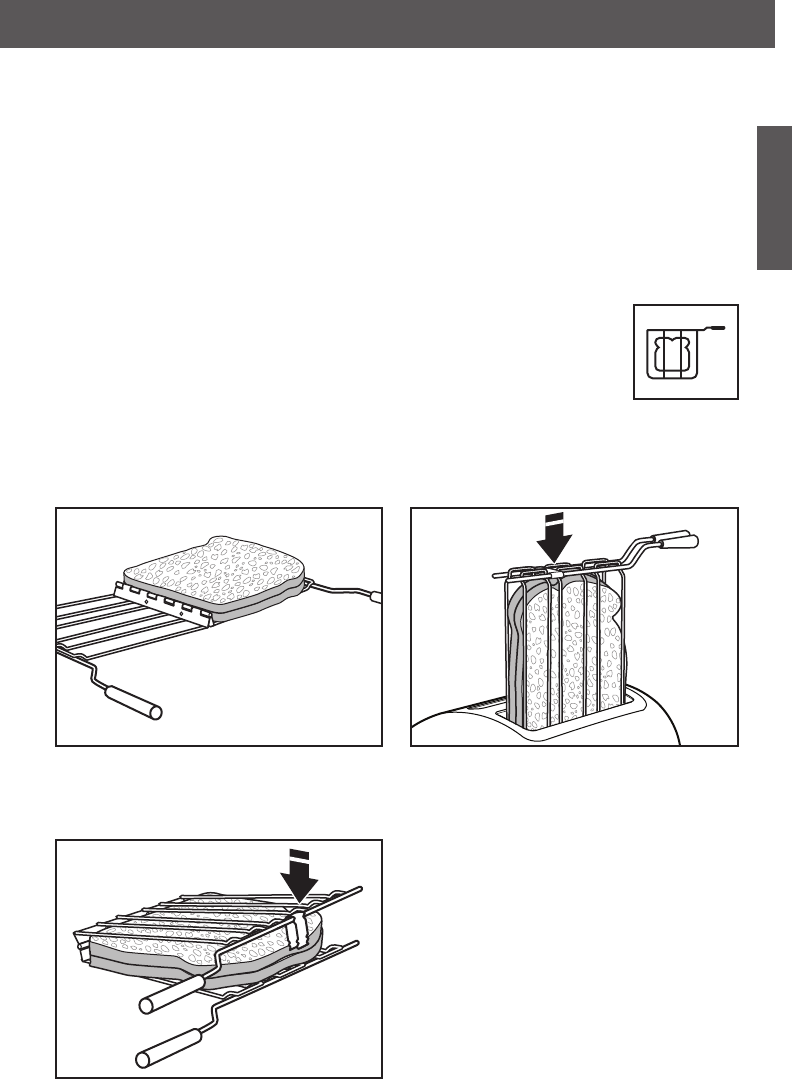
The hinged design of the Sandwich Rack
accessory opens at to make inserting and
removing sandwiches easy.
Preparing your sandwich:
1. Lightly butter the outside of the sandwich
bread – do not butter the side that will
face the lling. Buttering the outside of
the bread will slow browning and help
warm the lling.
2. Fill the sandwich with desired ingredients,
but do not overll it! Thinly sliced
ingredients – like ham, turkey, and
cheese – work best.
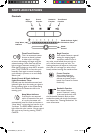
3. Open the rack by spreading the handles
apart. Then, place an edge of your
sandwich ush with the bottom channel
of the rack, as shown.
4. Press the sandwich rack handles together
to grip the sandwich. Close the clip to
keep grids together.
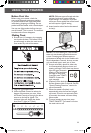
NOTE: Do NOT toast sandwiches without
the Sandwich Rack, because cheese or other
food could melt and stick to the interior of
the toaster.
Do NOT store your Sandwich Rack in the
toaster, or place it back in the toaster once
sandwich is toasted and unloaded. This
would start a new toasting cycle and prevent
toaster from working properly.
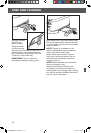
Toasting your sandwich:
1. Set the Shade Control
to the desired level of
brownness, then press
the SANDWICH button.
2. Insert the Sandwich Rack into the toaster
slot, with your sandwich inside, as shown.
The toaster will automatically lower the
Sandwich Rack and start toasting.
3. When the sandwich is ready, a signal will
beep 3 times, and the Sandwich button
light will blink.
4. Remove Sandwich Rack and press either
the SANDWICH button or the TOAST/
CANCEL button to return the carriage
to its proper position.
If Sandwich Rack is not removed, a signal
will beep every 30 seconds for 2 minutes
and the Sandwich button light will blink
to remind you to remove it. If Sandwich
Rack is not removed within 2 minutes,
the toaster will automatically turn off.
In any case, the Sandwich Rack must be
removed to operate toaster again.
W10506838A_01_EN.indd 13 11/8/12 2:01 PM