English
9
PARTS AND FEATURES
Wire whip*
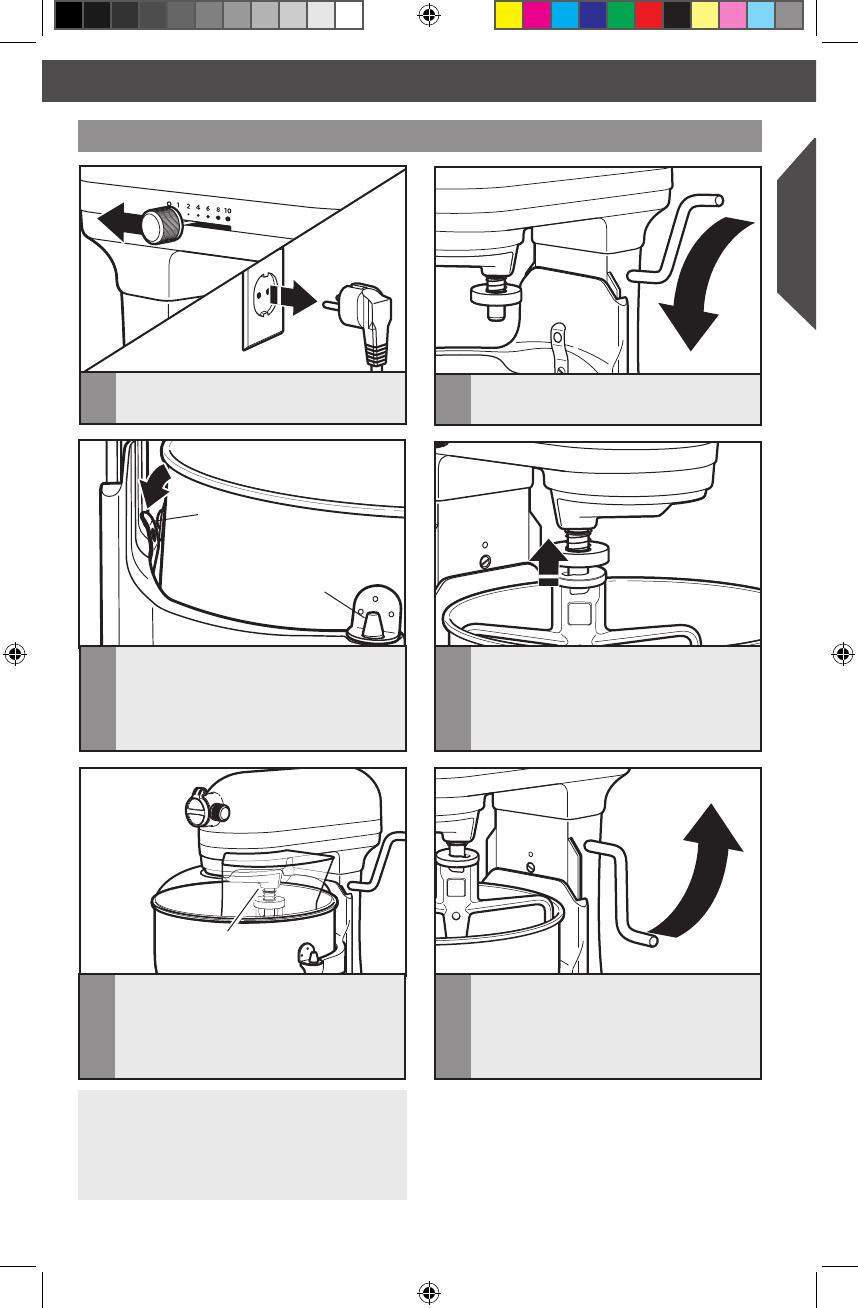
ASSEMBLING THE STAND MIXER
Locating Pin
Spring Latch
Pouring
Chute
1
Turn speed control to “0” (OFF), and
unplug Stand Mixer.
Attaching the bowl and beaters
2
Place bowl lift lever into down position.
3
Fit bowl supports over locating pins;
press down on back of the bowl until
bowl pin snaps into the spring latch. If
not securely snapped into place, bowl
will be unstable and wobble during use.
5
If using the pouring shield*, from the
front of the Stand Mixer, slide the
pouring shield over the bowl until it
is centered. The bottom rim of the
pouring shield should fit within the bowl.
4
Slip a beater (flat, wire whip, or dough
hook) onto the beater shaft and press
upward as far as possible. Turn beater to
the right, hooking it over the pin on the
beater shaft.
NOTE: Rotate the pouring shield* so the
motor head covers the U-shaped gap in
the shield. The pouring chute will be just
to the right of the attachment hub as you
face the Stand Mixer.
* Pouring shield included only for models 5KPM5, 5KSM7580X and 5KSM7591X
6
Raise the bowl into mixing position
by rotating the bowl lift lever
counterclockwise to the straight up
position. The bowl must always be
in the raised position when mixing.
W10648168A_ENv03.indd 9 12/11/13 11:48 AM


