


Now start...
With compactor in room where
it will be installed.
Product/Floor Damage
. Do Not grasp console to
move compactor.
. Before moving compactor
across floor, check that
compactor is on shipping
base or slide compactor onto
cardboard or hardboard.
Failure to follow these
instructions may result in
damage to floor covering or
product.
1
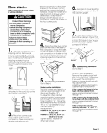
. Remove compactor from
shipping carton. Remove all
protective packaging materials
such as tape and shipping pads
Waxy residue from protective
shipping material may be
removed with a mild solution of
liauid household cleaner and
water.
cord . . . . .
clip
2.
. :...:.
. .
r!l
I
Check that power supply cord is
attached to the cord clip on the
rear of the compactor.
3
n
Place two corner posts
from carton on floor near
compactor. Open compactor
drawer and remove any
shipping materials or other items
shipped in the drawer. Do Not
remove the compactor bag (if
installed). Grasp the handle and
raise the front of drawer untrl it
clears stops. Grasp sides of
drawer and lift drawer out of
compactor. Place the drawer on
the two corner posts.
n
Place the other two corner
posts on the floor to the side of
the compactor. Grasp the sides
of the compactor cabinet and
put compactor on its side on top
of the corner posts. Remove the
shipping base from the bottom
of compactor.
n
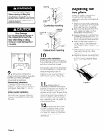
Freestandina installation
Go to Step 6. -
Undercounter installation
The rear wheels are preset for a
cabinet opening height of 34”
(86.4 cm> (Position “A”).
To adjust for other cabinet
opening heights, loosen screw
just enough to clear stud from
hole in position “A”. Move the
rear wheel and stud to position
“B” or “C” as needed for your
cabinet opening
measurement:
Position B: 34” to 34-3/16” (86.4
to 86.8 cm)
Position C: 34-3/l 6” to 34- l/2”
(86.8 to 87.6 cm)
Tighten screw. Repeat for
other rear wheel.
6
n
Use pliers to lower leveling
legs away from cabinet. Stand
the cabinet upright
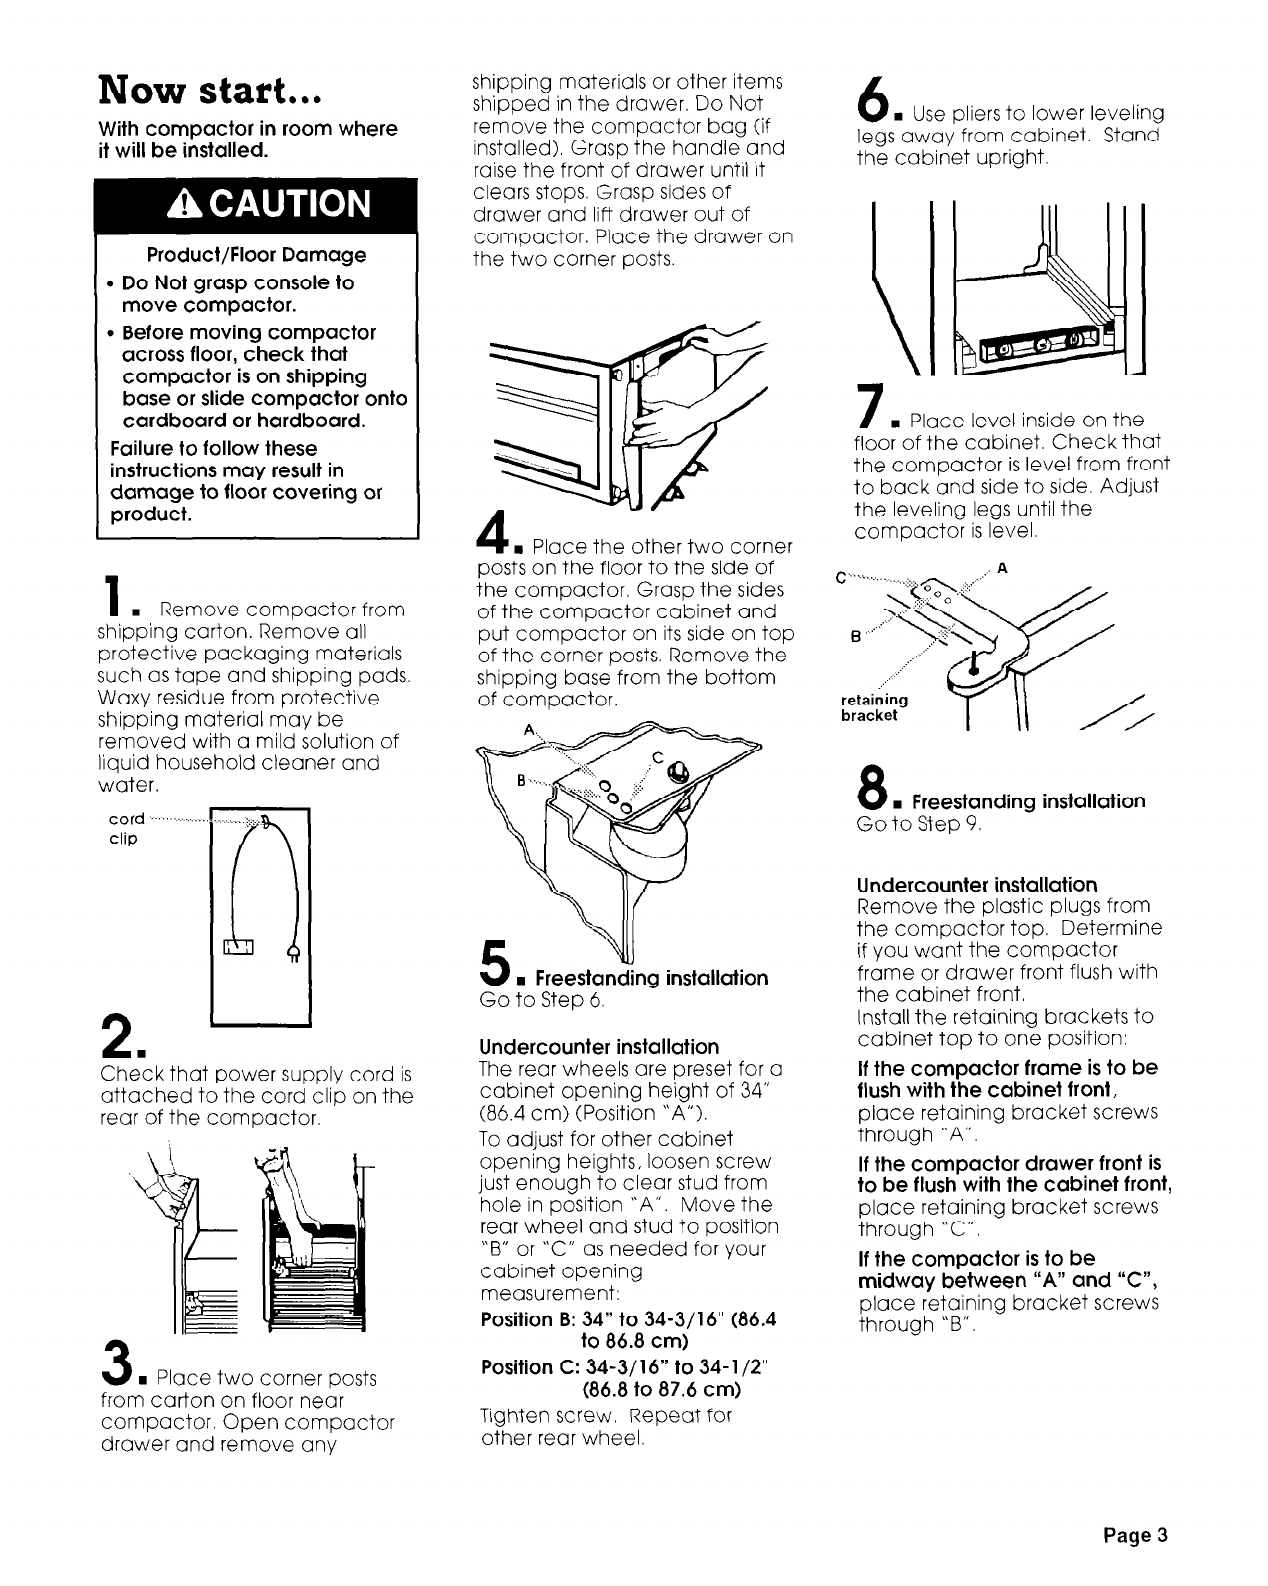
7
n
Place level inside on the
floor of the cabinet. Check that
the compactor is level from front
to back and side to side. Adjust
the leveling legs until the
compactor is level.
8
n
Freestanding installation
Go to Step 9.
Undercounter installation
Remove the plastic plugs from
the compactor top. Determine
if you want the compactor
frame or drawer front flush with
the cabinet front.
Install the retaining brackets to
cabinet top to one position:
If the compactor frame is to be
flush with the cabinet front,
place retaining bracket screws
through “A”,
If the compactor drawer front is
to be flush with the cabinet front,
place retaining bracket screws
through “C”.
If the compactor is to be
midway between “A” and “C”,
place retaining bracket screws
through ‘B”.
Page 3