


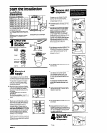
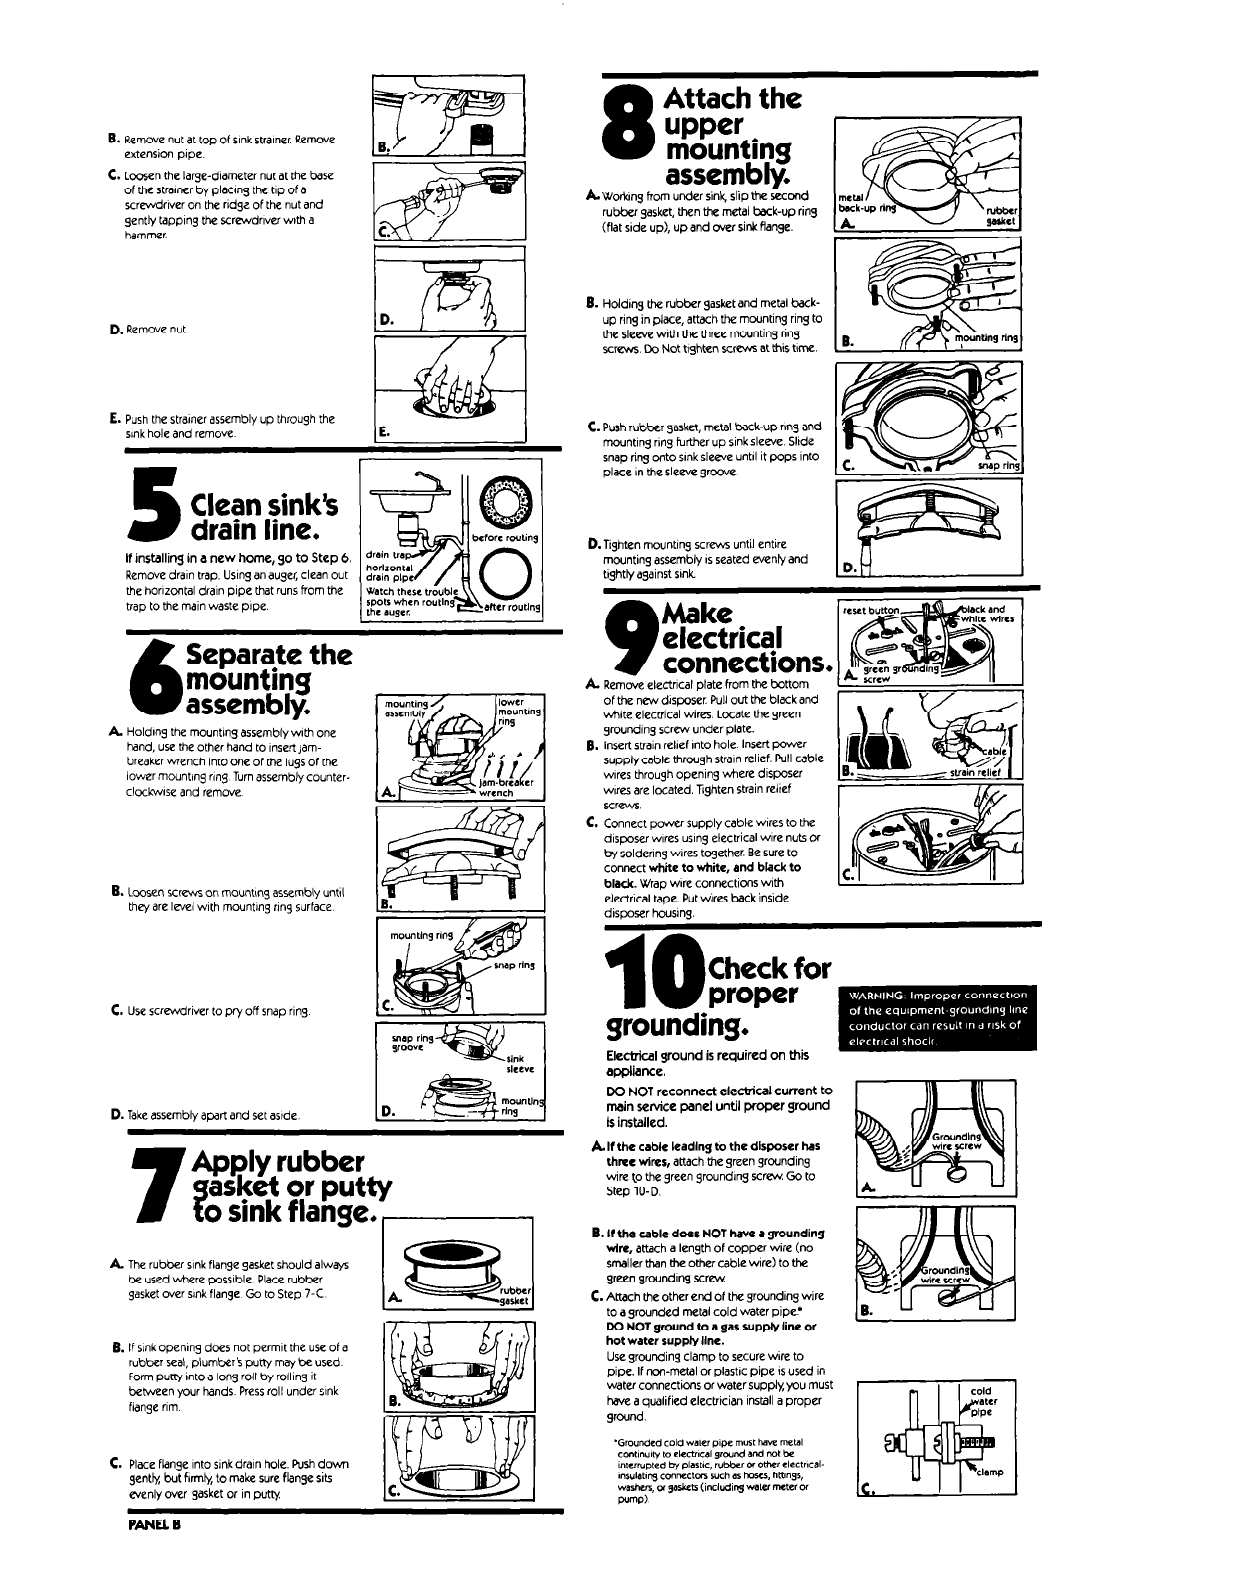
B. Remove nut at top of sink strainer Remove
extension pope.
C. Loosen the large-diameter nur at the base
of the strarner by placmg the tip of d
screwdwer on the rldjr of the nut and
gently tapp~nj the wrwdrlver ~0th a
hammer
8
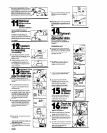
Attach the
upper
mounting
~wo,‘mg ,om?::?k:p!!ond
rub&r gasket, tin the metal bsck-up ring
(flat side up), up and over sink flange.
D. Remove nut
E. Push the straner assembly up through the
sink hole and remove
5
Clean sink’s
drain line.
If installing in a new home, go to Step 6.
Remove drain trap. Using anaujer, clean out
the horlzcmtal drain pope that run5 from the
trap to the main waste pipe.
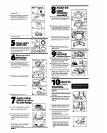
6
Separate the
mounting
assembly.
A Holdlnj the mountlnj assembly with one
hand, “se the other hand to ,nsert,am-
breaker wrench Into one of the lugs of the
lower mounting rlnj Turn assemblycounter-
clockwse and remove
B. Loosen scr- on mountmg assembly until
the/ are level with mountlnj rung surface
c. Use ScrewdrIver to pry off snap r,ng
D. Take assembb apart and set aslde
7
Apply rubber
asket
s
or putty
o sink flange. ,?
a The rubber sink flange gasket should alway;
be used where powble Place rubber
gasket over sink flange Go to Step 7-C
B. If slnkopenmj does not permit the “se of a
rubber seal, plumb& putty may be used
Form putty rntoa long roll by roll~nj It
behveen your hands Press roll under sink
flange nm
C. Place flange Into sink drain hole. Fust down
gently, but flrmb to make sure flange sits
evenly over gasket or I” putty
B. Holdmj ttx rubber gasket and metal back-
up nng in place, attxh the mwntlng ring to
the sleedve wth the three mounting rrnj
screw-s Do Not bqhten screws at this t!me.
C. Push rubber gasket, metal back-up n”g and
mounmg rmg further up sink sleeve. Slrde
snap ring wto srnk sleeve untrl It pops Into
place I” the sleeve groove.
D.Tijhten mounting scr- until entlre
mounting assembly IS seated evenly and
tkhtlvawnst sink
9
Make
electrical
connections.
A Remove electrical plate from the bottom
of the new disposer Pull out the black end
Vmrte electrical wires Locate the green
jroundnj screw under plate.
8. Insert strain relref Into hole Insert power
supply cable through strain relief. Pull cable
wres through open~nj where dlswser
wres are located. nghten strain relref
1D.H
screws.
c. Connect power supply cable bwres to the
disposer wires us~nj electrical wire nut5 M
connectwhiietotiite,andbbckto 1)s
by solderlnj wires together Be SUR to
black. Wrap wore conratlcns with
, ,,
electrical tape. Put wires back inside
drsooser housmq.
10
Check for
proper
grounding.
Electrical ground is required on this
appliance.
Do NOT reconnect eletical CUrTent to
main service panel until proper ground
Is installed.
k If the cabk kadlng to the dlswser has
three wires, attach tine green groundlnj
we to the green groundlng xre.v Go to
Step 10-D.
B. If the cable does NOT have a grounding
wire, attach a length of copper wire (no
smaller than the other cable wire) to the
jreen grcwndmg screw
C. Attach theotherend of thegrwndmj wire
to a grounded metal cold water pipe!
DO NOT ground to a gas sUpply line of
hot water supply Ilne.
Use grounding clamp to secure wire to
pipe. If noa-meta or plastrc pipe IS used in
water connections or water supply, you must
have a qwlified electrtcian install a proper
ground.
PANEL B