


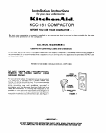

11. Loosen the screws In the top retaining brackets.
Rotate the brackets from shipping posrtion to the
install position. Retighten. See Figure 12.
/qziJYqr
C
FIGURE 12
NOTE: Position “A’‘-Compactor frame willbe flush with
cabinets. Remove cabinet mount screws from retaining
brackets. Save for use in step 13.
Position “B”-Midpoint between position “A” and “C. ”
Position “C”--Drawer front will be flush with cabinets.
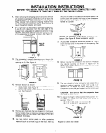
12.
When moving or lifting the compactor, use a glove to
protect and cushion your hand.
To prevent damage to floor covering, do not allow the
rear frame of the compactor to touch the floor when
lrftrng or rolling. (See Figure 13.)
FIGURE 13
Alrgn the rear of the compactor wrth the cabinet
openrng Plug the power cord Into a properly grounded
receptacle. See Frgures 1, 2 and 9.
Lrft the front of the compactor and roll Into the
openrng untrl the retarnrng brackets stop the unrt
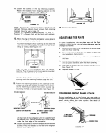
13. Fasten the retarnrng brackets to the undersrde of the
counter top wrth the screws provided Use auxiliary
clip for fastenrng to cabrnet front when counter fop
mountrng method IS not permissible See Figure 14.
RETAINER BRACKET
\
RETAINER BRACKET
/
MOUNTING SCREW
COUNTER TOP MOUNTING
Al TEERNATE CABINET FRONT
FIGURE 14
MOUN TIMING
Lift the front of the compactor until it is parallel with
the cabinet front. Place a screwdriver or other wedge
under the front edge of the compactor.
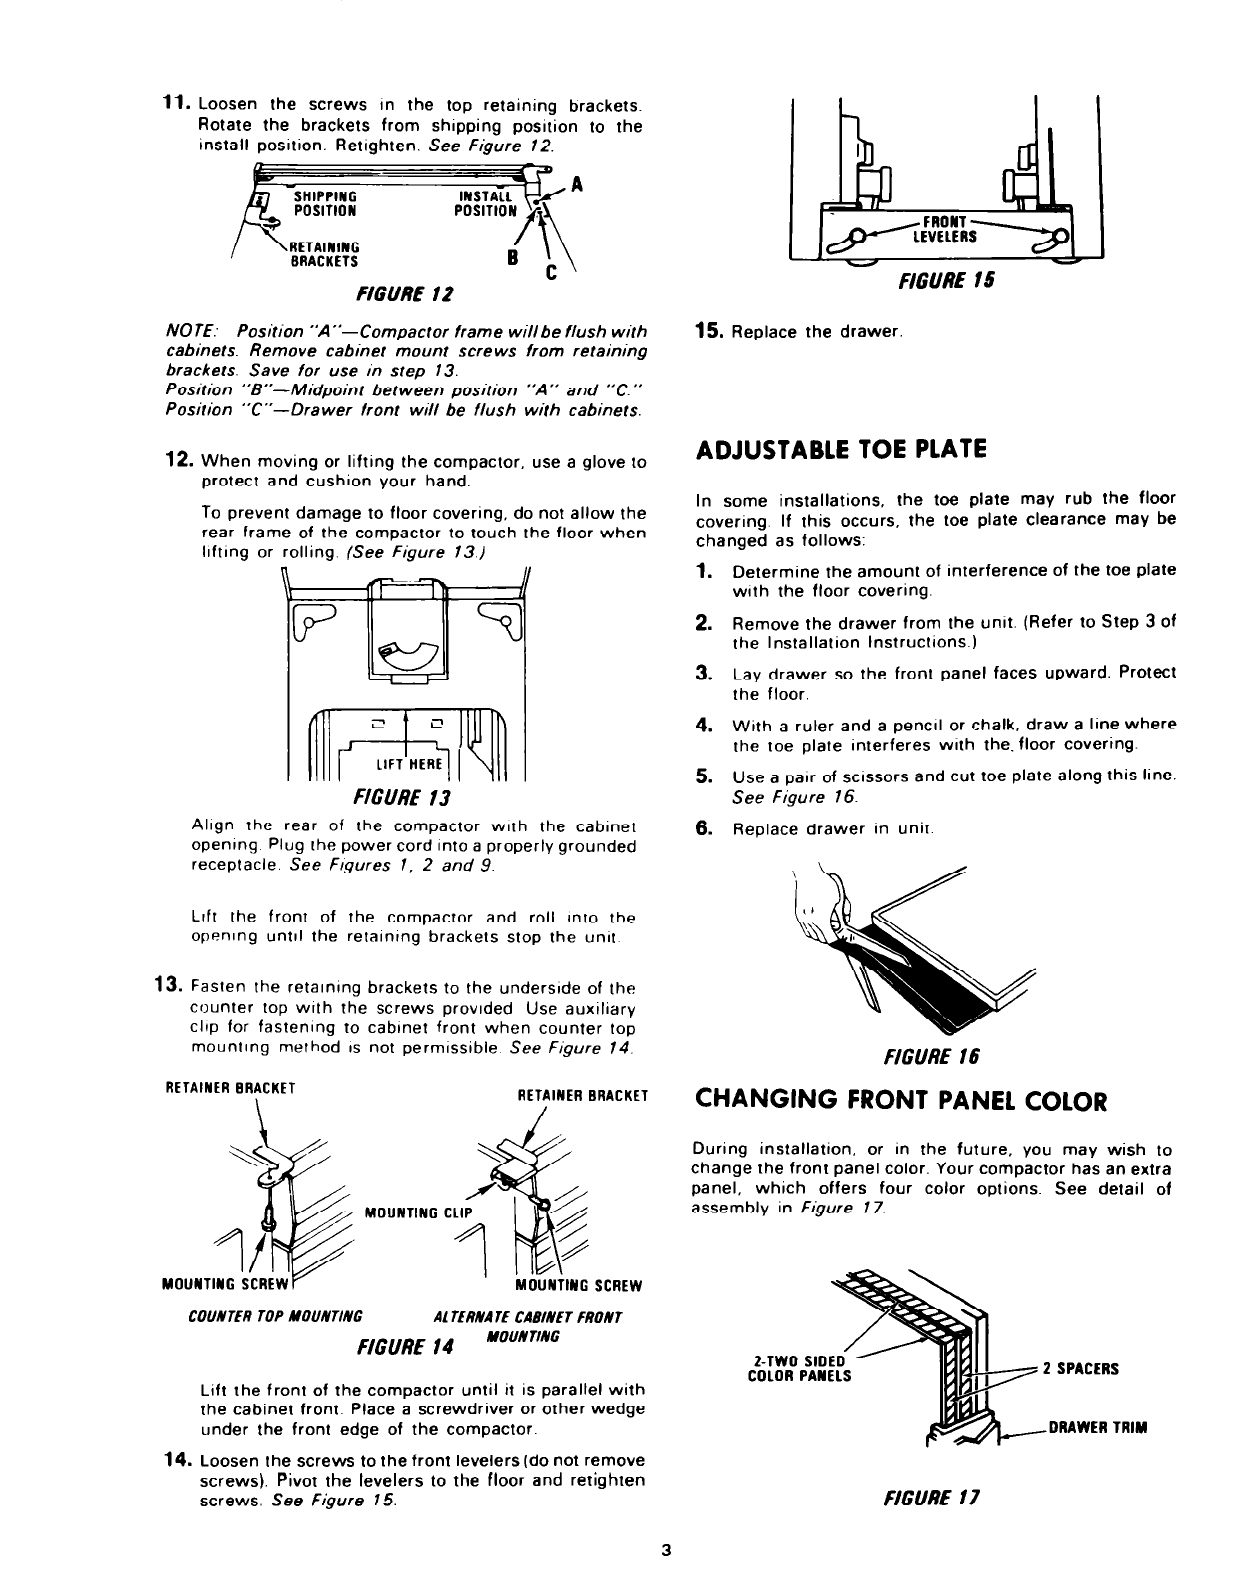
14. Loosen the screws to the front levelers (do not remove
screws). Pivot the levelers to the floor and retighten
screws. See Figure 15.
FIGURE 15
15.
Replace the drawer.
ADJUSTABLE TOE PLATE
In some installations, the toe plate may rub the floor
covering. If this occurs, the toe plate clearance may be
changed as follows:
1.
Determine the amount of interference of the toe plate
with the floor covering.
2. Remove the drawer from the unrt. (Refer to Step 3 of
the Installation Instructions.)
3. Lay drawer so the front panel faces upward. Protect
the floor.
4. With a ruler and a pencrl or chalk, draw a line where
the toe plate interferes with the.floor covering.
5. Use a pair of scrssors and cut toe plate along this line.
See Figure 16.
6.
Replace drawer In unit
FIGURE 16
CHANGING FRONT PANEL COLOR
During installation, or in the future, you may wish to
change the front panel color. Your compactor has an extra
panel, which offers four color options. See detail of
assembly in Figure 17.
COLOR PANELS
DRAWER TRIM
FIGURE 17
3