


5
Installing the Tank
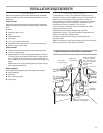
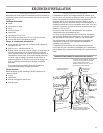
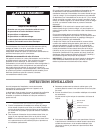
1. Position tank vertically beneath faucet so that the longer
copper tube from the faucet reaches the easy-connect fitting
on top of the tank.
2. Use a pencil to mark on the wall where the top of tank needs
to be located. Set tank aside. Mark a second line 2-1/4"
(5.7 cm) below the first line.
IMPORTANT: The tank must be positioned so that the copper
tubing and flexible tubing from the faucet does not kink.
3. Position mounting bracket on wall so that bottom of mounting
bracket is even with the lower line.
4. Use two screws (and plastic anchors if attaching to dry wall)
to fasten mounting bracket to wall. Hang tank on bracket.
IMPORTANT: Do not plug power supply cord into outlet at
this time.
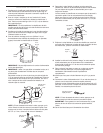
5. IMPORTANT: Do not lengthen, twist or tightly bend tubing.
Do not use any sealing compounds.
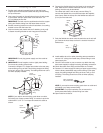
Connect the longest 1/4" copper faucet tube to the rear easy-
connect fitting on top of tank. Push tubing straight into fitting
as far as it will go. Pull on tubing. The tubing should not come
out when properly installed.
NOTE: If you need to remove tubing, push down on collet.
Pull tubing out of easy-connect fitting. It is easier to push the
collet down if a 1/4" or 7 mm open-end wrench is used as
shown.
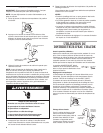
6. Connect the flexible tube from the faucet to the center tank
tube. Make sure the flexible tube does not kink. To avoid
kinking, the tube may be shortened.
The center tank tube is not an easy-connect fitting. To
connect the flexible tube, use pliers and open the supplied
hose clamp. Slide the clamp onto the flexible tube about 2"
(5 cm) from the tube end.
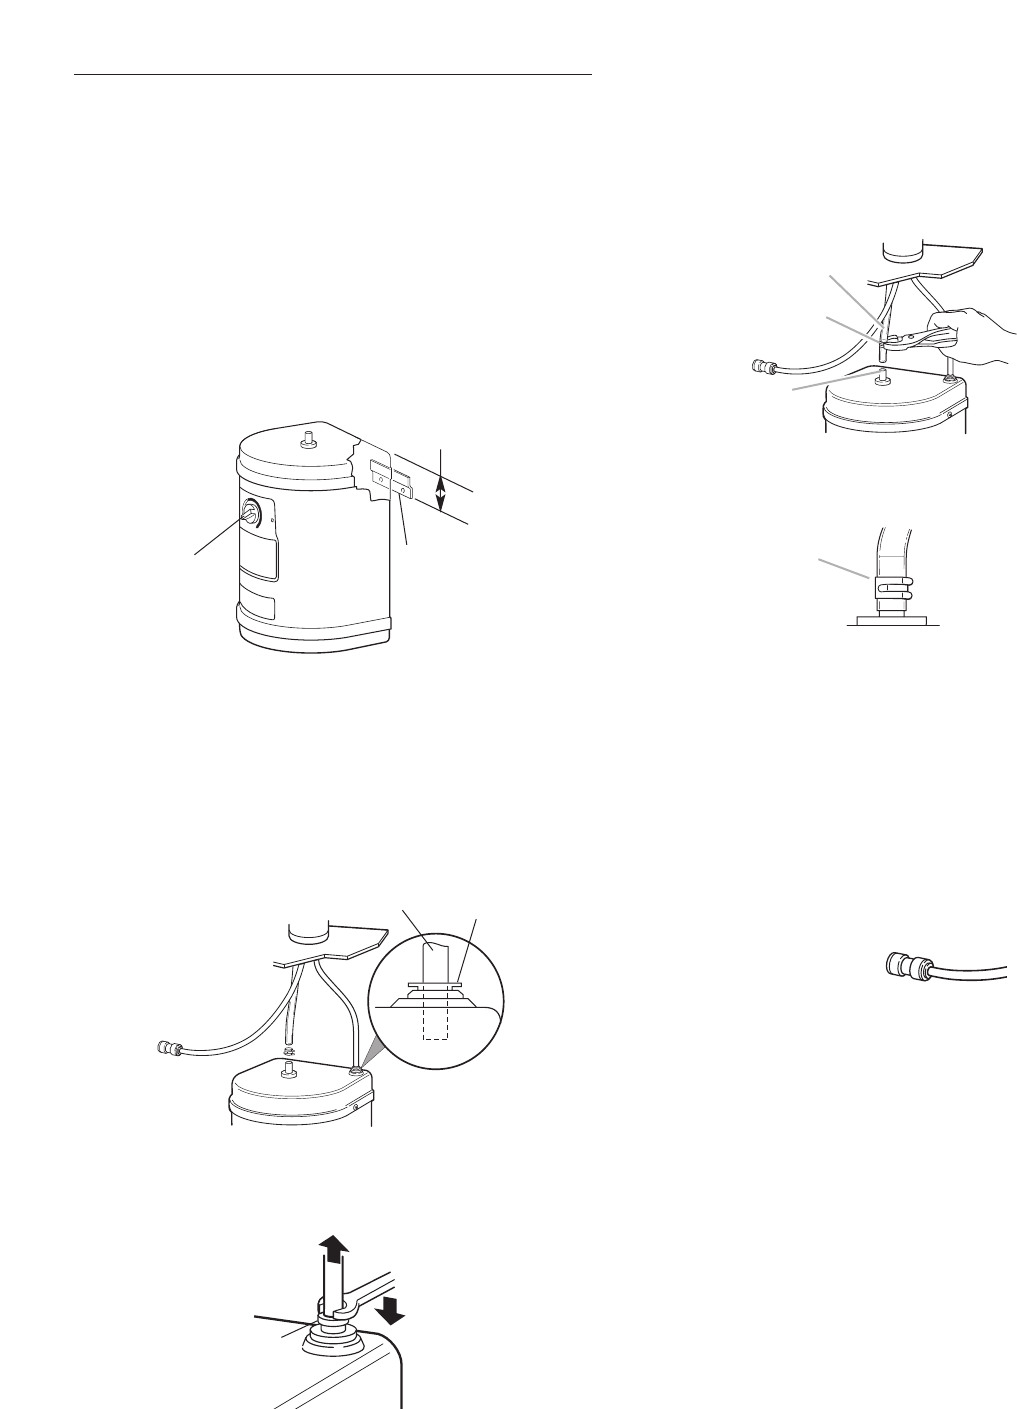
7. Push the flexible tube down onto the tank tube as far as it will
go. Position the hose clamp so that it is close to the end of
flexible tube.
8. Install saddle valve kit or other plumbing parts as needed to
connect 1/4" tubing from faucet easy-connect fitting to cold
water supply line.
9. Flush line into bucket or pan to remove any debris that may
have been trapped in supply line during plumbing connection.
10. Check that water flows freely and that there are no leaks.
11. Connect 1/4" water supply line tubing to faucet copper tubing
with the factory-assembled easy-connect fitting. Push water
supply line tubing straight into fitting as far as it will go. Pull
on tubing. The tubing should not come out when properly
installed.
NOTE: If you need to remove tubing, push down on collet and
pull tubing out of easy-connect fitting.
IMPORTANT: For proper operation, do not remove the
factory-assembled easy-connect fitting from tube.
12. Open water line to faucet.
mounting
bracket
2-1/4"
(5.7 cm)
off position
easy-connect
fitting
collet
copper
faucet tube
copper
faucet tube
collet
1/4" or 7 mm
open-end
wrench
flexible
tube
hose
clamp
tank
tube
factory assembled
easy-connect fitting
hose
clamp