


7
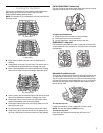
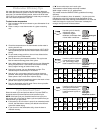
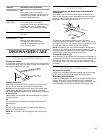
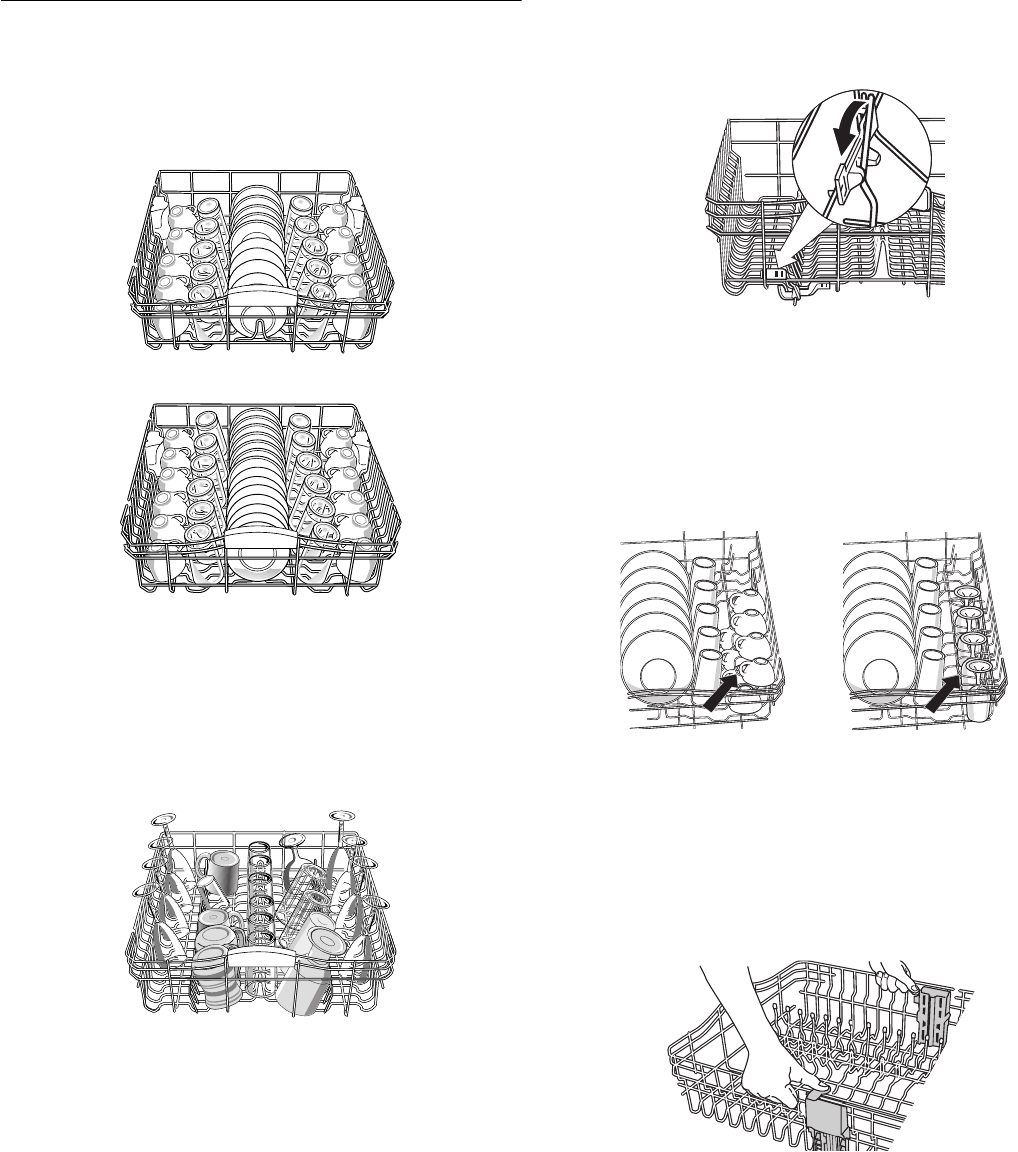
Loading the Top Rack
The top rack is designed for cups, glasses, and smaller items.
Many items, up to 9 in (22 cm), fit in the top rack. (See
recommended loading patterns shown.)
NOTE: The features on your dishwasher rack may vary from the
drawings shown.
10 place setting
12 place setting
■ Place items so open ends face down for cleaning and
draining.
■
Load glasses and cups in top rack only. The bottom rack is
not designed for glasses and cups. Damage can occur.
■
Place cups and glasses in the rows between tines. Placing
them over the tines can lead to breakage and water spots.
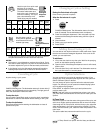
Cup and glass load
■
China, crystal, and other delicate items must not touch each
other during dishwasher operation. Damage may occur.
■
Load plastic items in the top rack only. Only plastic items
marked “dishwasher safe” are recommended.
■
Load plastic items so the force of the spray does not move
them during the cycle.
■
To avoid chipping, do not let stemware touch other items.
■
Small bowls, pans, and other utensils can be placed in the
top rack. Load bowls in the center section for best stability.
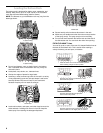
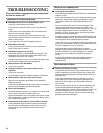
FLEXI-FOLD DOWN™ flexible tines
The row of tines on the left and right sides of the top rack can be
adjusted to make room for a variety of dishes.
To adjust the Flexible tines
1. Grasp the tip of the tine that is in the tine holder.
2. Gently push the tine out of the holder.
3. Lay the tines down, toward the center of the rack.
SURE-HOLD™ utility shelf
Fold down the extra shelf on the left or right side of the top rack
to hold additional cups, stemware or long items such as utensils
and spatulas.
Adjustable 2-position top rack
You can raise or lower the top rack to fit tall items in either the top
or bottom rack. Raise the top rack to accomodate items up to
9 in (23 cm) in the top rack and 13 in (33 cm) in the bottom rack,
or lower the top rack to accomodate items up to 11 in (28 cm) in
both the top and bottom racks. Adjusters are located on each
side of the top rack.
To raise the top rack
Lift the rack on either, or both, sides until the rack is level.
NOTE: The top rack adjusters MUST be level.
To lower the top rack
Press both rack adjusters and slide the rack back to its
original position.