9
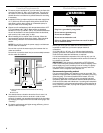
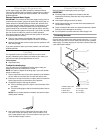
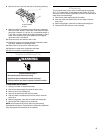
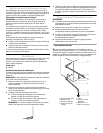
8. Remove the two caps from the side of the spray assembly.
9. Wash the interior components with mild soap or detergent
and warm water. Rinse in clean water. Then clean the same
parts with a solution of 1 tbs (15 mL) of household bleach in
1 gal. (3.8 L) of warm water. Rinse again thoroughly in warm
water. If the nozzles on the spray assembly are clogged,
clean them with a wire brush.
10. Clean the scoop and inside of the ice bin.
11. Replace the caps on the spray assembly and slide it back
into place. Reattach the discharge tube.
12. Slide in the ice chute until it clicks into place.
13. Replace the water tank, separators and slope.
14. Plug in ice maker or reconnect power.
Vacation and Moving Care
To shut down the ice maker:
1. Unplug ice maker or disconnect power.
2. Shut off the water supply and open the drain valve.
3. Remove all ice from storage bin.
4. Remove the water tank and drain the water.
5. After the water has drained from the ice maker, close the
drain valve.
6. Before using again, clean the ice maker and storage bin.
7. Discard the first 3 batches of ice produced.
NOTE: All components of the ice maker are permanently
lubricated at the factory. They should not require any additional
oiling throughout the normal life of the machine.
Winterizing
The ice maker must be shut down if temperatures drop below
45°F (7°C). Additionally, if temperatures drop below 32°F (0°C)
the water must be drained completely from the ice maker and all
water lines to avoid damage.
1. Remove the water tank and drain the water.
2. After the water has drained from the ice maker, close the
drain valve.
3. Before using again, clean the ice maker and storage bin.
4. Discard the first 3 batches of ice produced.
A.Spray Nozzles
B. Caps
A
B
WARNING
Electrical Shock Hazard
Disconnect power before servicing.
Replace all parts and panels before operating.
Failure to do so can result in death or electrical shock.


