


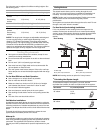

7
Complete Preparation
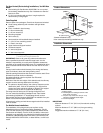
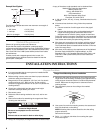
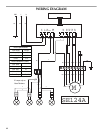
1. Determine the required location for the home power supply
cable and drill a ½" (1.3 cm) diameter hole for wire access.
2. Run wire through the home power supply cable according to
the National Electrical Code or CSA Standards and local
codes and ordinances. There must be enough ½" conduit
and wires from the fused disconnect (or circuit breaker) box
to make the connection in the hood’s electrical terminal box.
NOTE: Do not reconnect power until installation is complete.
3. Use caulk to seal all openings.
4. For vented installations only: Using a jigsaw or keyhole
saw, cut a 6½" (16.5 cm) diameter hole for the vent duct.
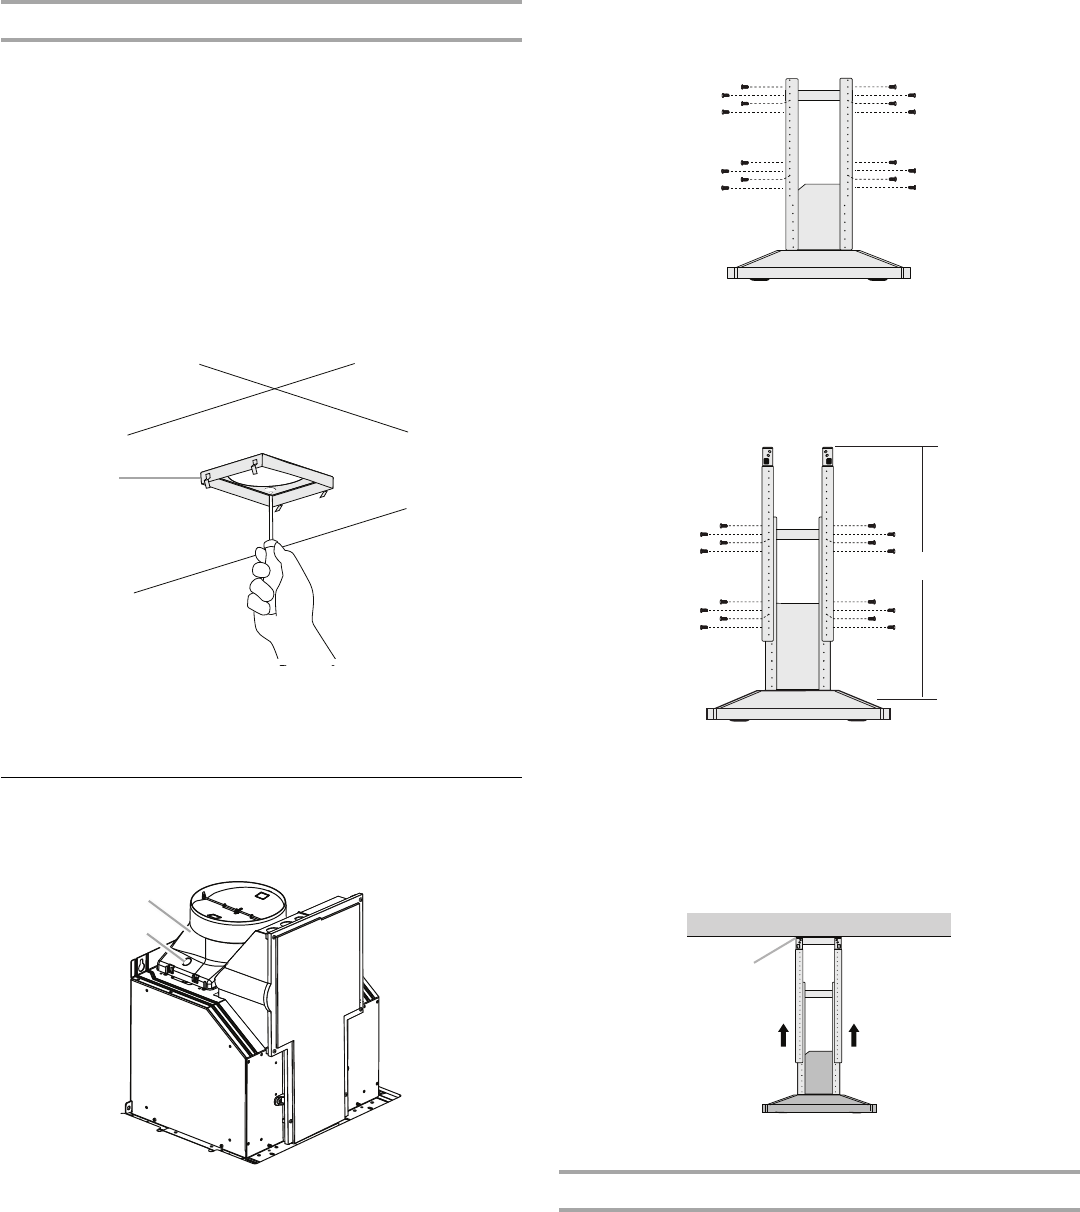
5. Attach the upper horizontal support bracket with 4 - 5 x
45 mm wood screws.
IMPORTANT: All screws must be installed into wood. If there
is no wood to screw into, additional wall framing supports
may be required.
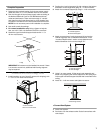
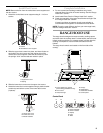
Assemble and Install Range Hood
1. Install transition on top of hood (if removed for shipping) with
2 - 3.5 x 9.5 mm sheet metal screws.
2. Position the 4 vertical supports (A) with notches at the bottom
and attach to the range hood using 16 - 4 x 8 mm screws.
3. Attach the horizontal support (B) using 8 - 4 x 8 mm screws.
4. Attach a second set of vertical supports (A) and set the
vertical height (B). See “Installation Dimensions” in the
“Location Requirements” section to help determine the
desired dimension for the vertical height “B.”
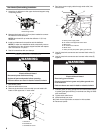
5. Using 2 or more people, lift the range hood assembly and
attach it by snapping the vertical supports to the spring clips
in the upper horizontal support bracket that is mounted to the
ceiling.
6. Install 16 - 4 x 8 mm screws and tighten to secure.
Connect Vent System
1. Install vent system.
2. Push duct over the exhaust outlet. Seal all connections with
vent clamps.
A. Upper horizontal support
A. Vent transition
B. 3.5 x 9.5 mm screw
A
B
A
A. Vertical supports
B. Horizontal support
A. Vertical supports
B. Vertical height
A. Mounting screws
B
A
A
B
A
A
A