


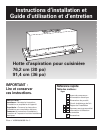

Before you start...
Proper installation is your
responsibility.
• Have a qualified technician
install the range hood.
• Comply with installation
clearances specified on the
model/serial rating plate.
Model/serial rating plate is
located behind the left filter on
rear wall of the vent hood.
Range hood location should be
away from strong draft areas,
such as windows, doors and
strong heating vents.
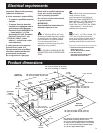
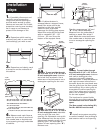
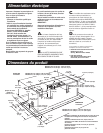
Cabinet opening dimensions that
are shown must be used. Given
dimensions provide minimum
clearance. Consult your
cooktop/range manufacturer
installation instructions before
making any cutouts.
Grounded electrical outlet is
required. See “Electrical
requirements.”
Important: Observe all governing
codes and ordinances.
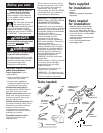
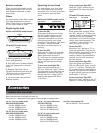
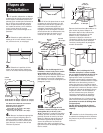
Parts supplied
for installation:
Parts needed
for installation:
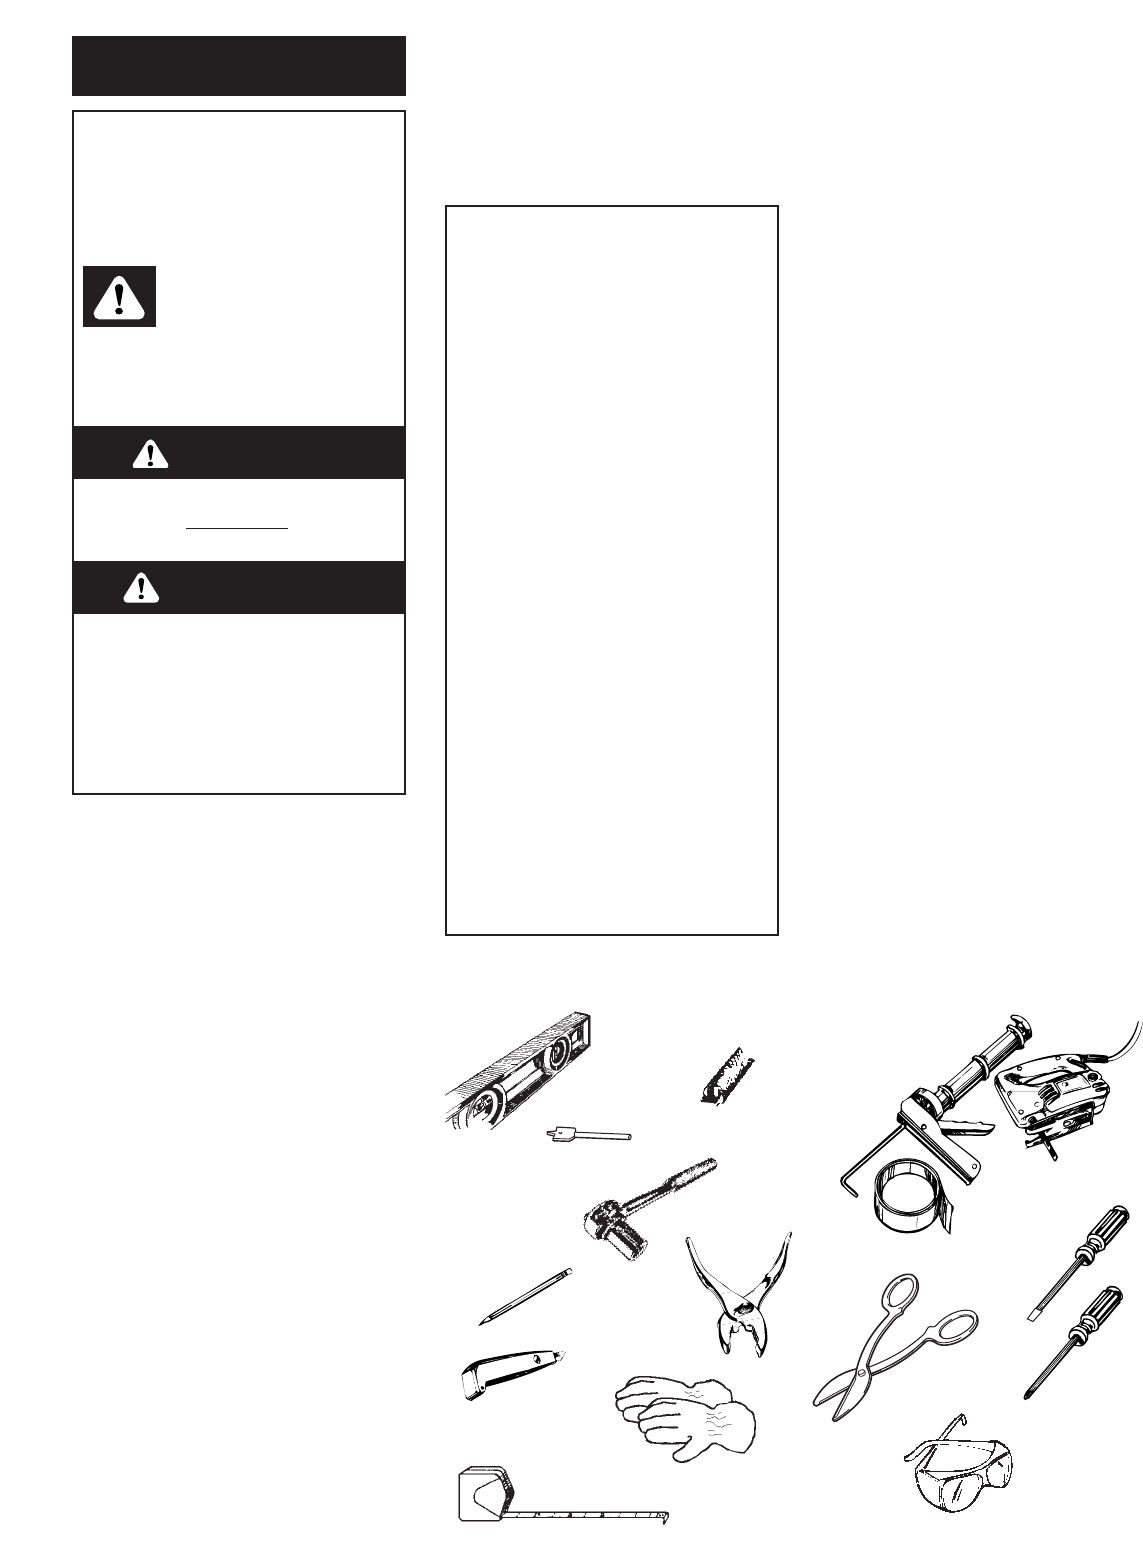
Tools needed:
Phillips
screwdriver
flat-blade
screwdriver
caulking gun and
weatherproof
caulking
compound
duct tape
metal
snips
pliers
pencil
saber or
keyhole saw
drill
1-1/4" drill bit
level
wire stripper
or utility knife
WARNING — TO REDUCE THE
RISK OF FIRE, ELECTRIC SHOCK,
OR INJURY TO PERSONS,
OBSERVE THE FOLLOWING:
Installation work and electrical
wiring must be done by qualified
person(s) in accordance with all
applicable Codes and Standards,
including Fire Rated
Construction. The combustion
airflow needed for safe
operation of fuel-burning
equipment may be affected by
this unit’s operation. Follow the
heating equipment
manufacturer’s guideline and
safety standards such as those
published by the National Fire
Protection Association (NFPA),
and the American Society of
Heating Refrigeration and Air
Conditioning Engineers
(ASHRAE), and the local code
authorities.
When cutting or drilling into wall
or ceiling, do not damage
electrical wiring and other
hidden utilities.
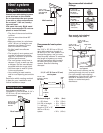
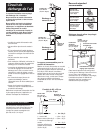
Ducted fans must always be
vented to the outdoors.
WARNING — To reduce the risk
of fire, use only metal ductwork.
This unit must be grounded.
2
This vent hood is factory set for
venting through the roof or wall.
For non-vented (recirculating)
installations, non-vented
(recirculating) kit, Part No. 883140
is available from your dealer or
authorized parts distributor.
3/8" (8mm)
nut driver
or ratchet
gloves
measuring tape
safety glasses
• 2 screws
• damper
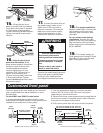
• plastic cover (used for customized
front panel)
• wood filler strips for cabinets with
recessed bottoms (step 5, page 5)
• 2, 1" x 1" x 5" (25.4 x 25.4 x 127 mm)
wood pieces – optional (step 10, page 6)
• 2, 1/2" (12.7 mm) U.L.- or C.S.A.-listed
conduit connectors
• 1 wall cap for interior-mounted motor
• metal vent system
• 4, 1-1/4" (31.8 mm) wood screws
• power supply cable
This is the safety alert symbol.
This symbol alerts you to
potential hazards that can kill
or hurt you and others. All safety
messages will follow the safety alert
symbol and either the word “DANGER”
or “WARNING”. These words mean:
You can be killed or seriously injured
if you don’t follow instructions.
DANGER
WARNING
Your safety and the safety of
others is very important.
We have provided many important
safety messages in this manual and
on your appliance. Always read and
obey all safety messages.
All safety messages will tell you what
the potential hazard is, tell you how to
reduce the chance of injury, and tell
you what can happen if the
instructions are not followed.
You can be killed or seriously injured
if you don’t immediately
follow
instructions.