


5
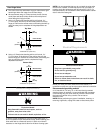
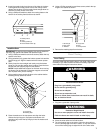
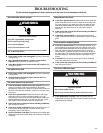
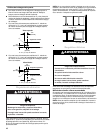
Door Hinge Holes
■ The views of the top and bottom hinge pin hole show a right-
hand hinge. Mirror the image for a left-hand hinge.
■ We recommend using a C-clamp and two pieces of scrap
wood (front and back) to help reinforce the overlay frame
when drilling the hinge pin holes.
1. Using a ³⁄₈" Brad point doweling drill bit, drill a hole, ⁹⁄₃₂"
(7.1 mm) deep, into the top of the overlay panel for the top
hinge pin. Remove the excess wood, surrounding the hole, by
using the rotary tool to complete the hinge depression as
shown.
Top View
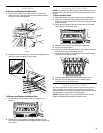
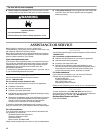
2. Using a ³⁄₈" Brad point doweling drill bit, drill a hole, ⁹⁄₃₂"
(7.1 mm) deep, in the bottom of the overlay frame for the
bottom hinge pin. Remove the excess wood, surrounding the
hole, by using the rotary tool to complete the hinge
depression as shown.
Bottom View
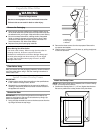
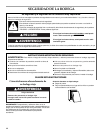
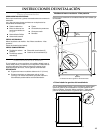
Location Requirements
To ensure proper ventilation for your wine cellar, allow for a ¹/₄"
(6.35 mm) space on each side and at the top. When installing your
wine cellar next to a fixed wall, leave 2¹⁄₂" (6.35 cm) minimum
clearance on the hinge side to allow for the door to swing open.
NOTE: It is recommended that you do not install the wine cellar
near an oven, radiator, or other heat source. Do not install in a
location where the temperature will fall below 55°F (13°C). For
best performance, do not install the wine cellar behind a cabinet
door or block the base grille.
Electrical Requirements
Before you move your wine cellar into its final location, it is
important to make sure you have the proper electrical connection.
Recommended grounding method
A 115 Volt, 60 Hz., AC only, 15– or 20–amp fused, grounded
electrical supply is required. It is recommended that a separate
circuit serving only your wine cellar be provided. Use an outlet
that cannot be turned off by a switch. Do not use an
extension cord.
NOTE: Before performing any type of installation, cleaning, or
removing a light bulb, unplug wine cellar or disconnect power.
A. Diameter ³⁄₈" (9.53 mm)
A. Diameter
³⁄₈" (9.53 mm)
¹⁵⁄₃₂"
(12 mm)
⁷⁄₃₂"
(5.5 mm)
A
Back Surface
Front Surface
³⁄₈"
(9.5 mm)
Front Surface
Back Surface
¹⁵⁄₃₂"
(12 mm)
⁷⁄₃₂"
(5.5 mm)
A
³⁄₈"
(9.5 mm)
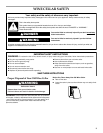
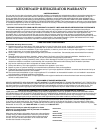
WARNING
Explosion Hazard
Keep flammable materials and vapors, such as
gasoline, away from wine cellar.
Failure to do so can result in death, explosion, or fire.
2¹⁄₂" (6.35 cm)
¹⁄₄" (6.35 mm)
Electrical Shock Hazard
Plug into a grounded 3 prong outlet.
Do not remove ground prong.
Do not use an adapter.
Do not use an extension cord.
Failure to follow these instructions can result in death,
fire, or electrical shock.
WARNING