


9
HOT WATER DISPENSER CARE
NOTE: It is not necessary to turn off the hot water dispenser each night to conserve energy. The hot water dispenser uses
approximately 10 to 19 kilowatt-hours of energy per month when heating 7 to 8 cups of water per day.
Prepare Hot Water Dispenser for Nonuse
If the hot water dispenser will not be used for 2 to 30 days, set the Temperature Control to the Off position to conserve energy.
Winterizing and Seasonal Storage
Cold Weather Care
1. Turn the Temperature Control to the Off position.
2. Unplug the hot water dispenser power supply cord.
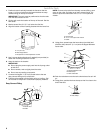
3. Push down and turn the faucet cap clockwise to open the
faucet.
4. Allow the water to run until the water turns cold.
5. Release faucet cap.
6. Close water supply valve.
7. Place a tray under the tank to catch any water leaks.
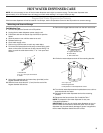
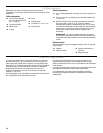
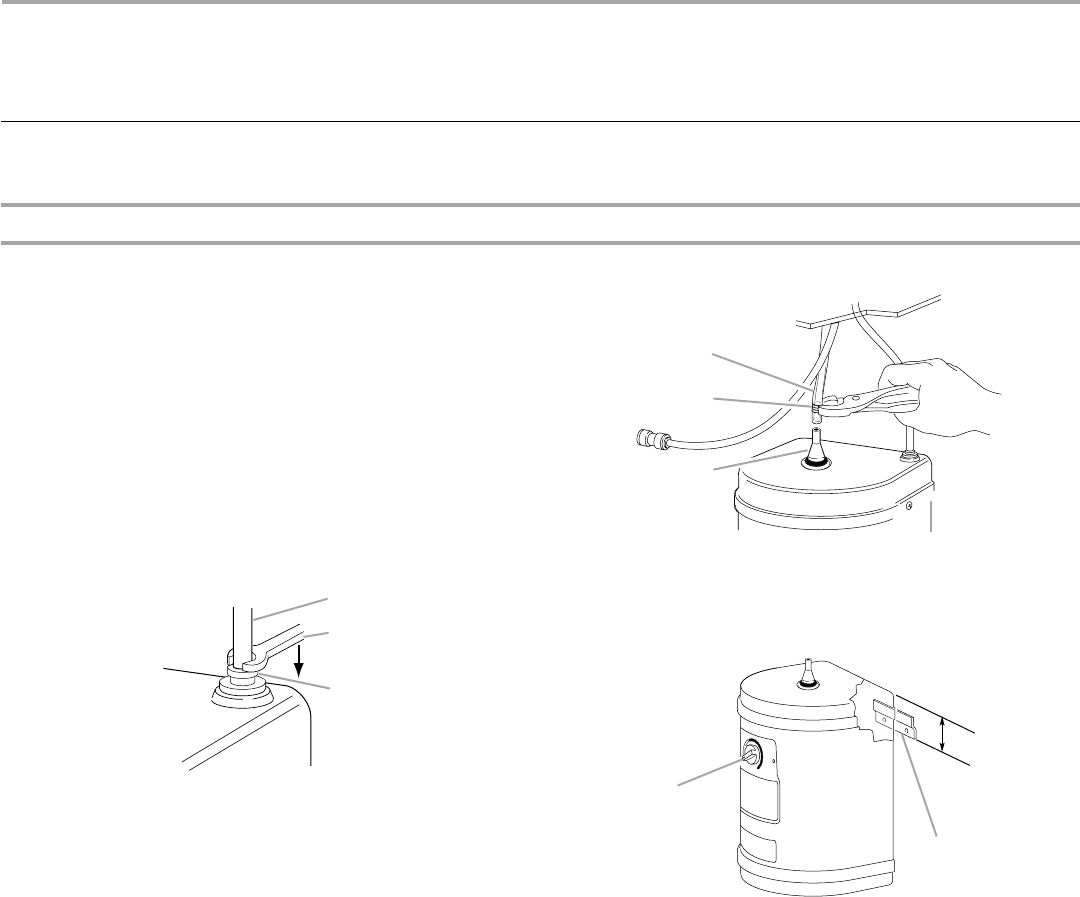
8. To remove the faucet tube from the easy-connect fitting, push
down on the collet. Pull tube out of easy-connect fitting. It is
easier to push the collet down with a ¹⁄₄" or 7 mm open-end
wrench.
9. Using pliers, spread open the hose clamp (provided) on the
largest diameter faucet tube.
10. Slide the hose clamp about 2" (5 cm) from the end of the
largest diameter faucet tube.
11. Remove the largest diameter tube from the tank outlet tube.
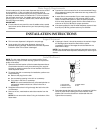
12. Lift the hot water dispenser tank off the mounting bracket.
13. Turn the hot water dispenser tank upside down over a sink or
bucket and drain the water.
14. Reinstall the hot water dispenser tank on the mounting
bracket.
15. Reconnect the faucet tubes. See “Install the Tank.”
NOTE: To prepare the hot water dispenser for use, see
“Complete Installation.”
IMPORTANT: Do not plug in the hot water dispenser or turn on
the thermostat until the tank is filled with water. The hot water
dispenser may be permanently damaged if power is supplied to
the hot water dispenser before the tank is filled.
A.Faucet tube
B.
¹⁄₄
" or 7 mm open-end wrench
C.Collet
A
B
C
A.Largest diameter tube
B.Hose clamp
C.Tank outlet tube
A.2
¹⁄₄
" (5.7 cm)
B.Mounting bracket
C.Off position on the temperature control
A
B
C
A
B
C