


17
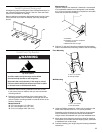
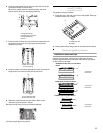
6. Insert the small grease tray all the way under the front of the
grill basin and hook it into the slots.
When the 2 grease trays are installed properly, the small
grease tray will hook over the large grease tray.
7. Insert the orifice tube on the front of the burner assembly into
the opening at the front of the grill basin and set burner
assembly into place.
8. Insert front tabs of the flame spreader into slots at the front of
the grill basin, then the rear tabs into the rear slots.
9. Check the surface burner and grill flames. Refer to the
“Electronic Ignition System” section.
10. Place the wave tray on top of the flame spreader.
11. Place the grill grate into position.
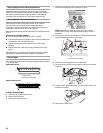
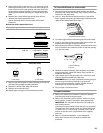
Install Griddle
(on griddle models)
The griddle is factory installed.
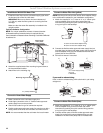
1. Place drip tray in the well at the front of the griddle. Slide tray
toward the back until it stops.
2. Clean griddle before using. Refer to the Use and Care Guide.
Electronic Ignition System
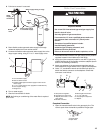
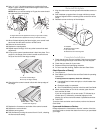
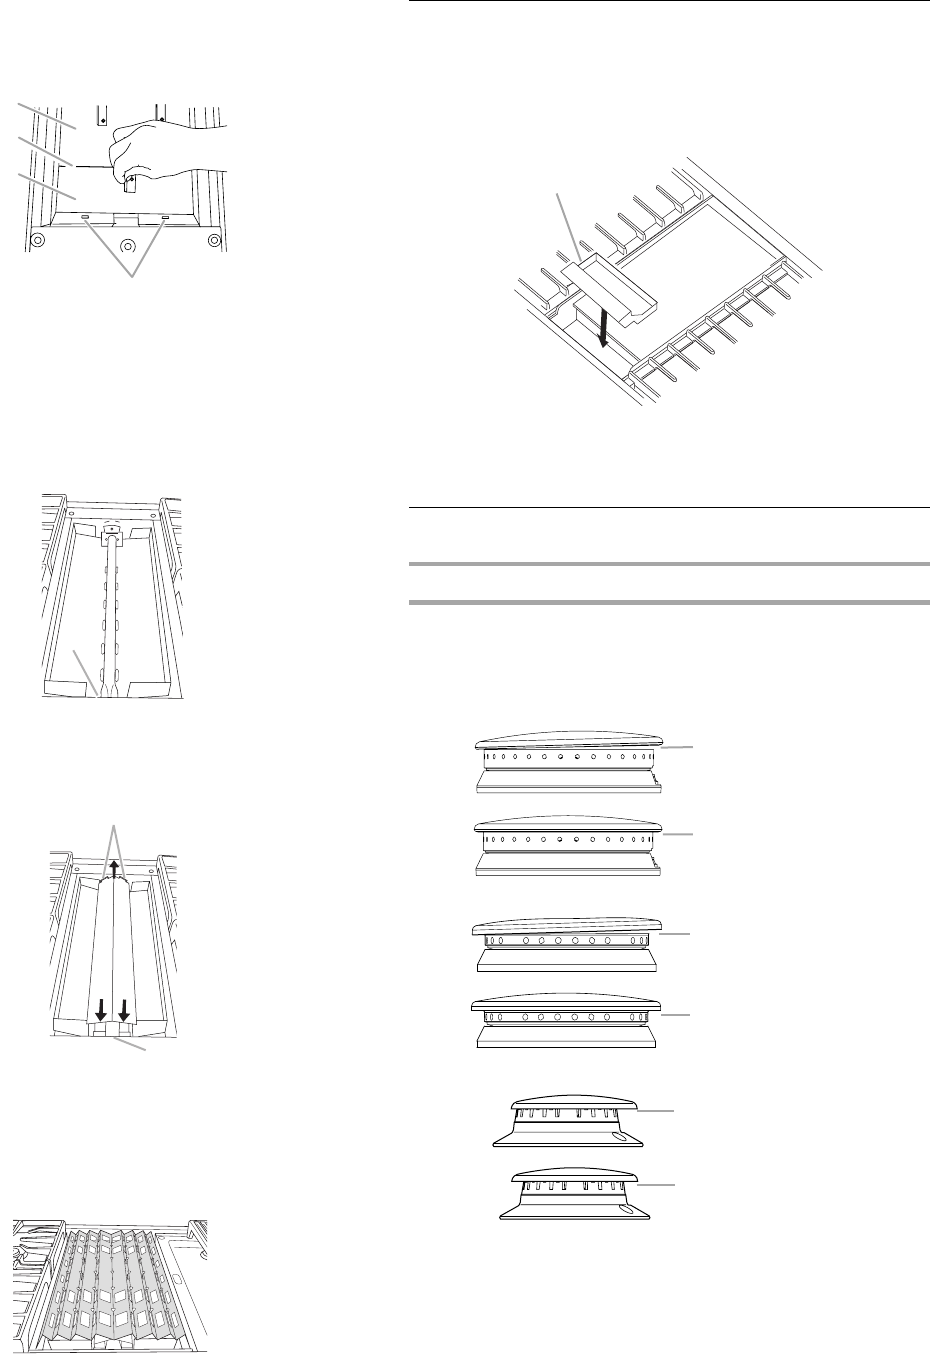
Install Burner Heads and Caps
Install the burner head, making sure the alignment pins are
properly aligned with the burner base. Place burner cap (black)
on top of the burner head.
A.Large grease tray
B.Grease tray connection
C.Small grease tray
D.Slots
A.Front opening
A.Front tabs and slots
B.Rear tabs and slots
A
B
C
D
A
A
B
A.Griddle drip tray
B.Griddle
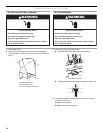
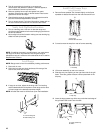
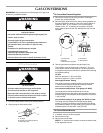
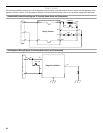
20,000 Btu/h Ultra Power™ Dual-Flame
Burner
A.Incorrect
B.Correct
15,000 Btu/h Professional Burner
A.Incorrect
B.Correct
5,000 Btu/h Simmer/Melt Burner
A.Incorrect
B.Correct
A
B
A
B
A
B
A
B