


- 4 -
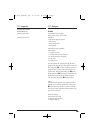
• The assembled meat grinder
t
is connected
to the motor block
r
by a bayonet connector:
- Insert the meat grinder casing
t
into the motor
block
r
, such that the arrow on the feeding
shaft lies against the symbol on the motor
block
r
. The locking button presses itself in
(Fig.
Ạ
).
- Lightly press the meat grinder casing
t
in and
at the same time turn the feeding shaft on the
meat grinder casing
t
into the middle position
(Fig.
ạ
), so that the arrow on the feeding shaft
lies against the symbol . When the meat
grinder casing
t
engages, the locking button
springs out.
- Finally place the feed tray
e
on top of the
feeding funnel.
- To dismantle it, press the locking button and
turn the feeding funnel to the right (Fig.
Ạ
) .
You can now pull the meat grinder casing
t
out.
b) Assembling the sausage attachment
Unfold the fold-out side. There you will find the
step-by-step illustrations for assembling the appliance.
• Remove the meat grinder casing
t
as described
under a).
• Disassemble any attachments that might be fitted
and clean the meat grinder casing
t
.
Note:
The cross blade
i
with the spring
u
is not requi-
red for the sausage attachment
s
! If need be, re-
move them both from the meat grinder casing
t
.
• Coat all metal parts with cooking oil.
• Take the sausage disc
d
from the small com-
partment on the top of the appliance (Fig.
Ả
).
• Position the sausage disc
d
so that the indenta-
tions in the sausage disc
d
lie on the fixing
points in the meat grinder casing
t
.
• Then place the sausage attachment
s
before
the sausage disc
d
.
• Screw the ring clamp
a
on hand-tight.
• Assemble the meat grinder casing
t
as described
under a).
c) Assembling the kubbe attachment
Unfold the fold-out side. There you will find the
step-by-step illustrations for assembling the appliance.
• Disassemble the meat grinder casing
t
as de-
scribed under a).
• Disassemble any attachments that might be fitted
and clean the meat grinder casing
t
.
Note:
The cross blade
i
with the spring
u
is not requi-
red for the Kubbe attachment
f
! If need be, remo-
ve them both from the meat grinder casing
t
.
• Coat all metal parts with cooking oil.
• Insert both plastic parts of the Kubbe attachment
f
so that the indentations on the Kubbe attach-
ment
f
lie on the fixing points in the meat grin-
der casing
t
.
• When everything has been correctly assembled,
screw the ring clamp
a
on until it is handtight.
• Assemble the meat grinder casing
t
as described
under a).
d) Assembling the biscuit pastry
attachments
Unfold the fold-out side. There you will find the
step-by-step illustrations for assembling the appliance.
• Remove the meat grinder casing
t
as described
under a).
• Disassemble any attachments that might be fitted
and clean the meat grinder casing
t
.
Note:
The cross blade
i
with the spring
u
is not requi-
red for the biscuit attachment
q
! If need be, remo-
ve them both from the meat grinder casing
t
.
• Coat all metal parts with cooking oil.
• Remove the pattern strips
q
from the front of the
biscuit attachment
q
.
IB_62025_SFW250A1_LB6 05.11.2010 14:00 Uhr Seite 4