


English
Español
Français
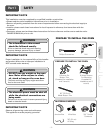
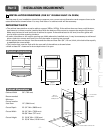
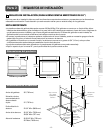
INSTALLATION REQUIREMENTSPart 2
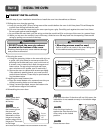
PREPARATION FOR MOVING THE OVEN
The second step of your installation should be to remove any packing material from the oven before you install
the oven.
1. Remove all tape from around the oven.
2. Open the oven door and remove packaging materials and oven racks inside the oven.
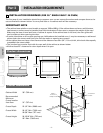
3. Door removal is not a requirement for installation of the oven, but is an added convenience.
To remove the door, follow the steps below.
4. Place the oven on a table or platform even with the cutout opening. (table or platform must support 190lbs
[86Kg] for a single built-in oven, 325lbs [147Kg] for a double built-in oven.
5. Remove the metal bottom trim from the oven. It will be installed at the end of the installation process. The trim
is wrapped separately and taped to the top of the unit.
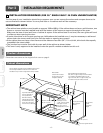
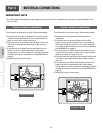
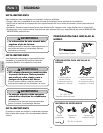
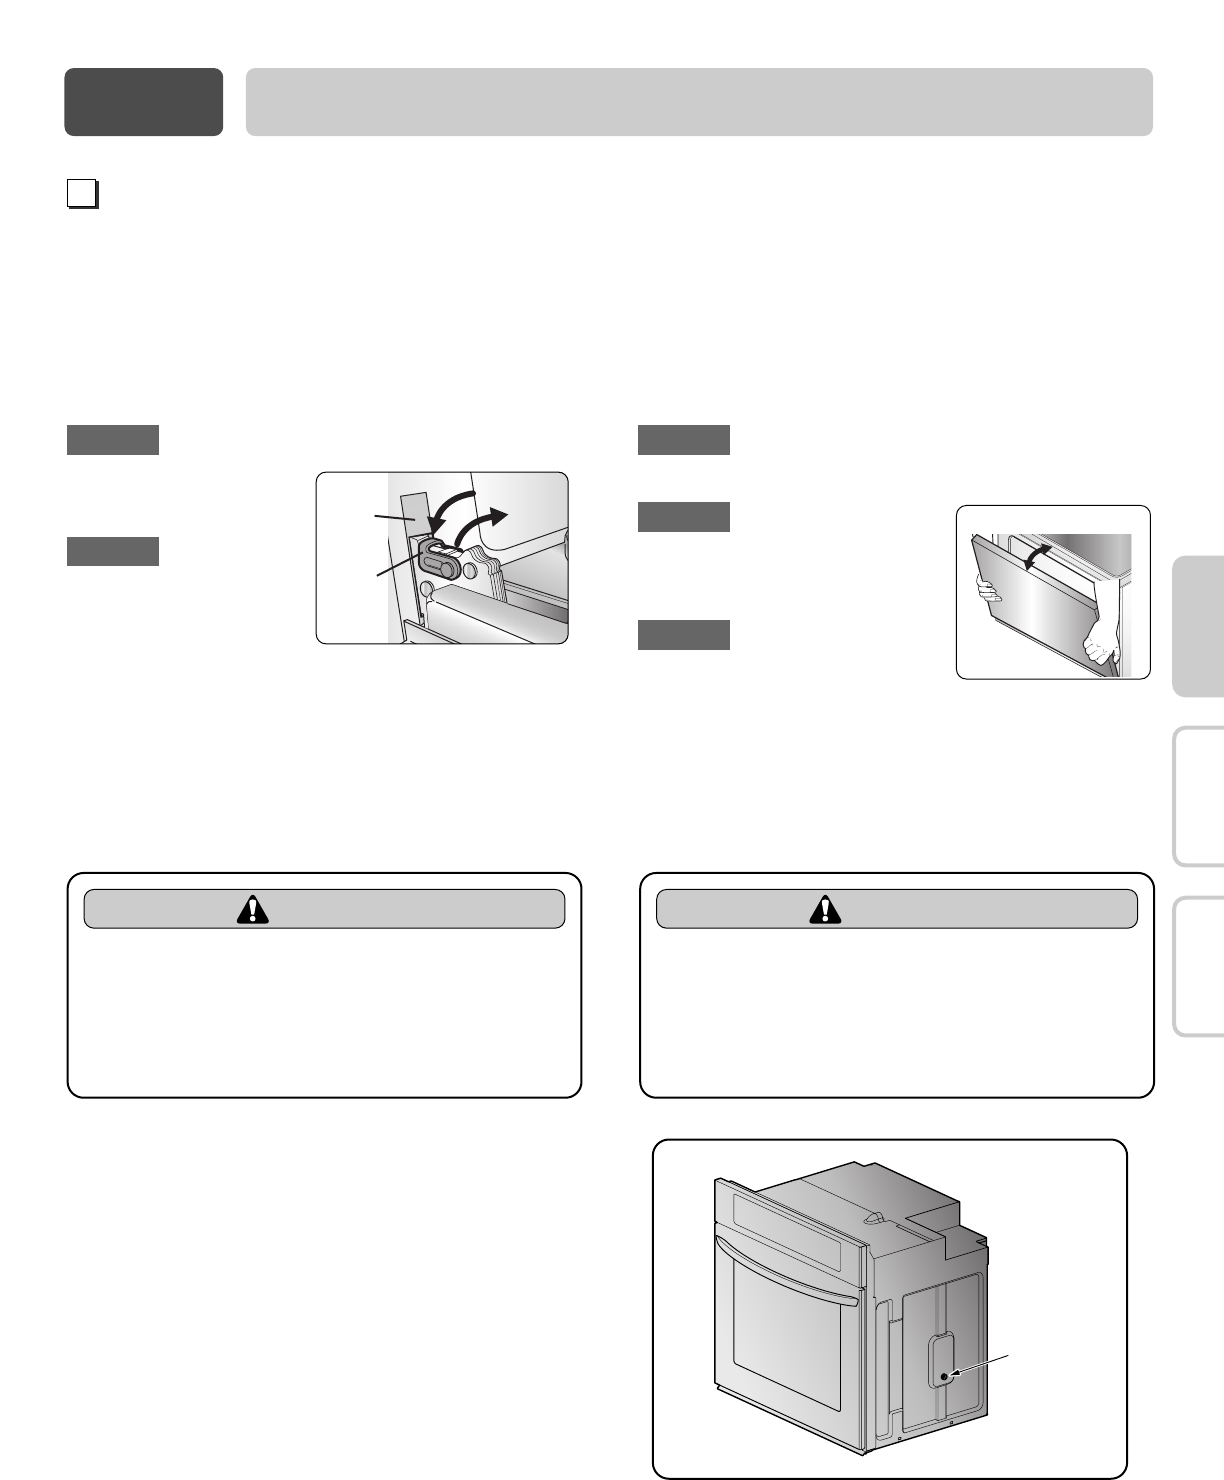
Fully open the door.
Pull the hinge locks
down toward (Fig.1) the
door frame, to the
unlocked position.
Firmly grasp both sides of the door at the top.
Close door to the door removal
position, which is approximately
5 degrees. (refer to the Fig.2)
Lift door up and out until the
hinge arm is clear of the slot.
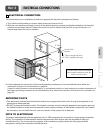
CAUTION
• Make sure the cabinets and wall
coverings around the oven can
withstand the temperature (up to
194˚F[90˚C]) generated by the oven.
- Discoloration, delamination or melting may occur.
IMPORTANT NOTE
• Do not lift the door by the handle.
• The oven door is very heavy. Be sure you have a firm
grip before lifting the oven door off the hinges.
Use caution when lifting. It is recommended that two
people lift and position the oven into the cabinet
opening. Failure to follow this instruction can result in
back or other injury. Wear gloves to protect hands
from any sharp edges.
• Do not lay the oven door on its handle. This may cause
dents or scratches.
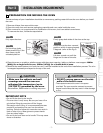
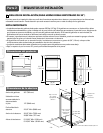
CAUTION
• DO NOT remove spacers on the side
walls of the built-in oven.
- These spacers center the oven in the space
provided. The oven must be centered to prevent
excess heat buildup that may result in heat damage
or fire.
Hinge
lock
Slot
Lock
Unlock
<Fig.1>
<Fig.2>
about 5˚
Step. 1
Step. 2
Step. 3
Step. 4
Step. 5
Spacer
4
- 7 -